Back to guides
CampusticsCampustics

Step-by-step guides

A printable handbook covering every part of Campustics.

Getting started

Sign in for the first time

Anyone · 2 min

Use the email and one-time password your school shared, then set your own password.

  1. 1

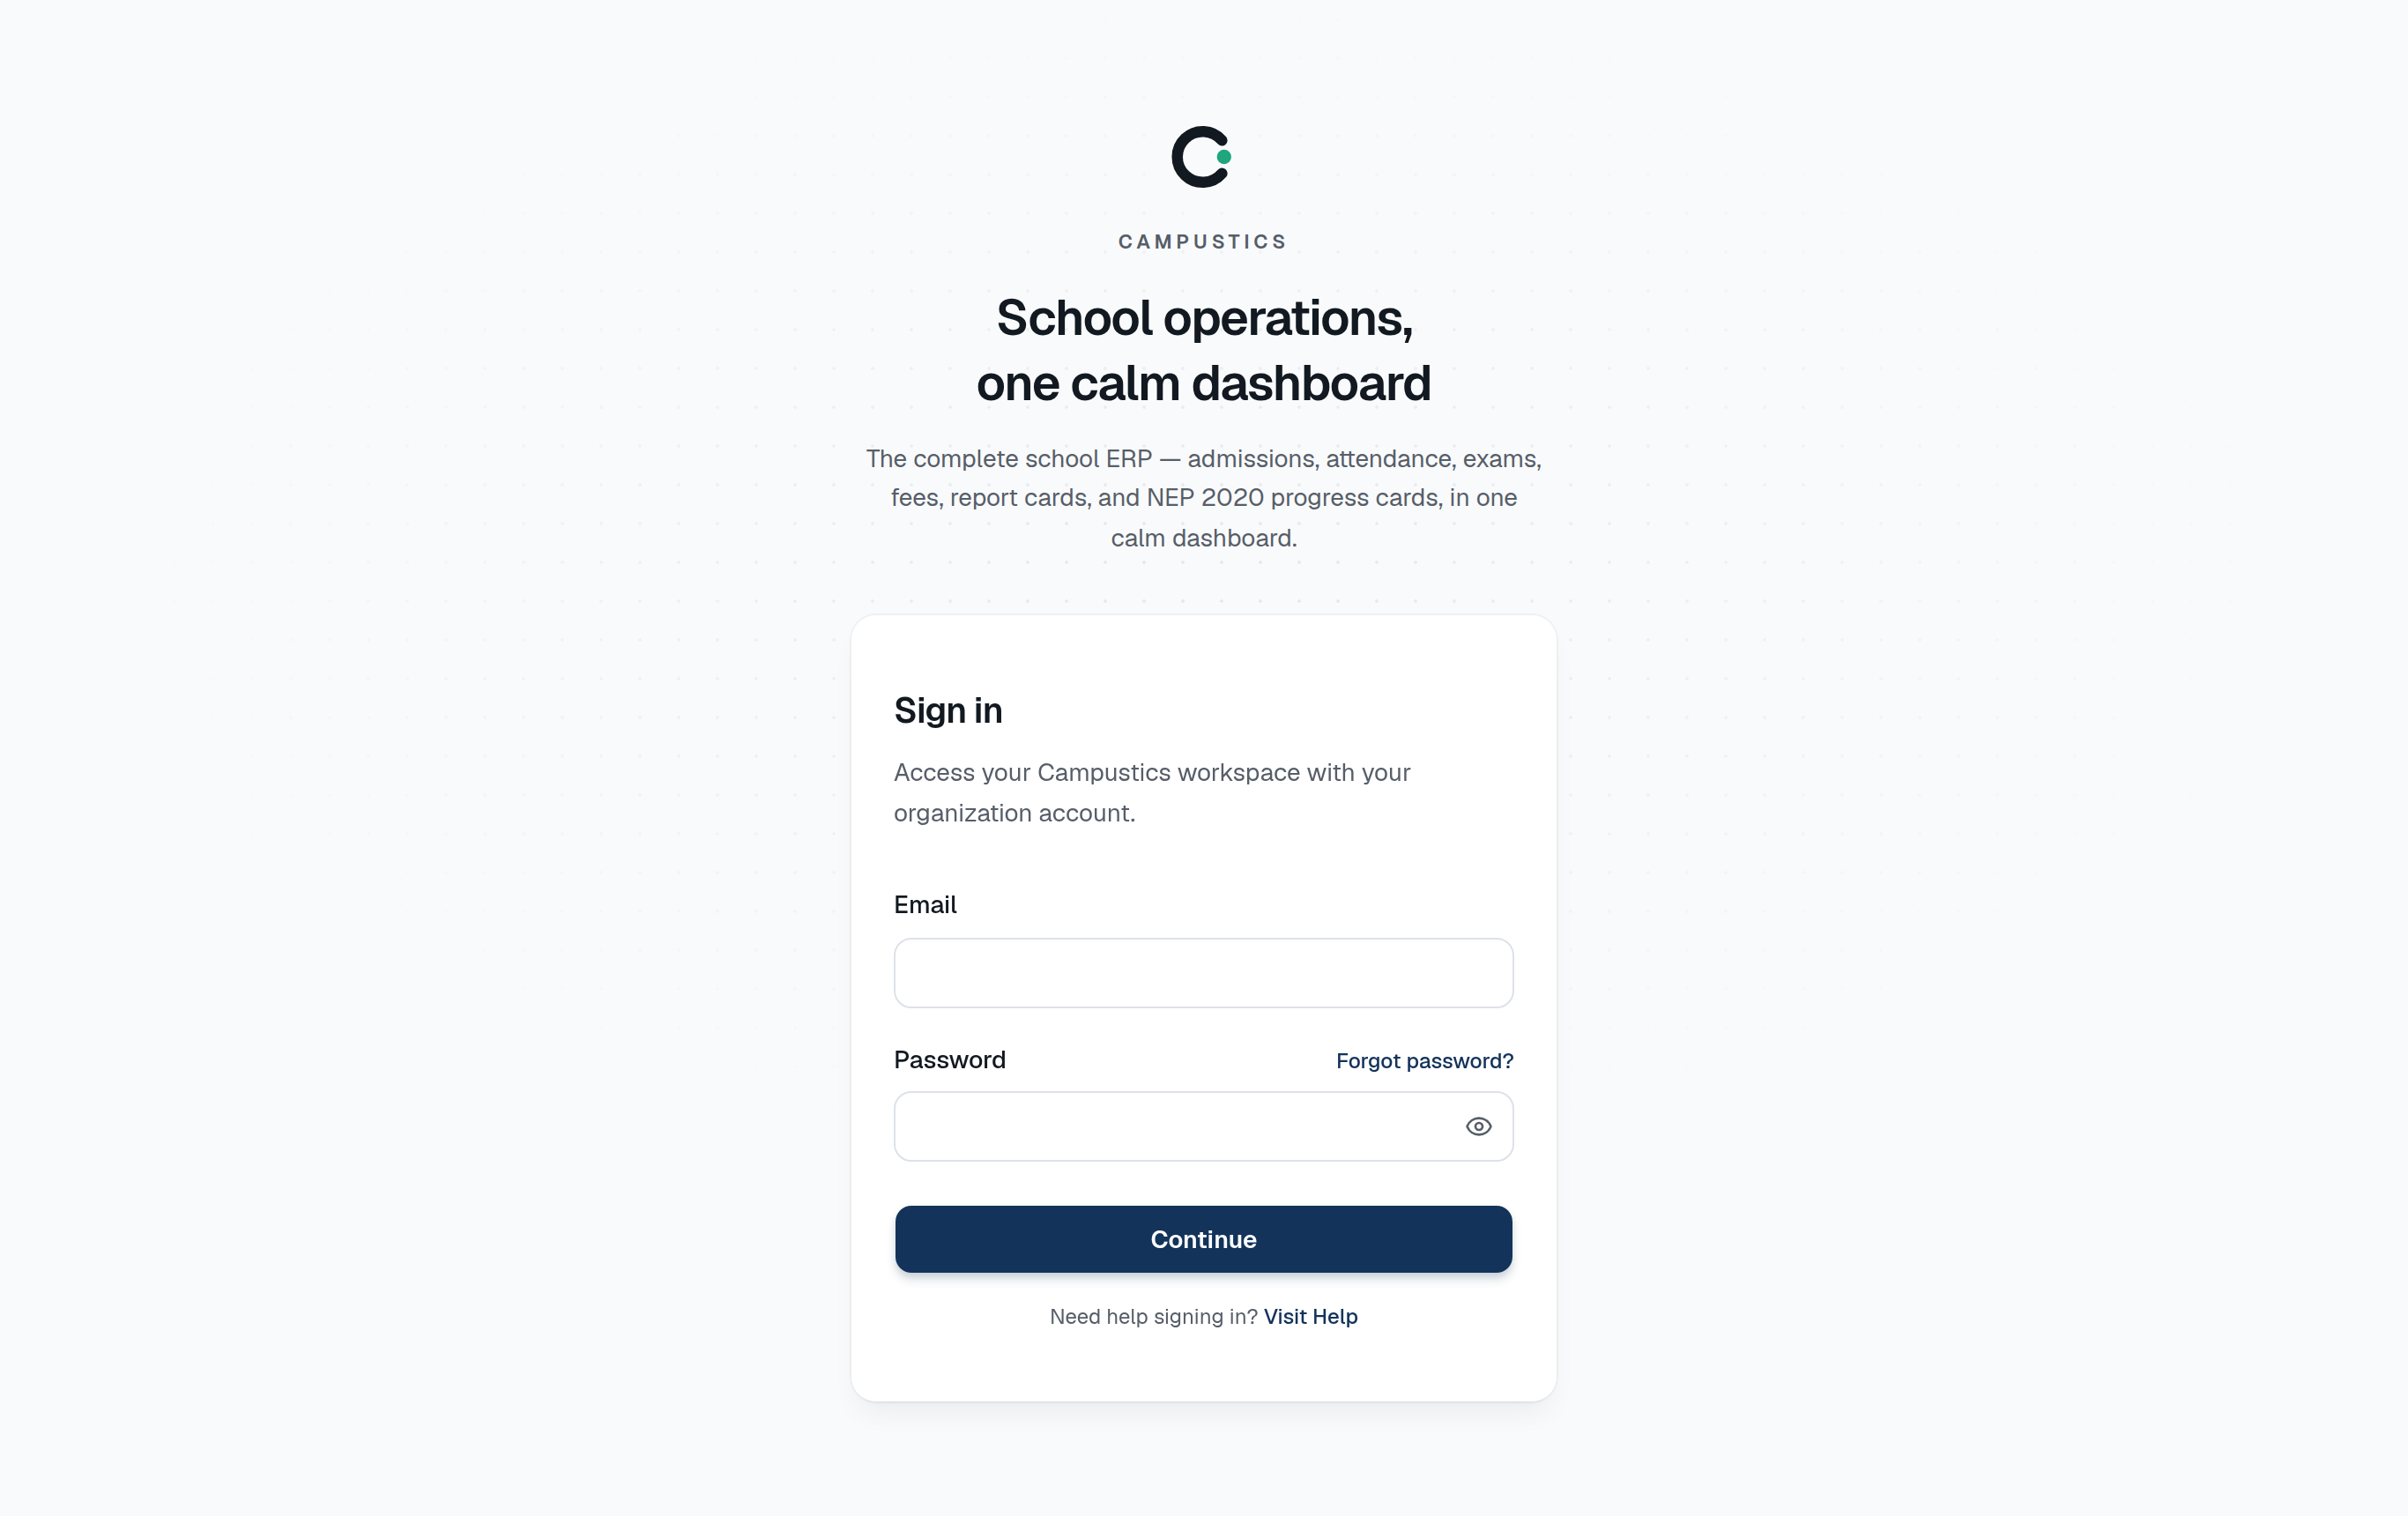
    Open your school's sign-in page

    Open the URL your school shared (for example yourschool.campustics.com) in Chrome, Edge, or Safari.

    The sign-in page
  2. 2

    Enter your email and one-time password

    Type the email and temporary password from your welcome email, then press Continue.

    Tip: If the field turns red but your details are correct, it's usually a stray space — retype the password.

  3. 3

    Set your own password

    You'll be asked to choose a new password right away. Use at least 12 characters with a number.

  4. 4

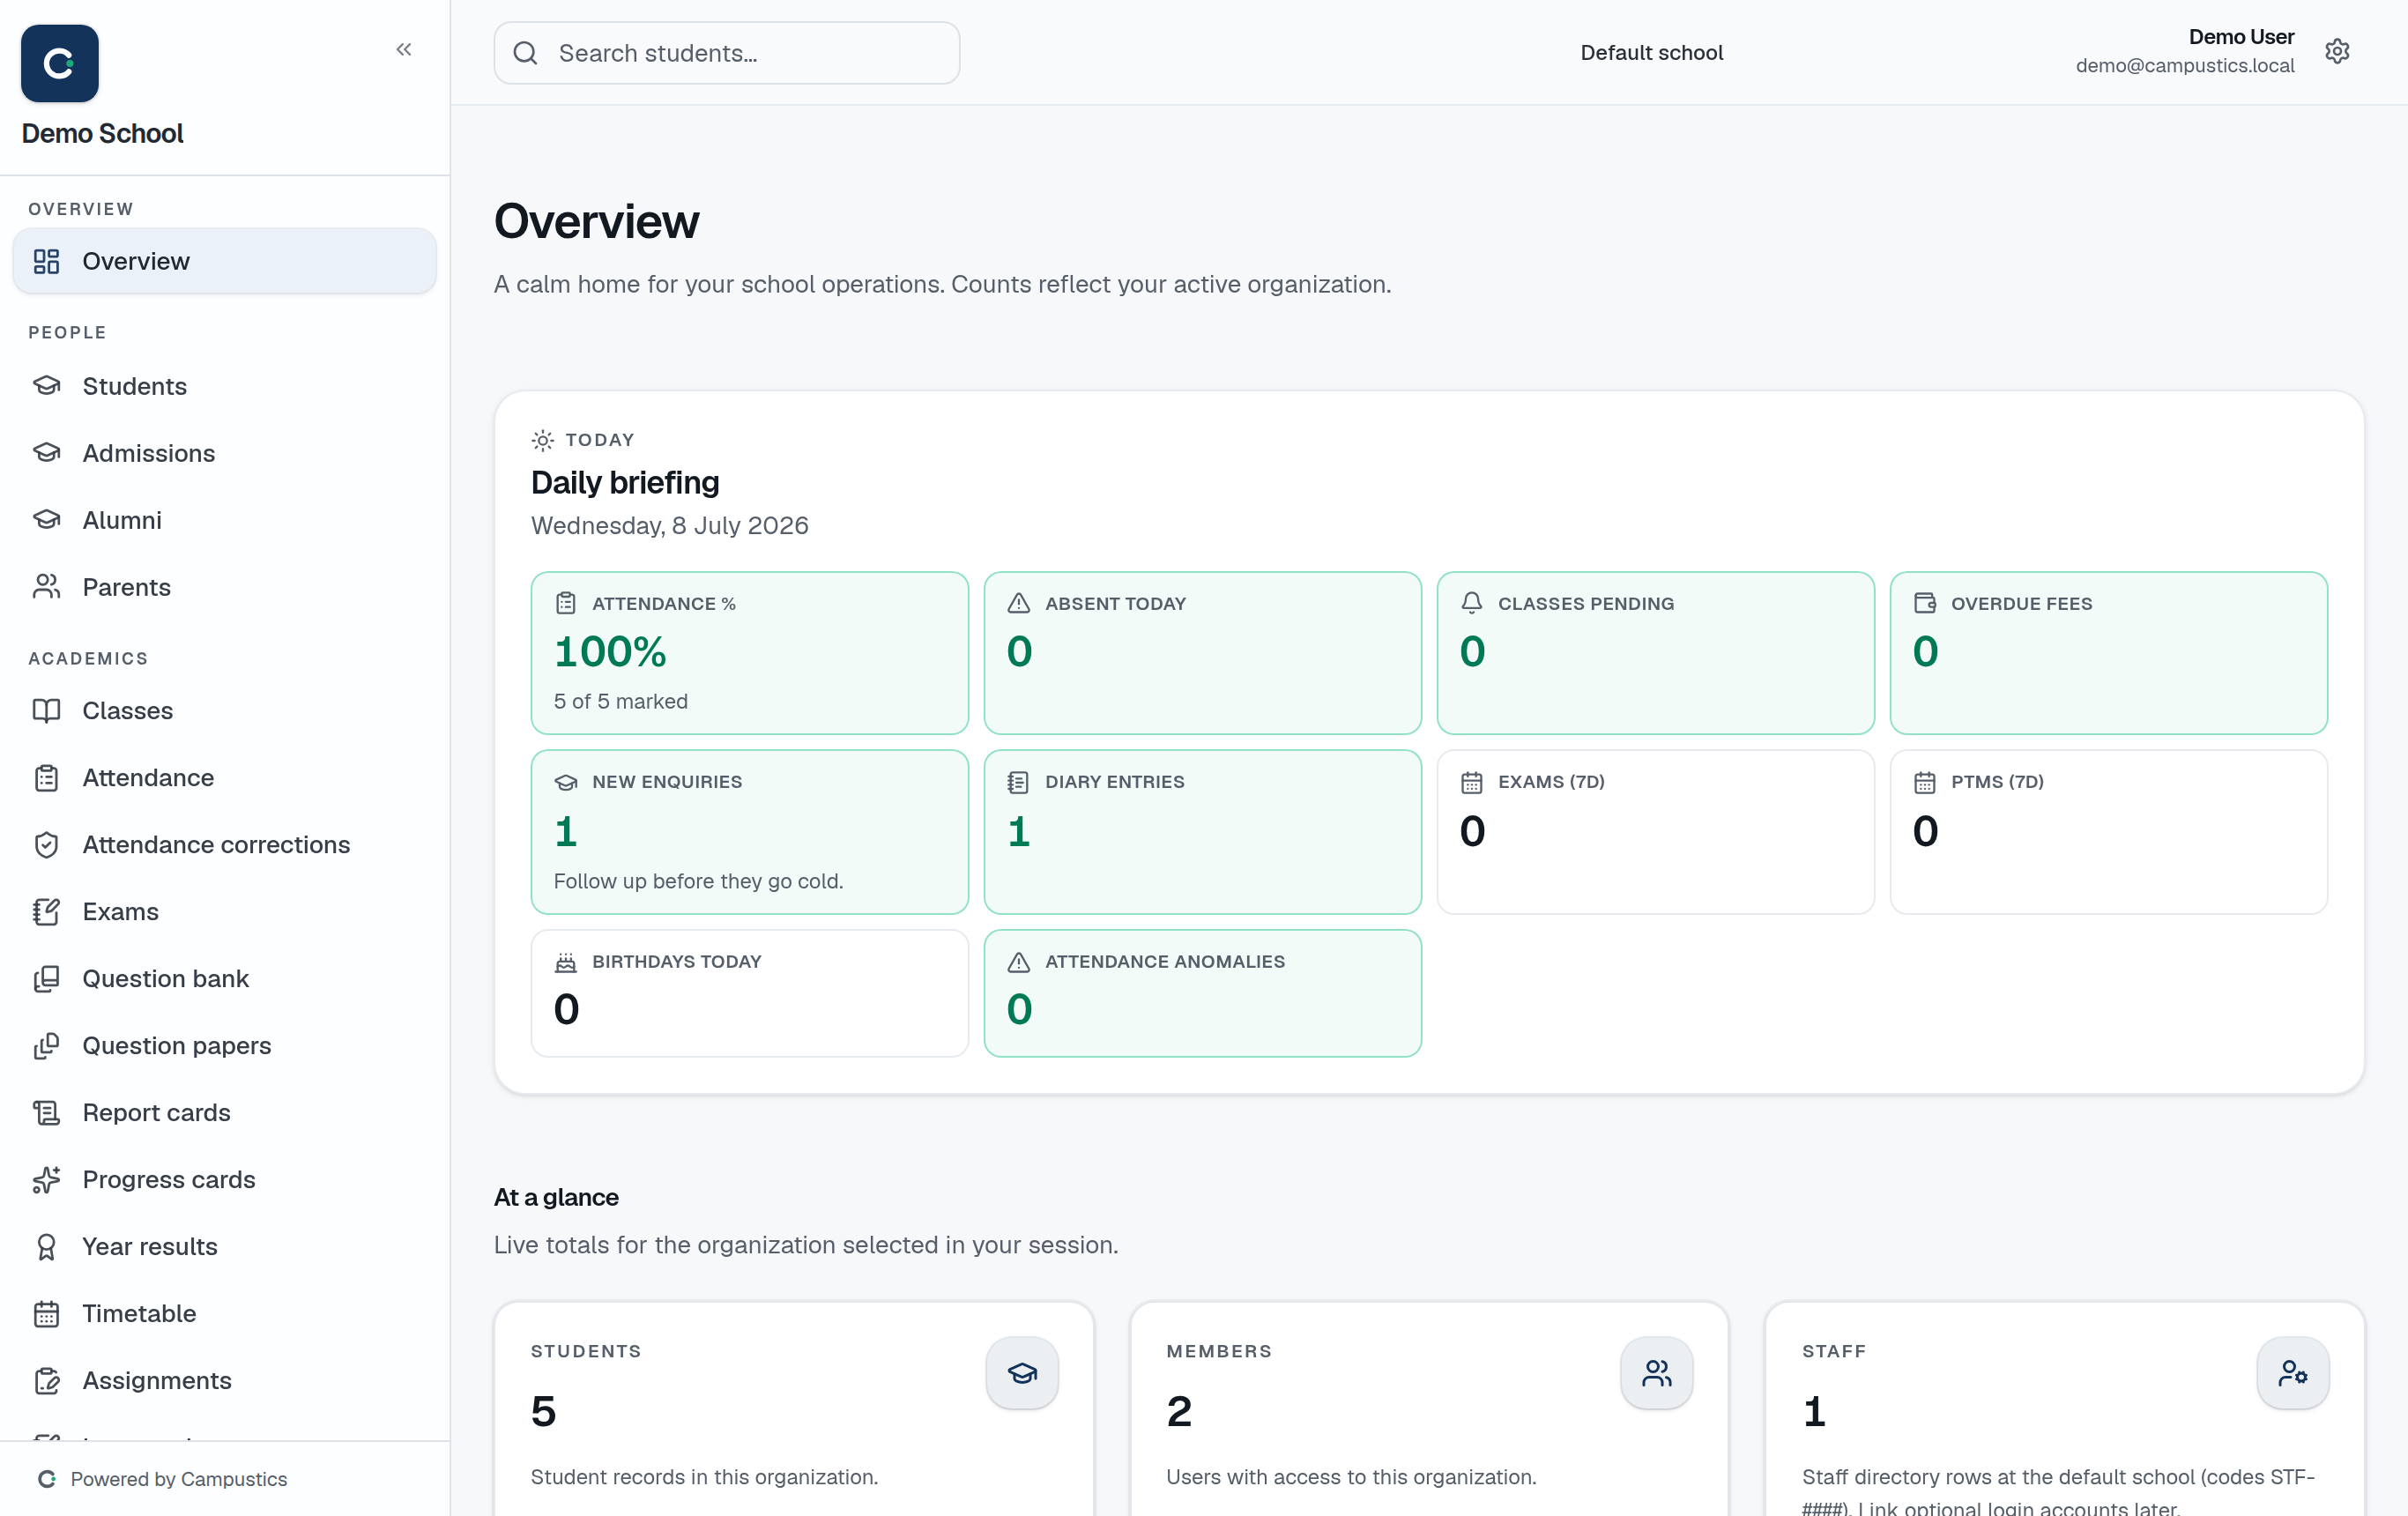
    You land on your dashboard

    Admins land on the main dashboard; parents, teachers, and students each land on their own portal.

    The admin dashboard

    Tip: The first time you sign in, a 2-minute interactive tour points out the sidebar and key widgets. It only runs once.

Reset a forgotten password

Anyone · 2 min

Request a reset link from the sign-in page — valid for one hour.

  1. 1

    Click 'Forgot password?'

    On the sign-in page, click the Forgot password? link below the password field.

    The sign-in page
  2. 2

    Enter your email

    We email you a reset link that's valid for one hour. Open it and choose a new password.

  3. 3

    Internal logins are reset by your admin

    If your login is an internal address like SCH-2026-0001@students.local or 9876543210@parents.local, the email can't reach you.

    Tip: Ask your school office to reset it — there's a Reset password button on every row of the Students and Parents pages.

Set up your school

Brand your school

Admin · 3 min

Replace the generic logo and colours so parents and staff see your school.

  1. 1

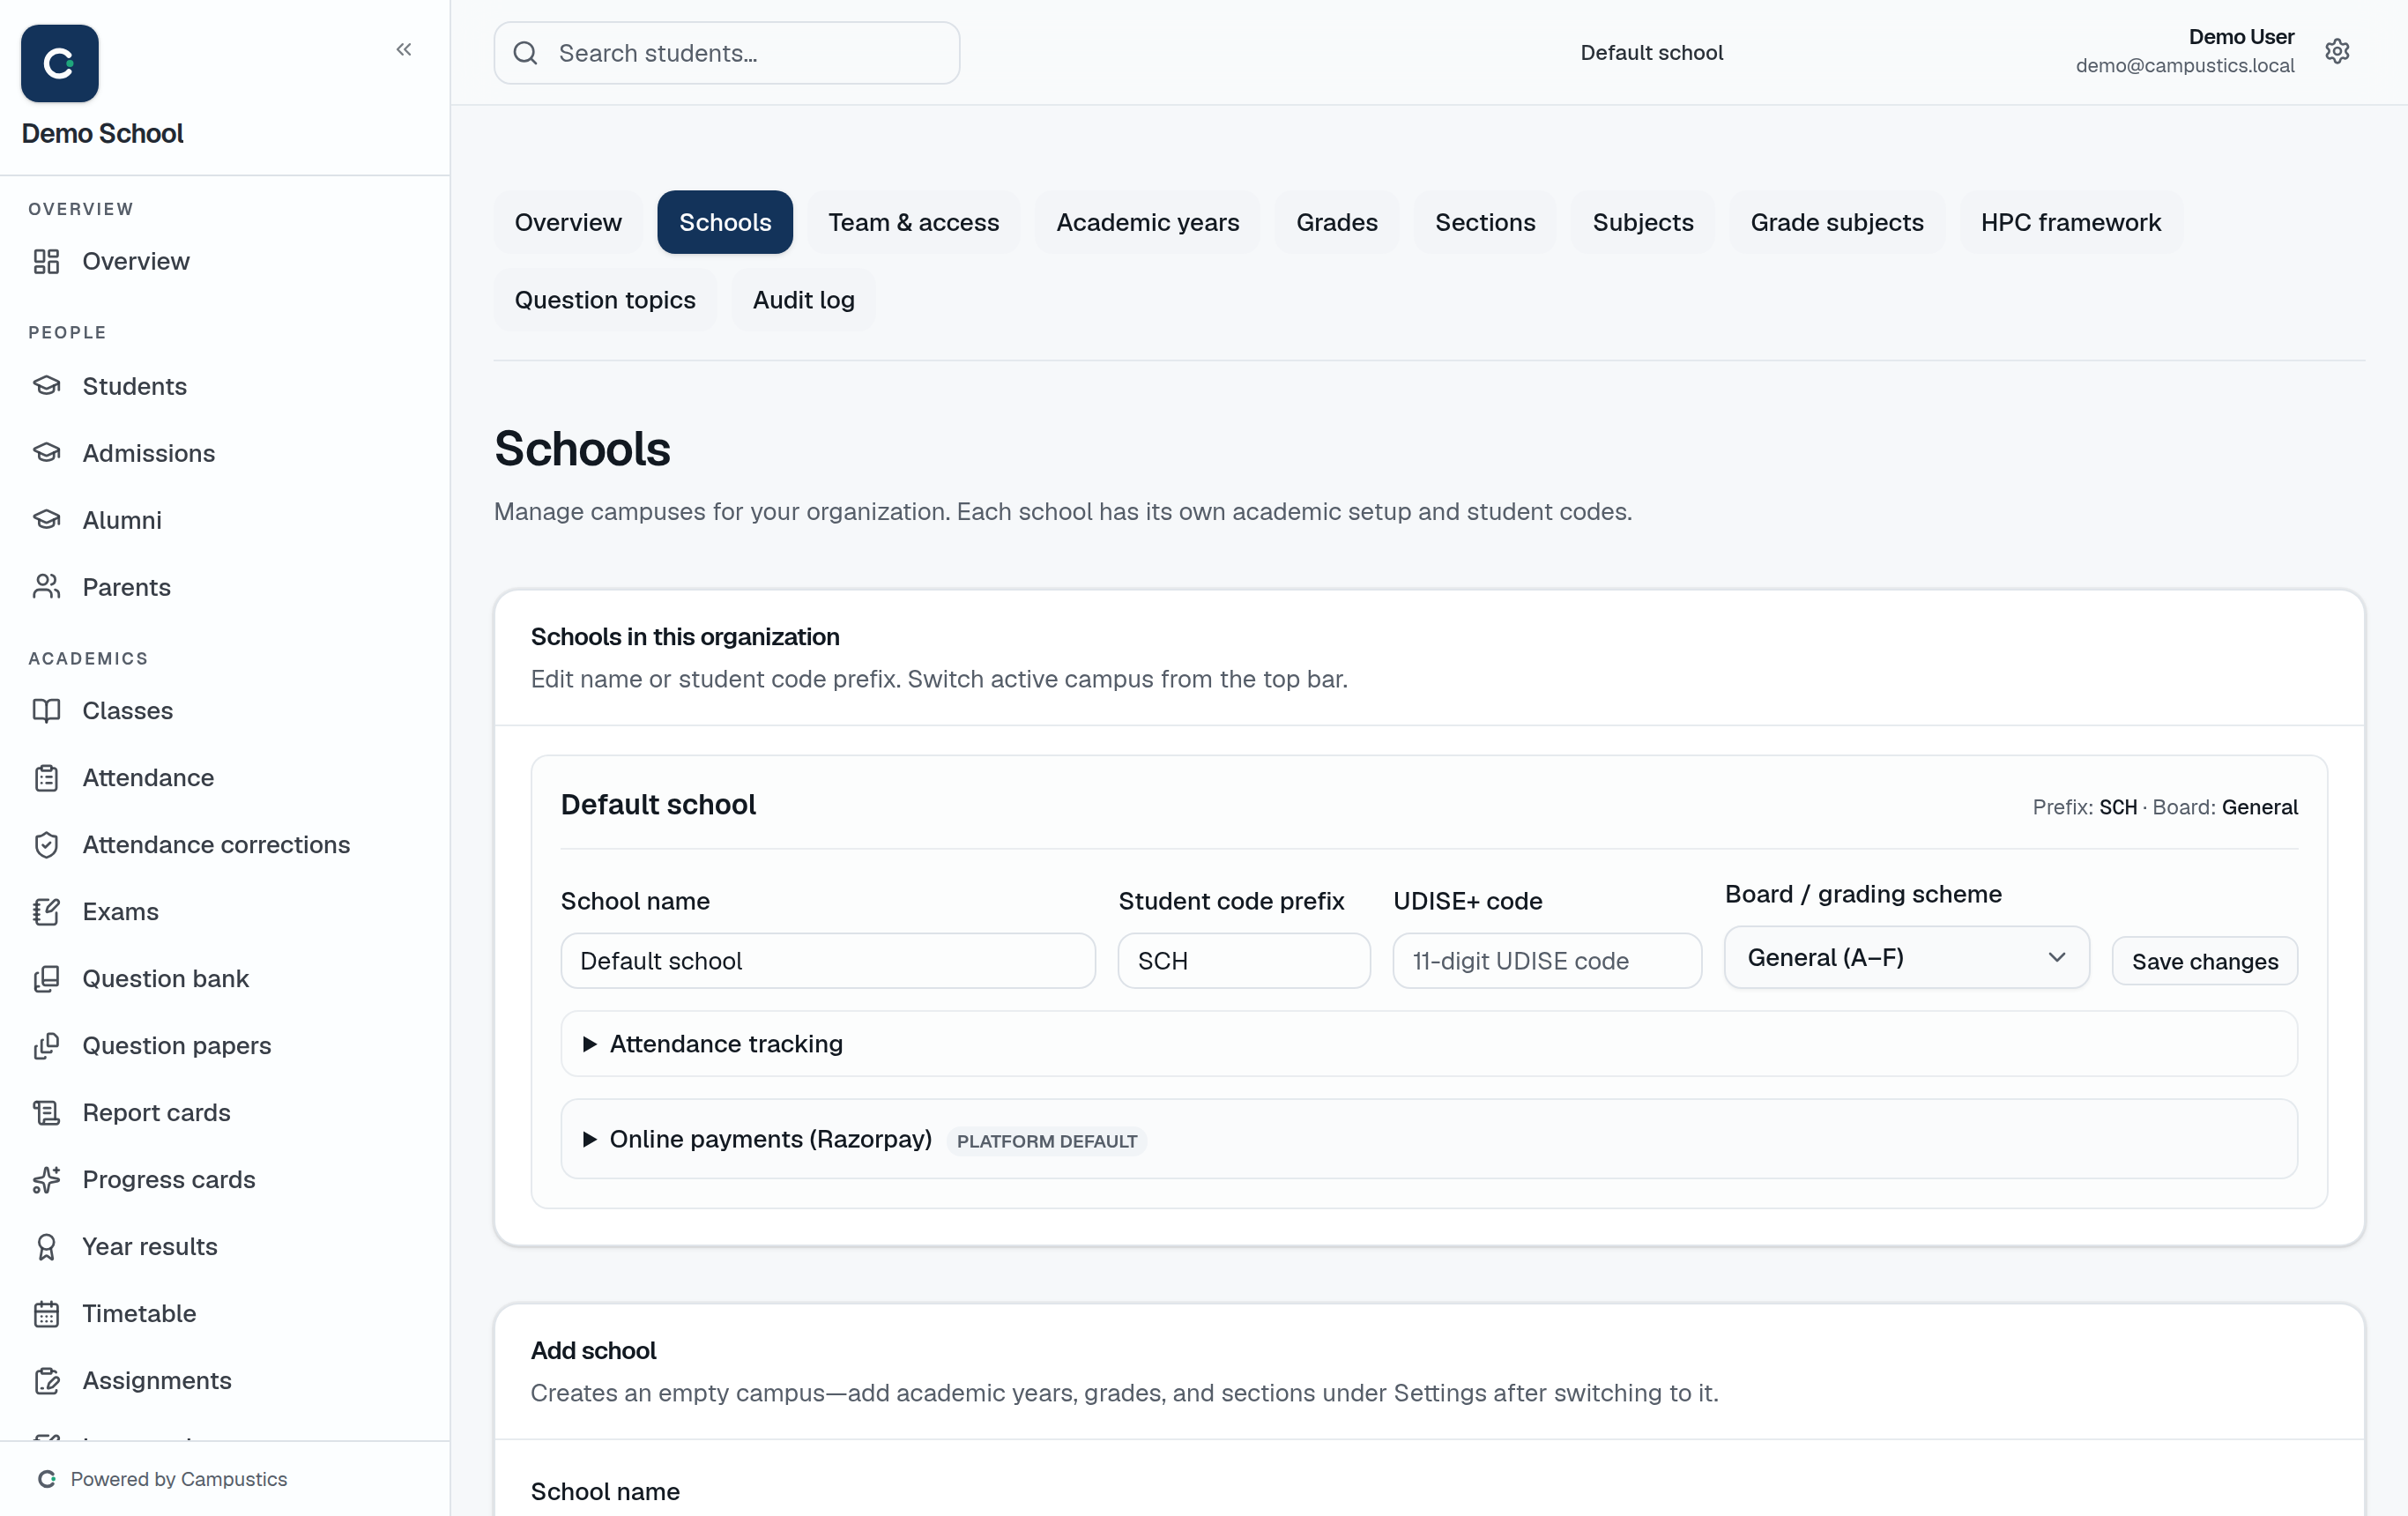
    Open Settings → Schools

    Go to Settings → Schools, open your school, and click Edit.

    Settings → Schools
  2. 2

    Fill in name, prefix, board, and logo

    Set the full name, short brand name, student-code prefix (e.g. SXM → SXM-2026-0001), the board / grading scheme, and upload a square logo plus your colours.

    Tip: The board / grading scheme (CBSE, ICSE, Karnataka State, or General) decides how percentages become grades on report cards. Existing cards keep the scheme they were made under, so switching later is safe.

  3. 3

    Save and refresh

    Save, then refresh — the sidebar logo, topbar, and every print template now use your branding. Each campus can have its own logo and prefix.

Set up your academic structure

Admin · 5 min

Create the academic year, then the grades and sections your school offers.

  1. 1

    Add the academic year

    Go to Settings → Academic years → New. Name it (e.g. 2026-27), set start/end dates, and mark it Active. Only one year is active at a time.

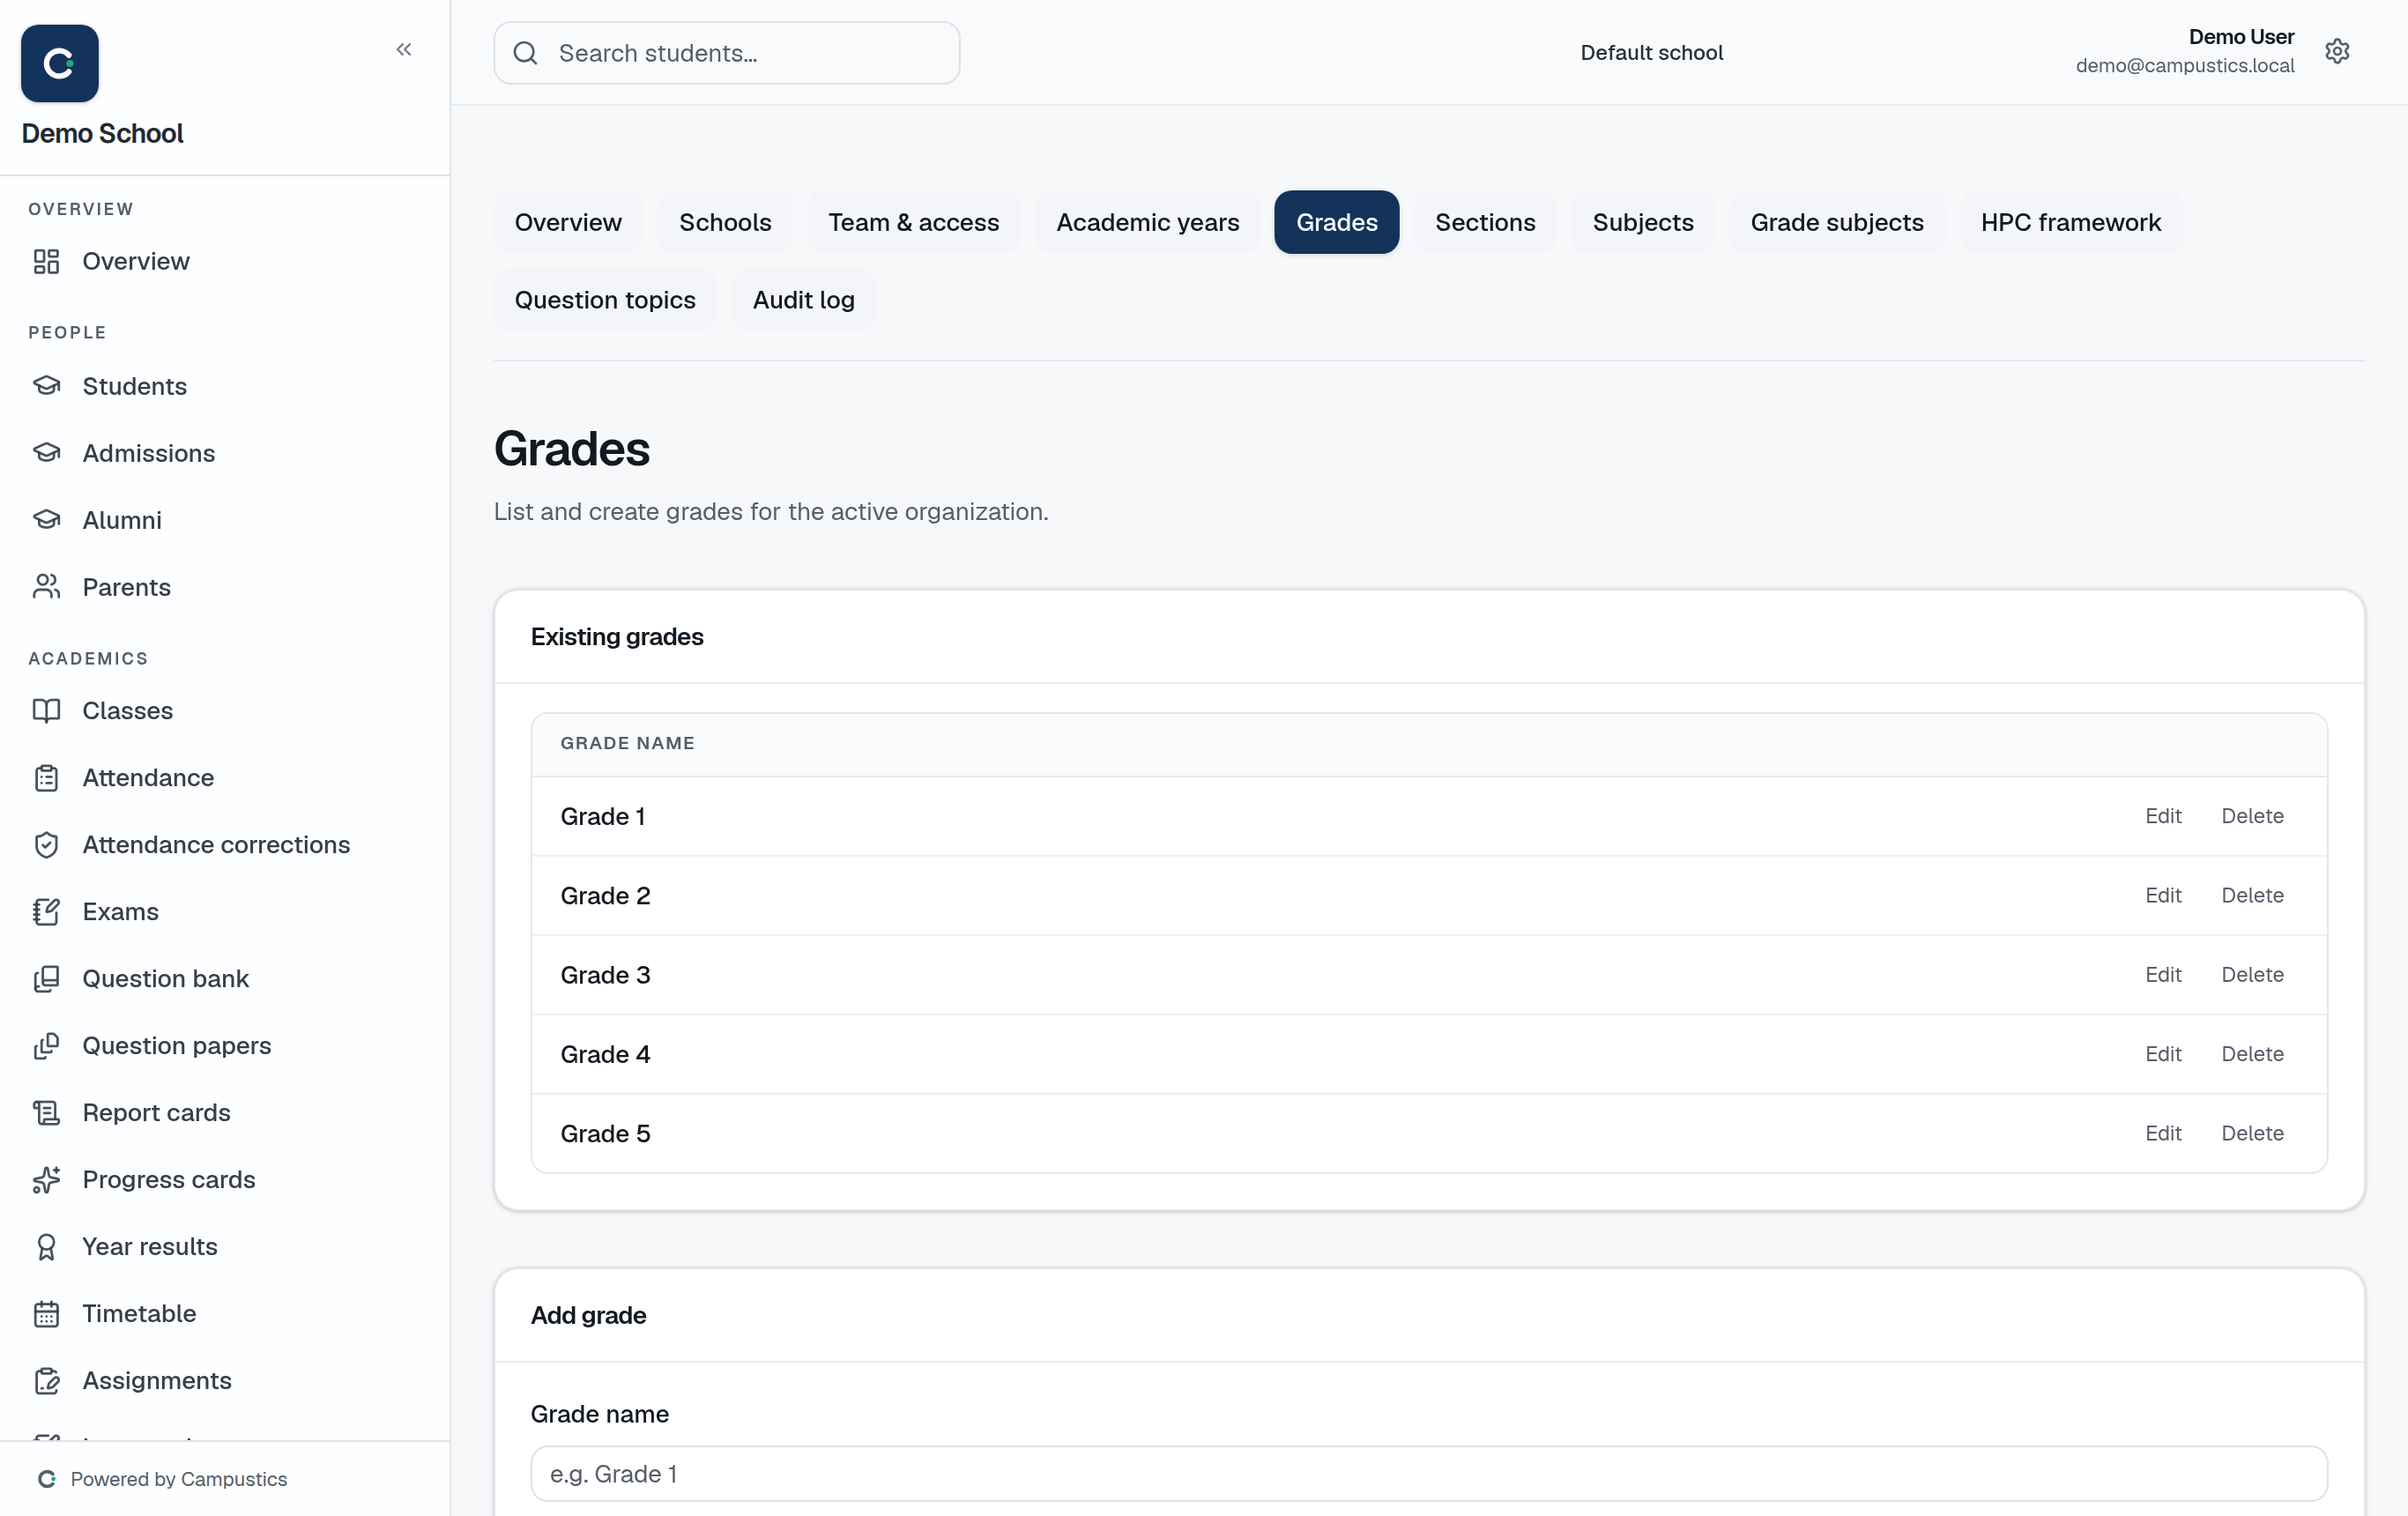
    Settings → Grades
  2. 2

    Add your grades

    Go to Settings → Grades and add every grade top to bottom (Nursery, LKG … Grade 12). Add a display-order number so they sort correctly.

  3. 3

    Add sections

    Go to Settings → Sections and add each section under its grade, with a capacity. Class teachers are assigned later from the class page.

    Tip: Grades and sections drive everything else — enrolment, attendance, exams. Get them right once at the start.

Add subjects and map them to grades

Admin · 3 min

List every subject, then tick which grades offer each — and assign default teachers.

  1. 1

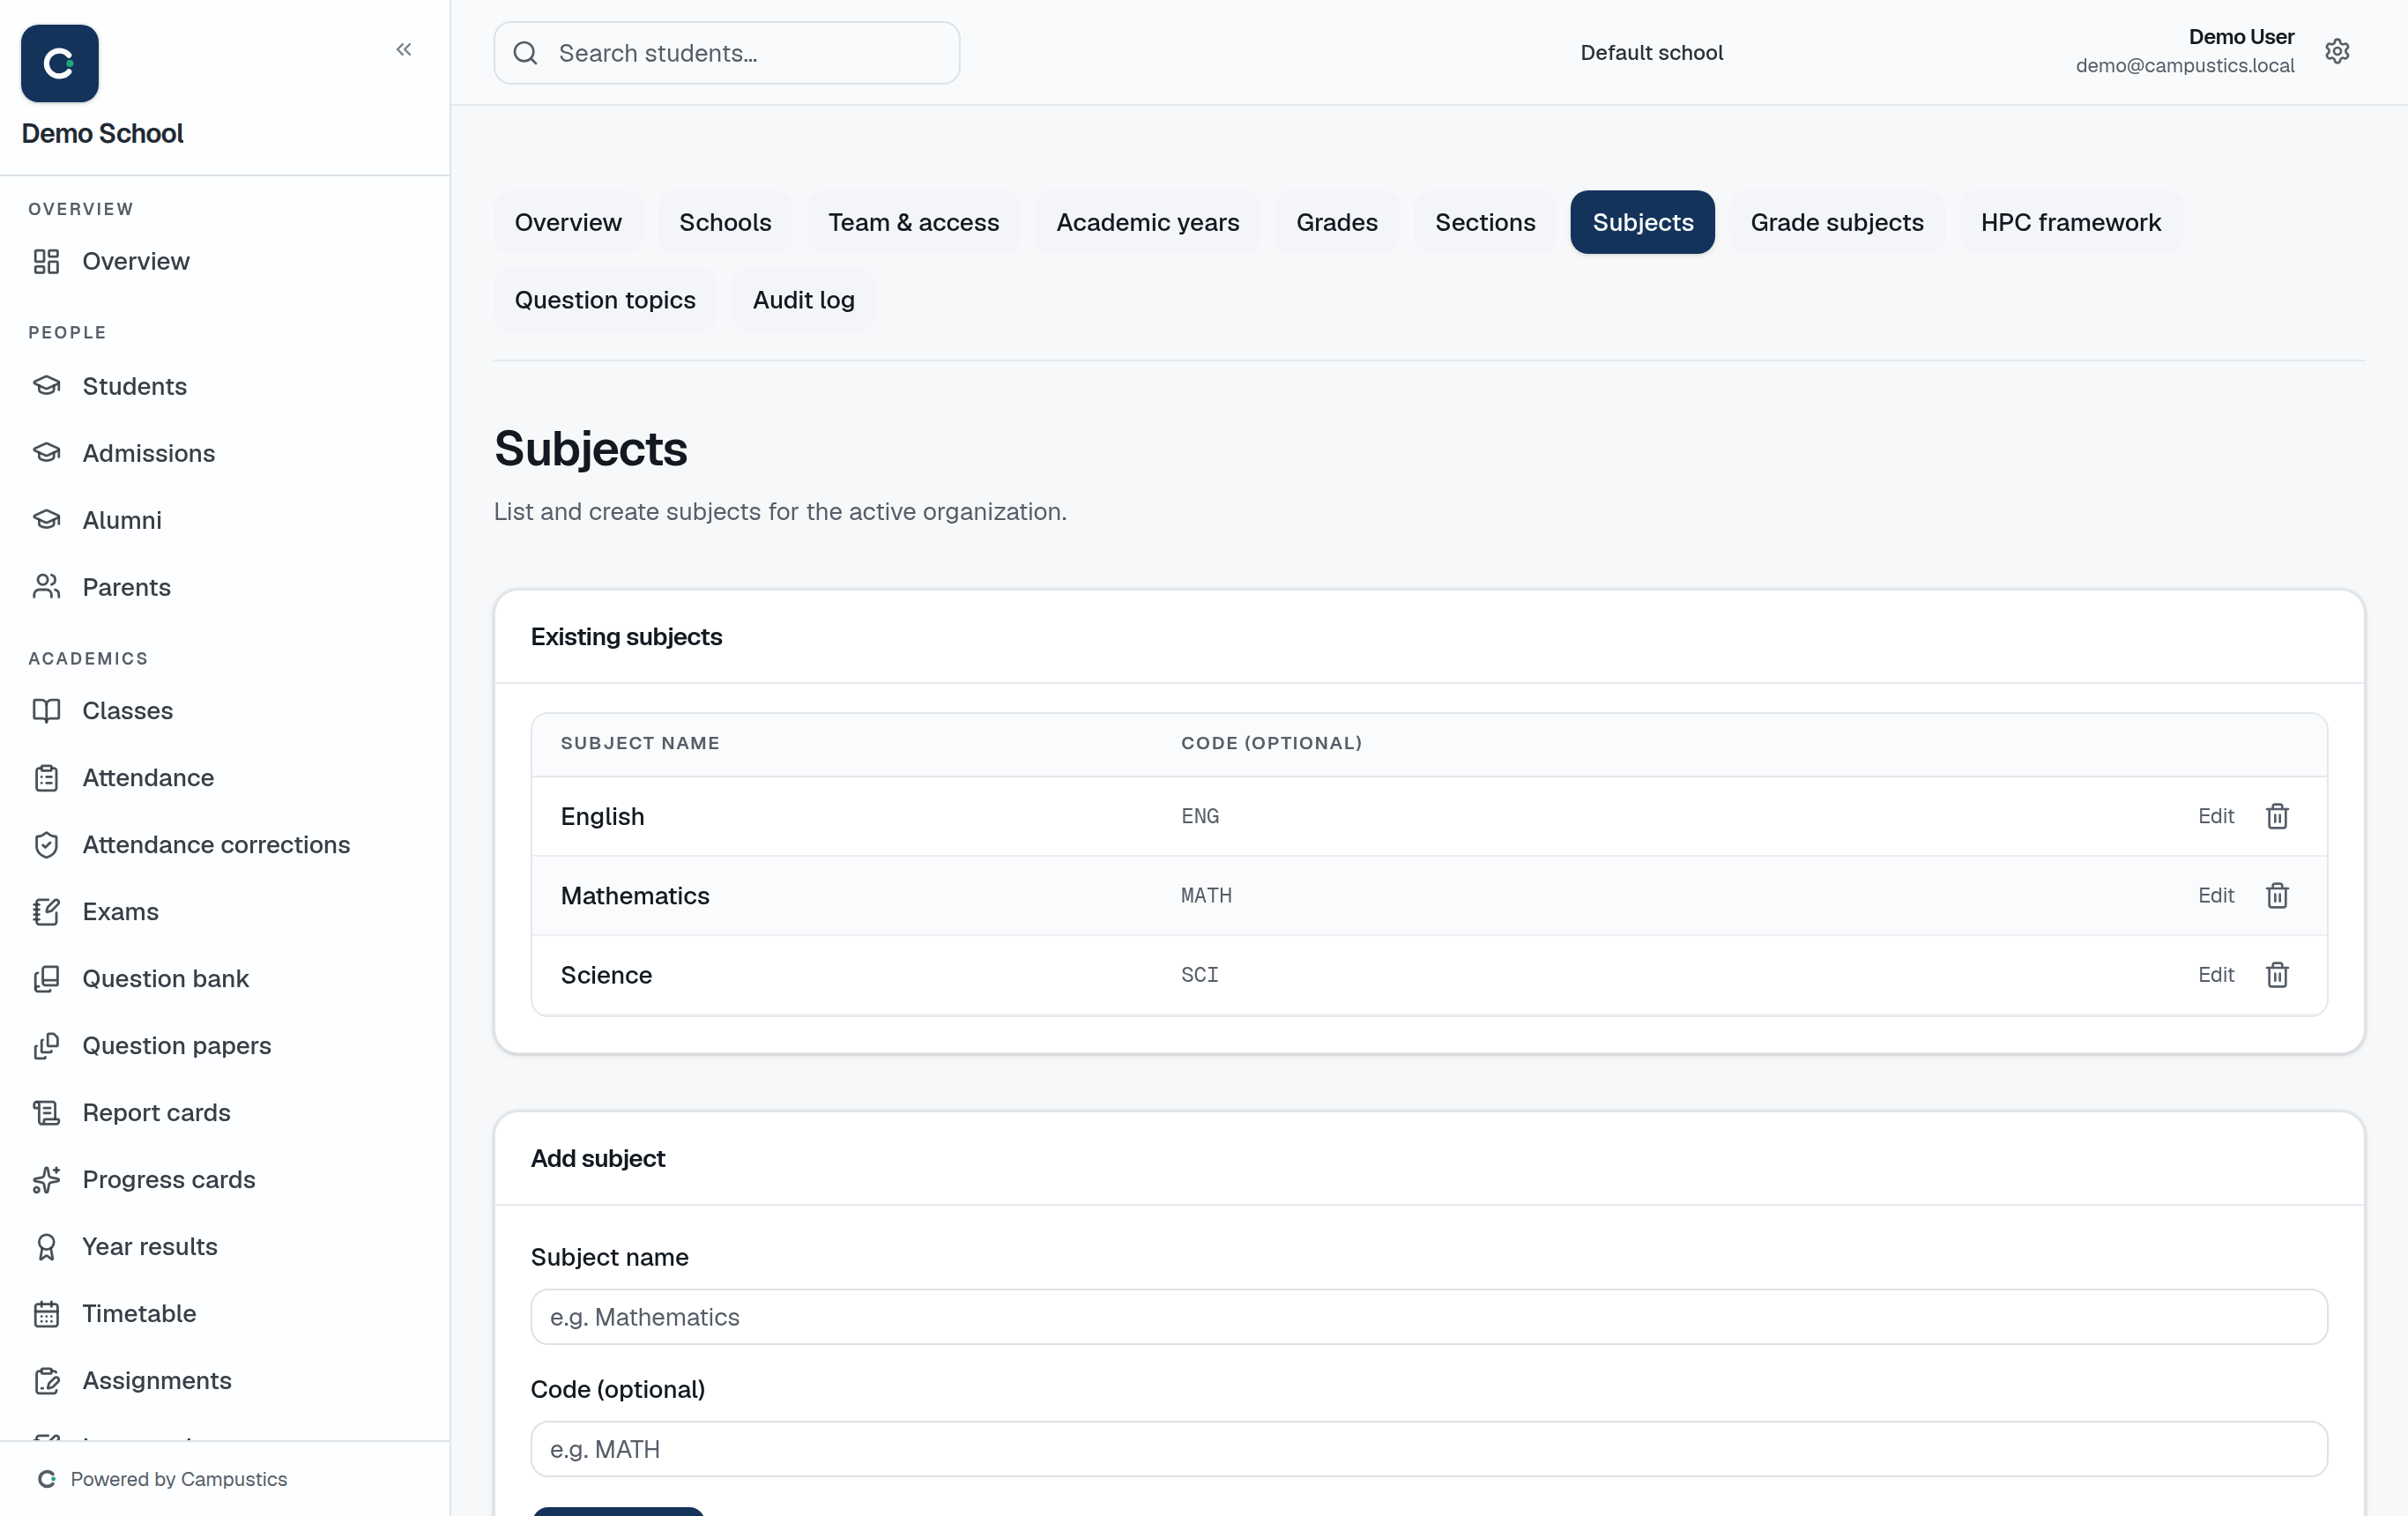
    Add your subjects

    Go to Settings → Subjects and add every subject taught anywhere (English, Mathematics, Science, and so on).

    Settings → Subjects
  2. 2

    Map subjects to grades

    Go to Settings → Grade subjects and tick which subjects each grade offers. Assign a default teacher per (grade, subject) once staff exist.

    Tip: Exam creation, report cards, and the AI question bank all read this mapping — set it once and the rest of the year auto-fills.

Add your staff

Admin · 3 min

Add teachers and staff one by one or via CSV, and issue their logins.

  1. 1

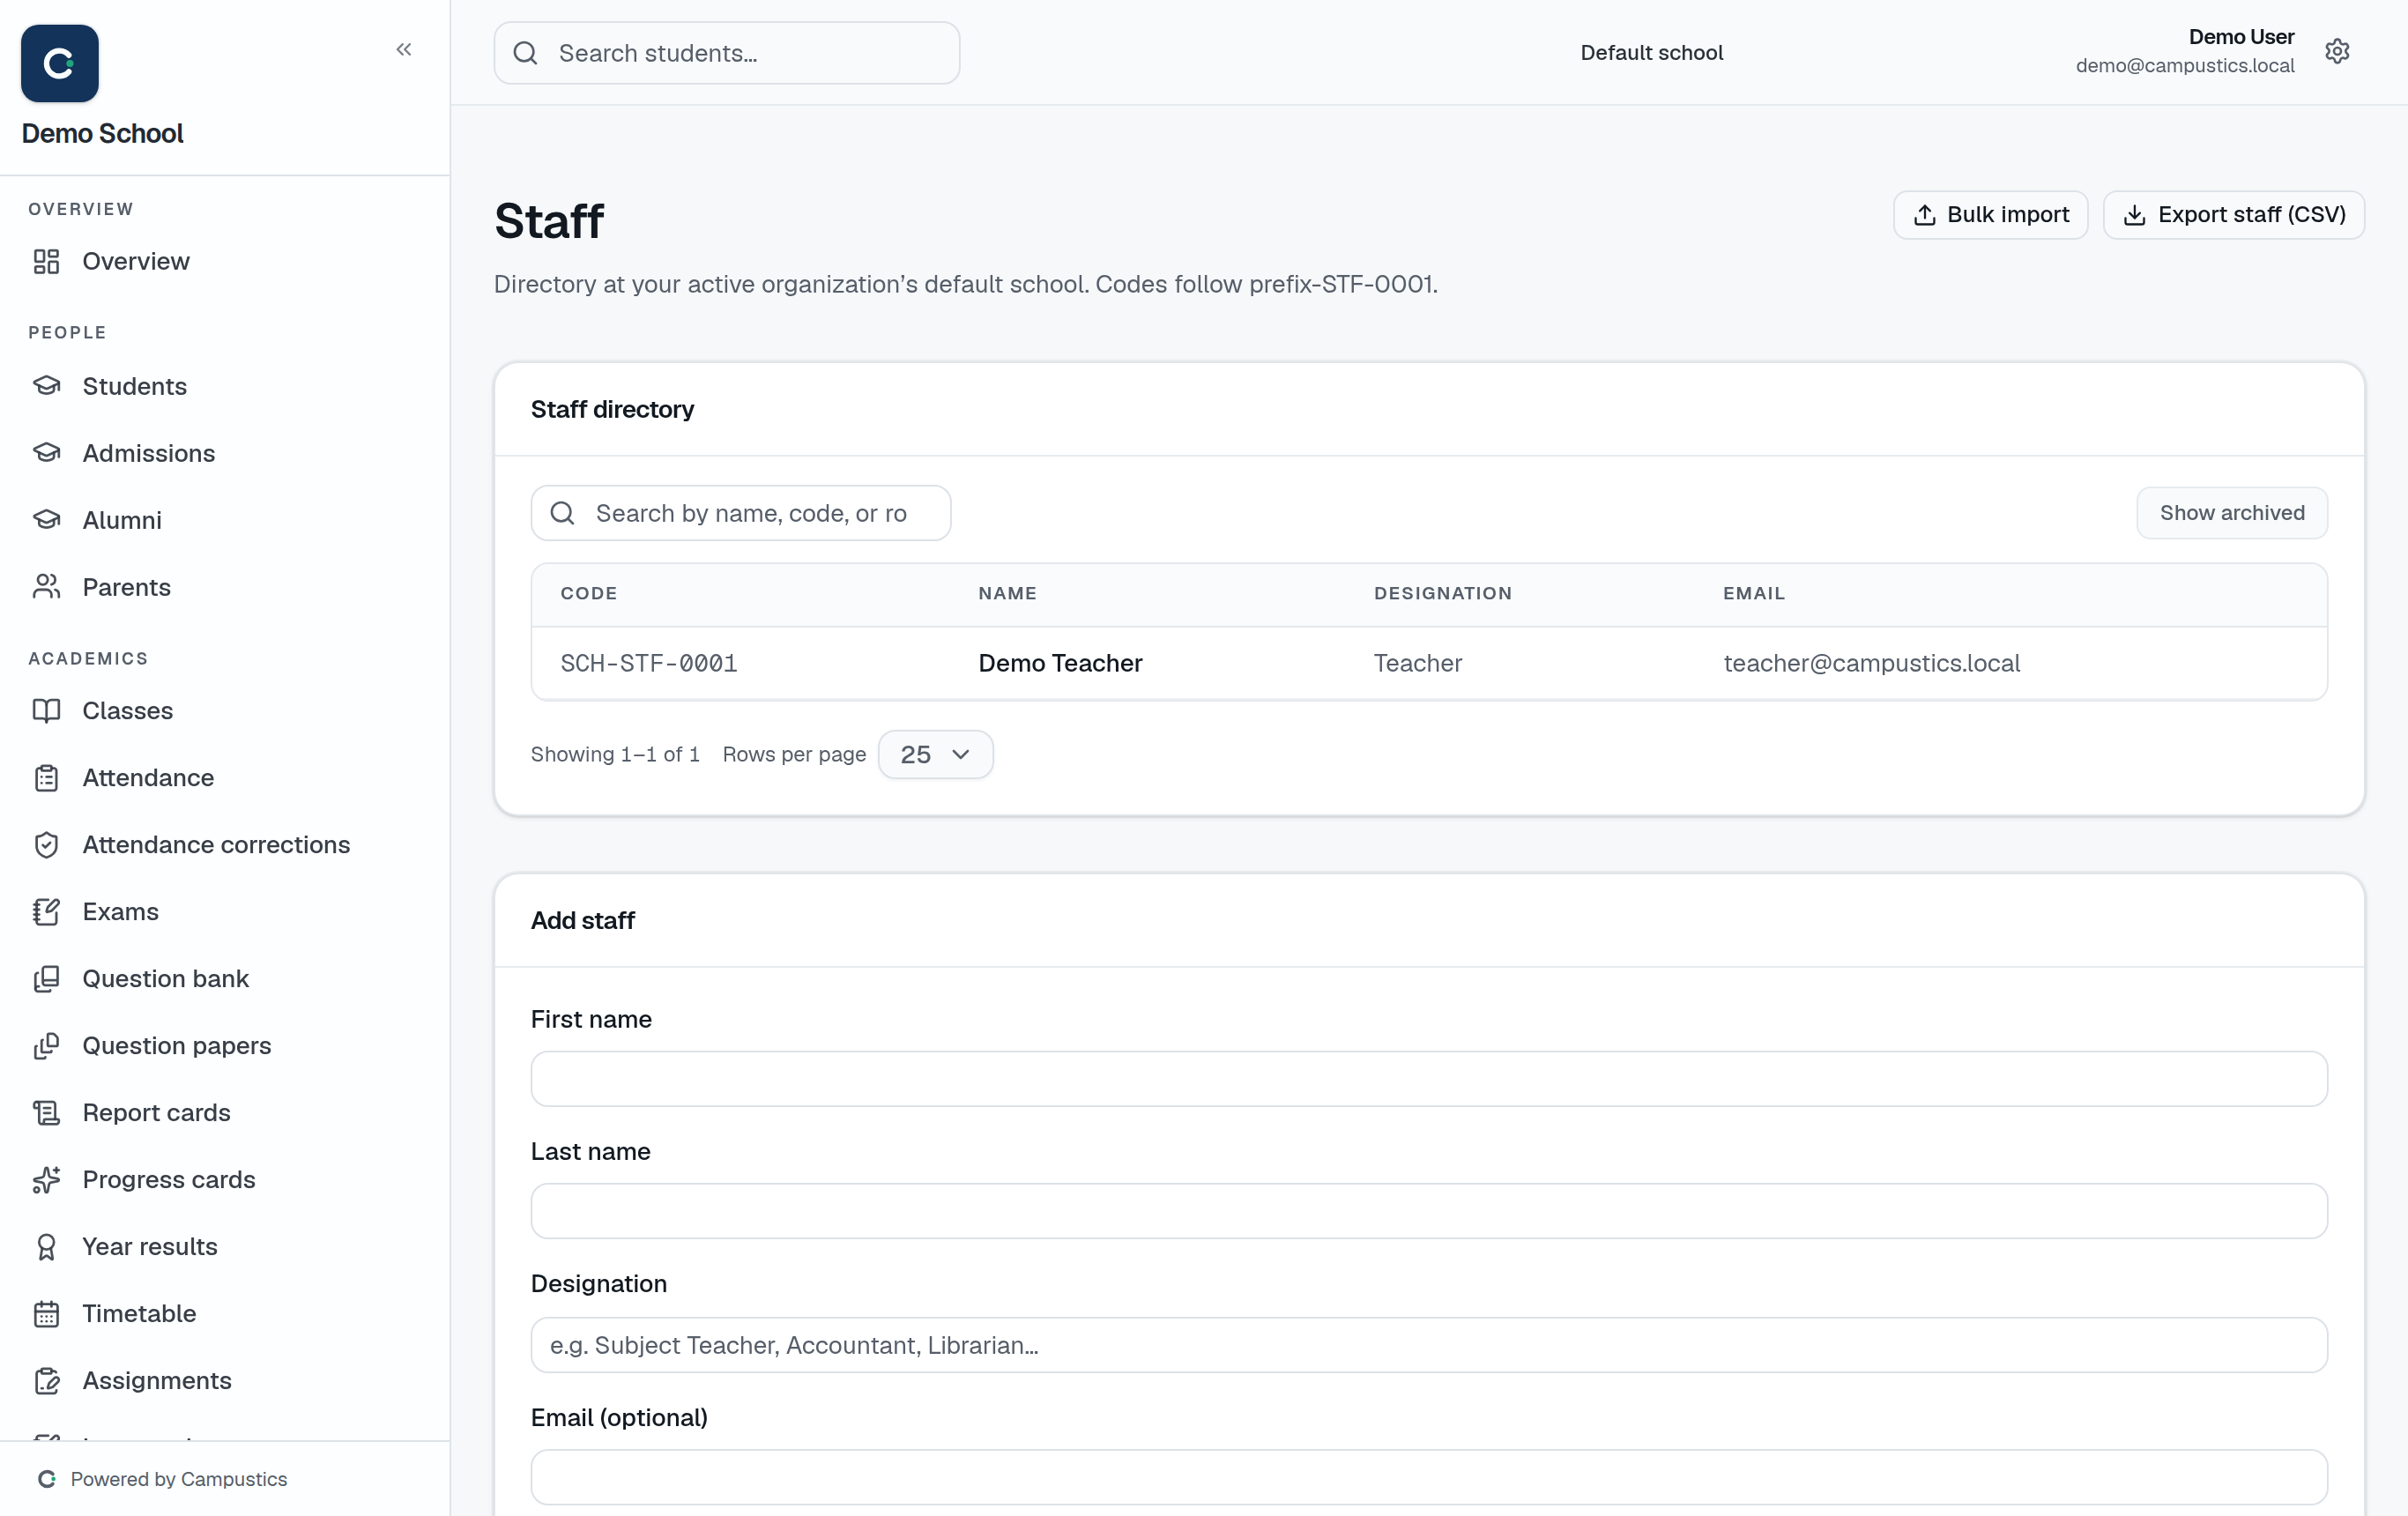
    Add a staff member

    Go to Staff → Add staff and fill in name, email, phone, designation, and date of joining.

    The Staff page
  2. 2

    Issue their login

    After saving, click Issue login — Campustics generates credentials and emails them. They can sign in immediately as a Teacher (the default role).

    Tip: For a large school, use Staff → Import CSV to add everyone at once instead of one by one.

  3. 3

    Assign class teachers

    Open a class (Classes → Edit) and set its class teacher. This is what lets a teacher take that class's attendance.

Set roles and permissions

Admin · 4 min

Use the five built-in roles, or create a custom role with exactly the access you want.

  1. 1

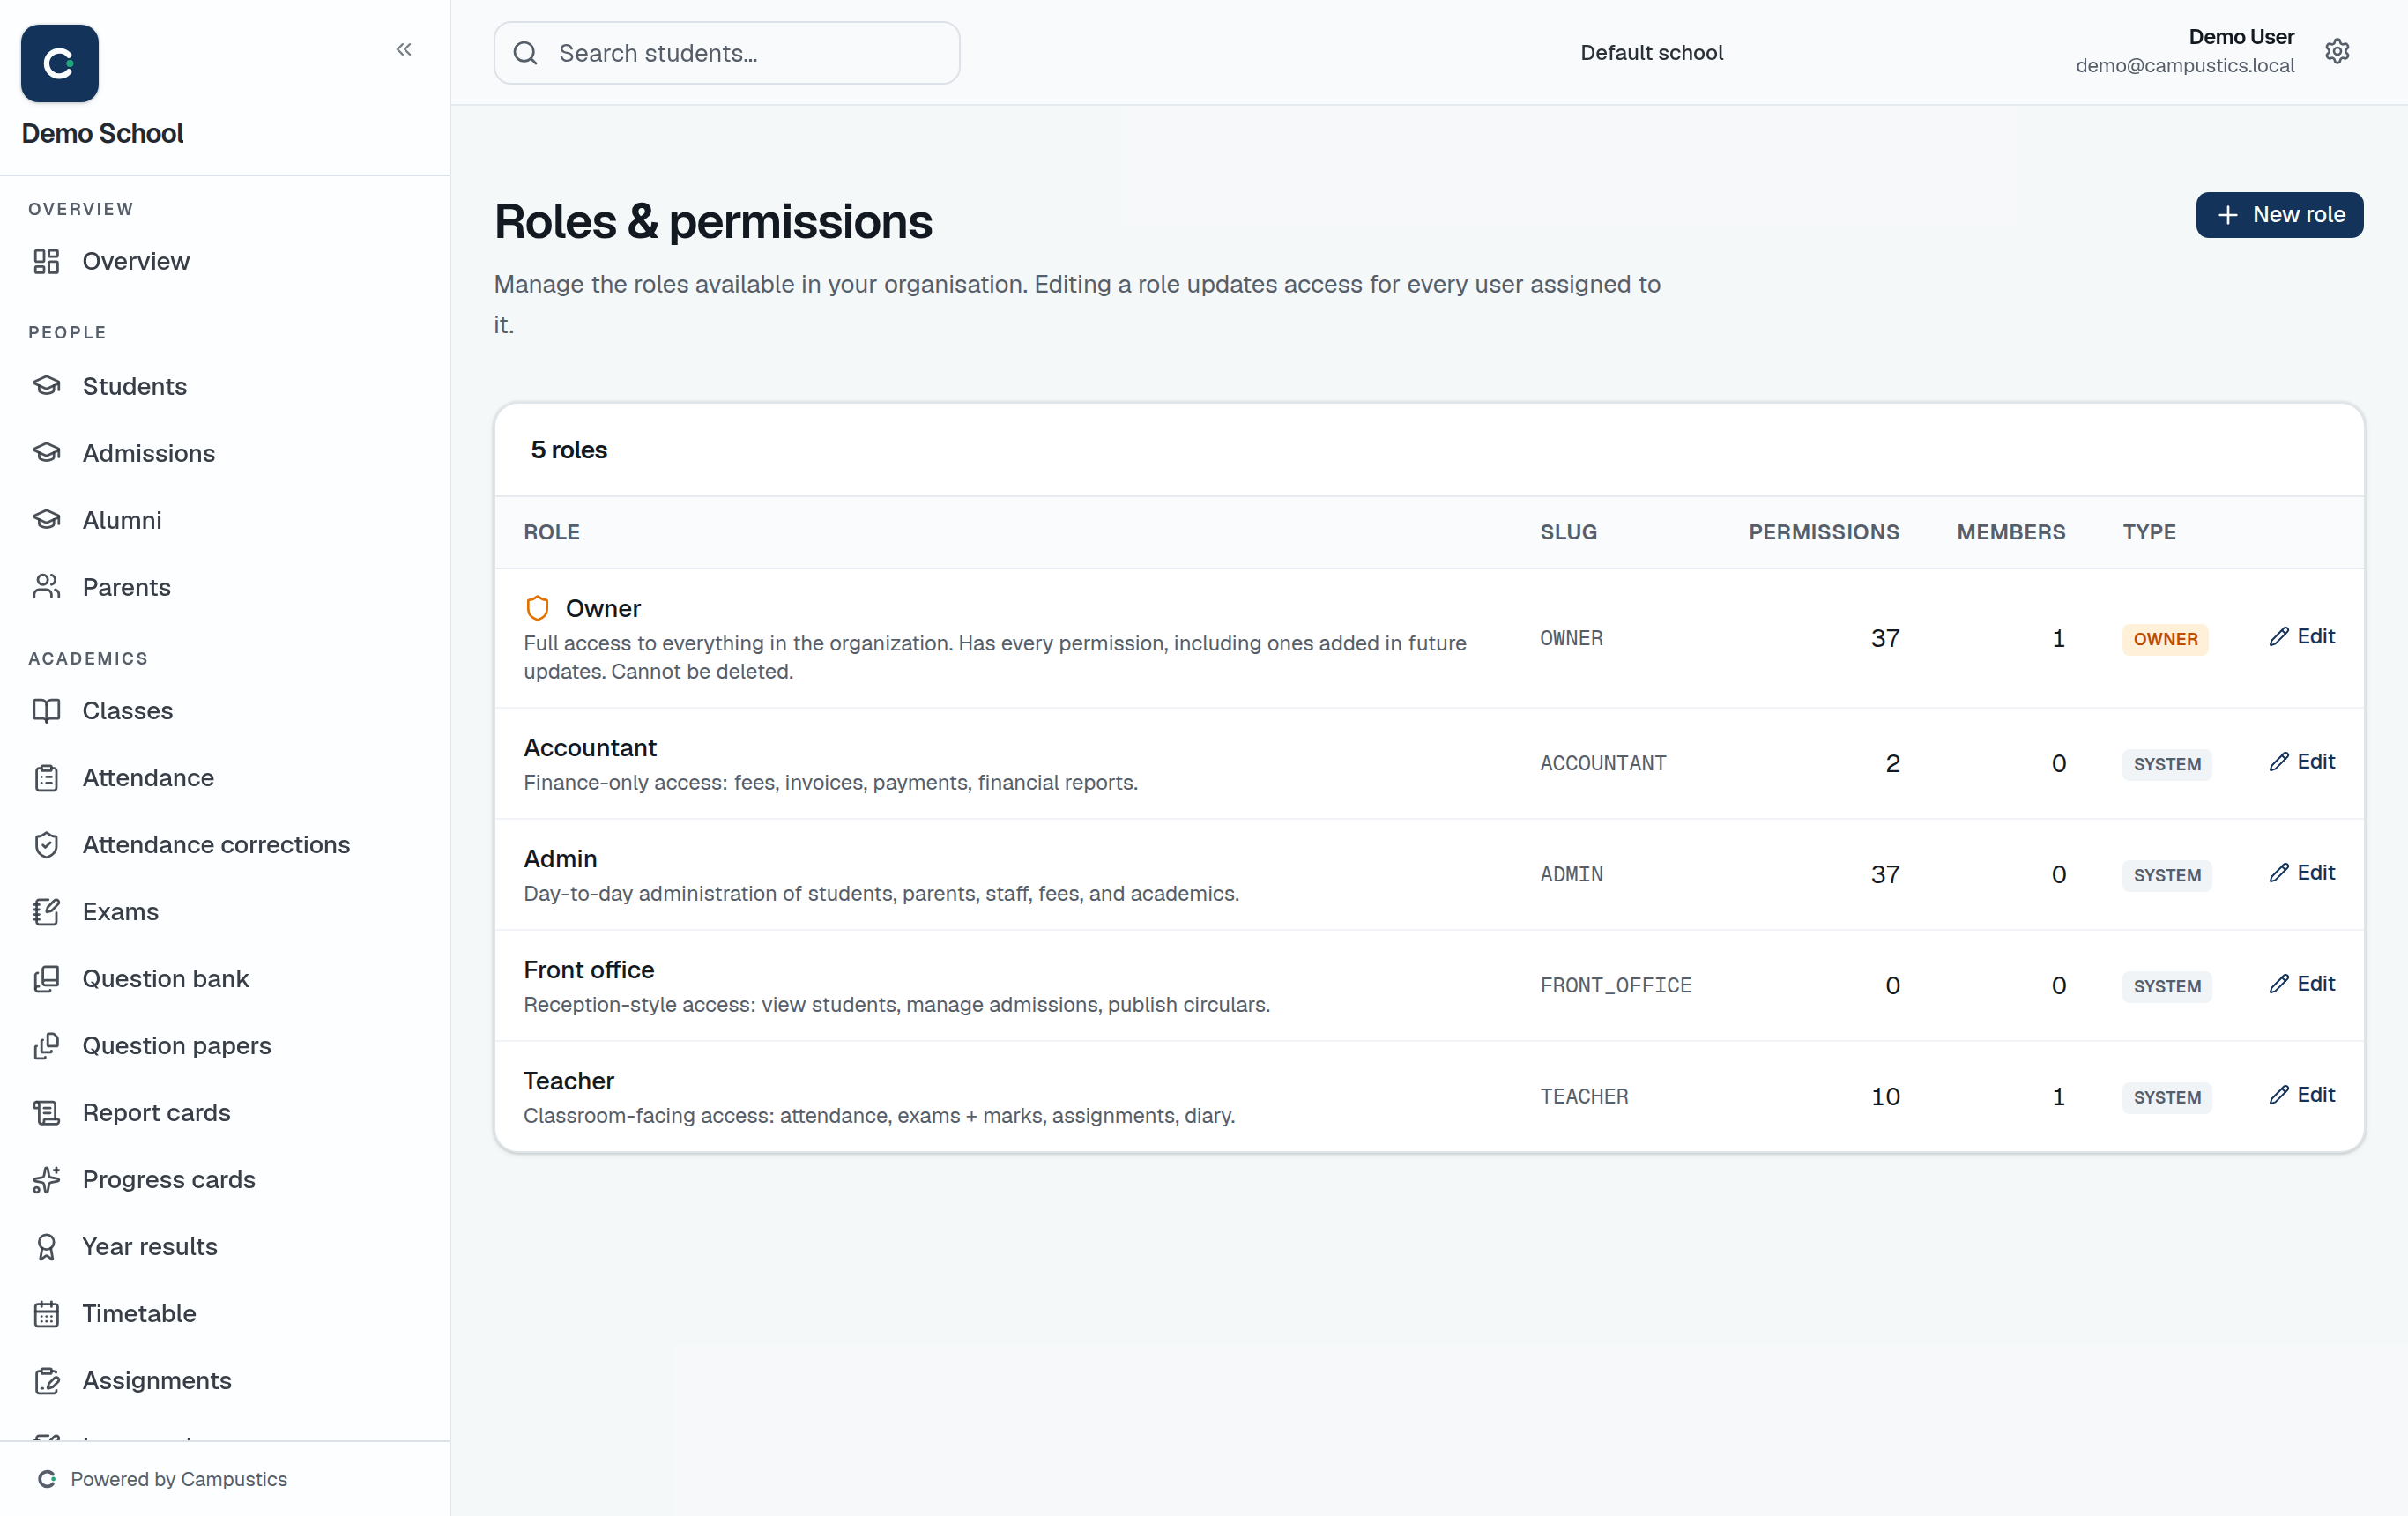
    Know the built-in roles

    Campustics ships with Owner, Admin, Teacher, Accountant, and Front office. For most schools these defaults are enough.

    Roles & permissions
  2. 2

    Create a custom role (optional)

    Go to Admin → Roles & permissions → New role. Tick the permissions per module (Students, Exams, Fees…); use 'Select all' for a full module. Save.

    Tip: Examples: a 'Vice Principal' = Admin plus report-card generation; an 'Auditor' = read-only across the school.

  3. 3

    Assign the role

    Open a staff member (or Admin → Users) and set their role. It takes effect on their next sign-in.

Students & admissions

Admit and enrol a student

Admin · 3 min

Accept an application (or add a student directly) to create the student, enrolment, and parent in one step.

  1. 1

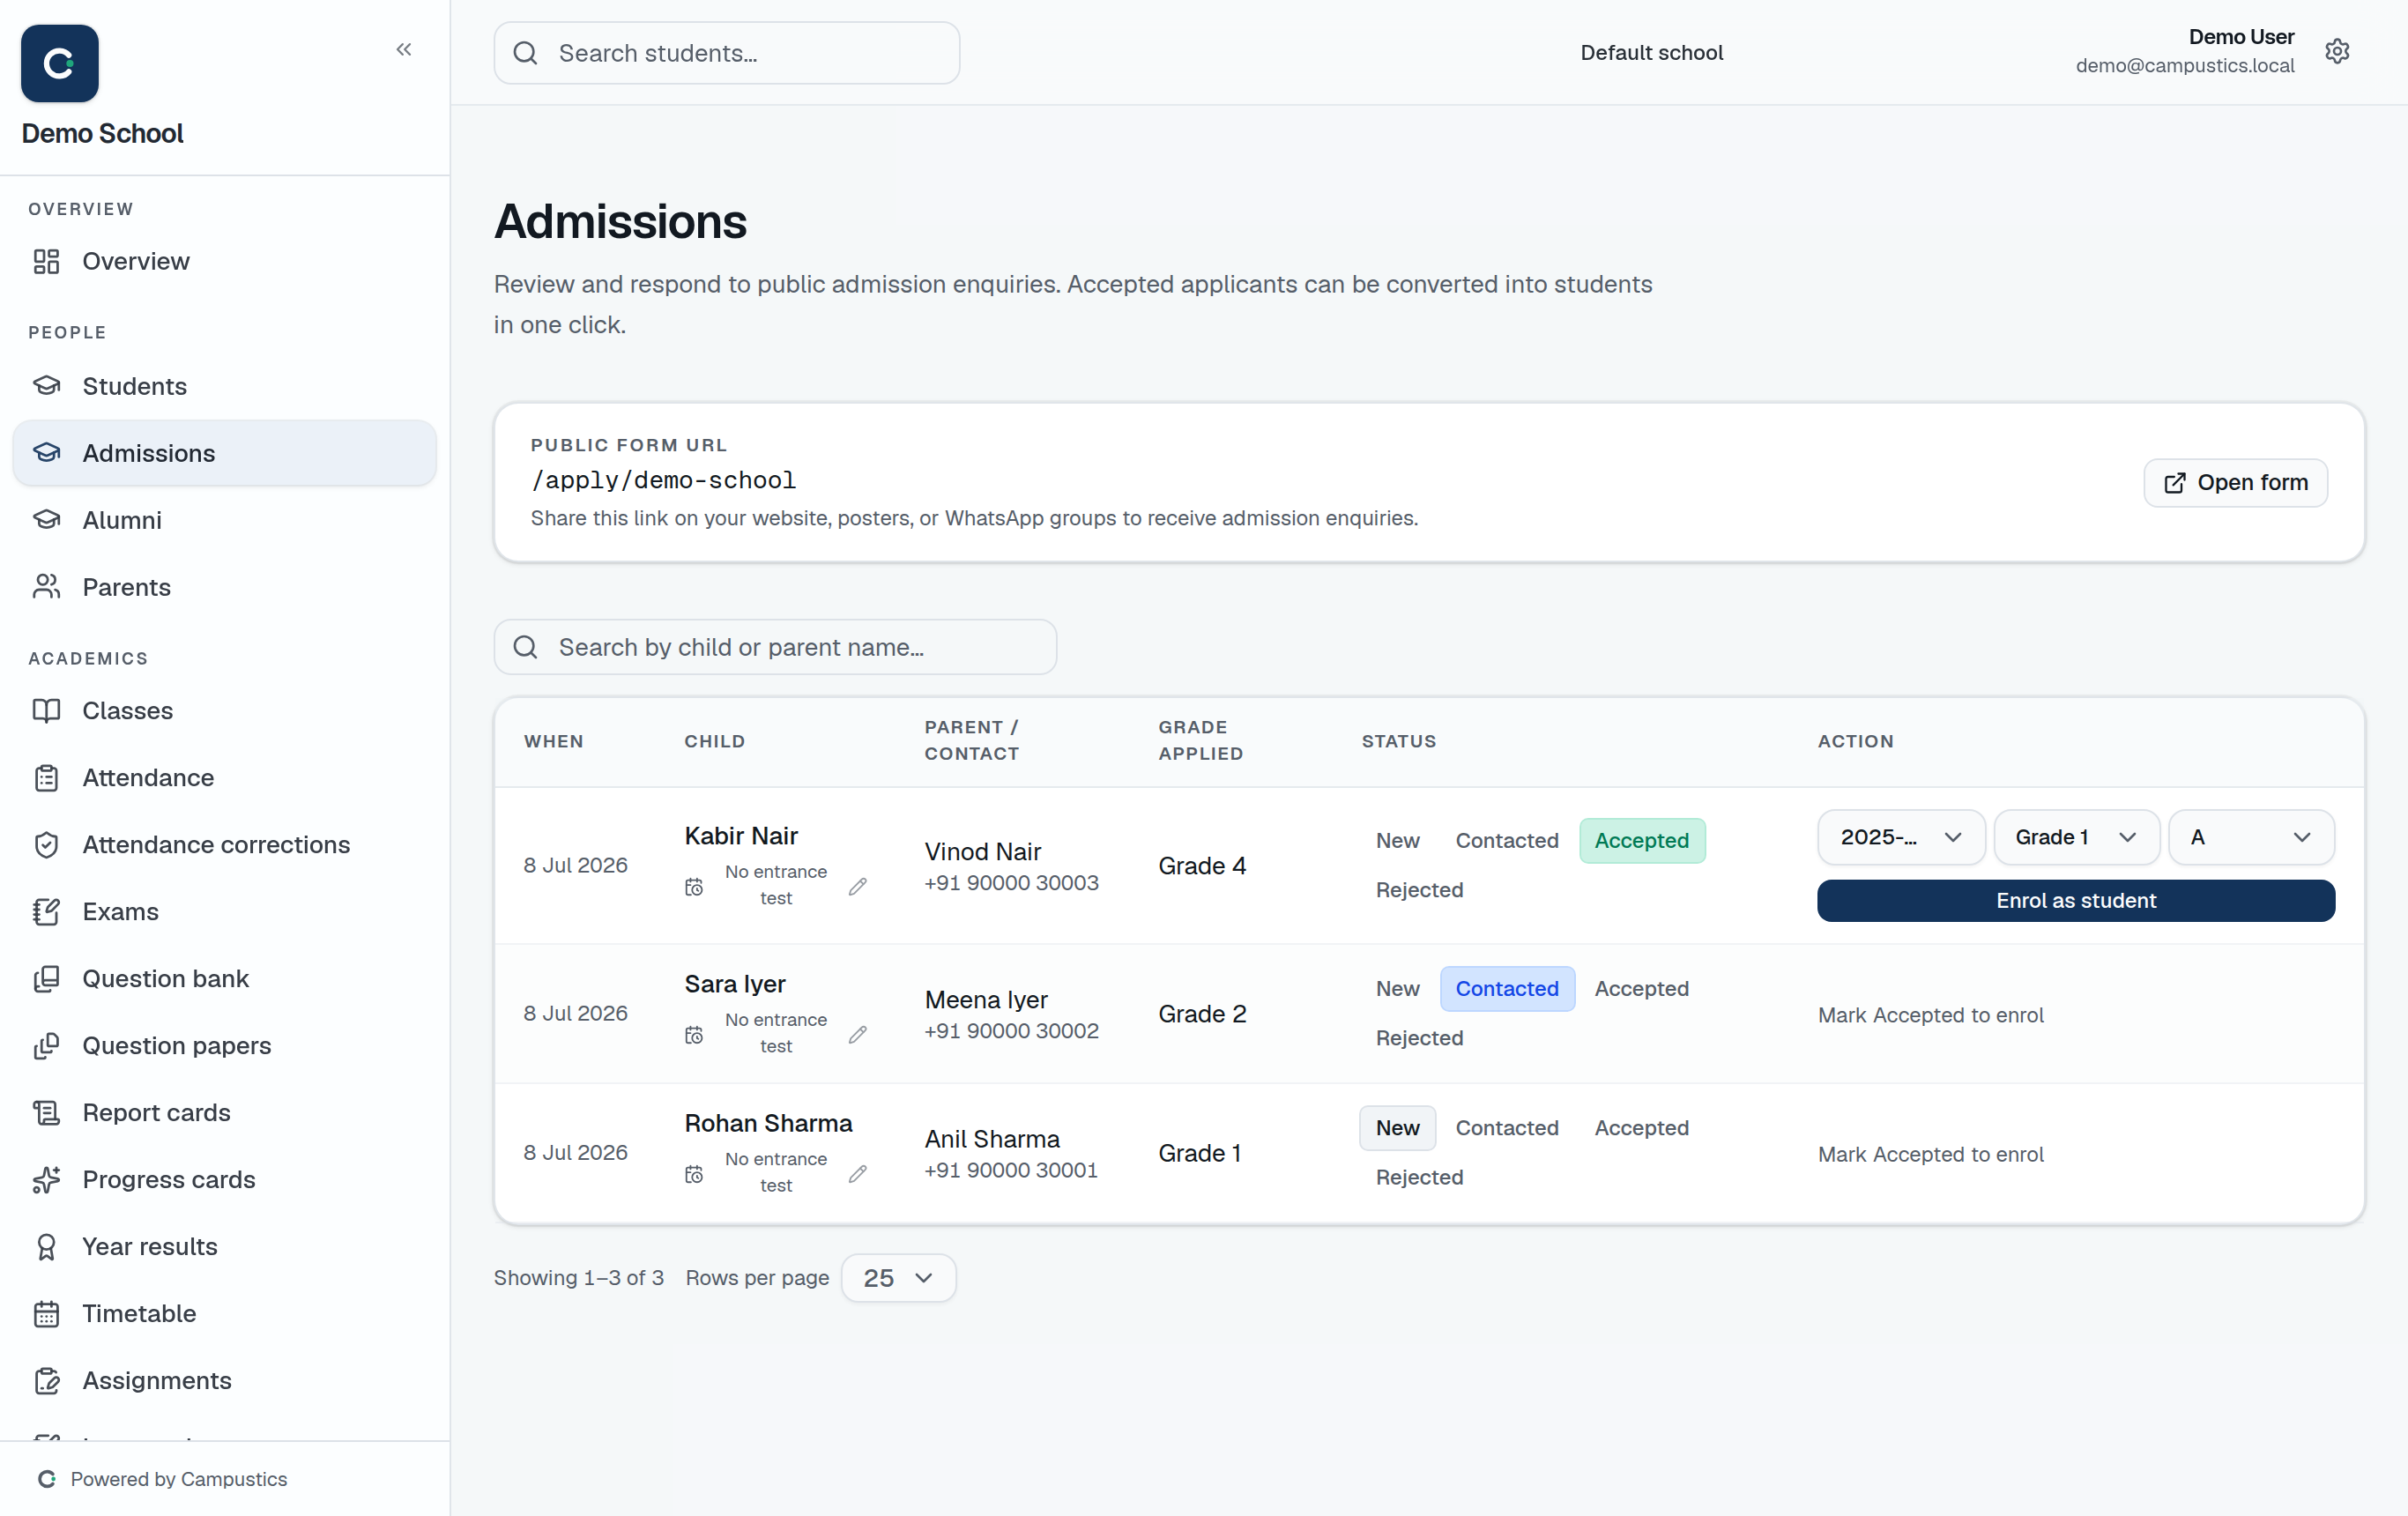
    Open Admissions

    Go to Admissions from the sidebar. Applications submitted through your public form appear here.

    The Admissions list
  2. 2

    Open an application and Accept

    Click an application to review it, then press Accept. This creates the Student, Enrollment, and Parent records together.

    Tip: No application? Use Students → Add student to enter one directly, or Students → Import for a CSV of many at once.

  3. 3

    Add a photo

    Open the new student's profile and upload a photo. It's auto-resized, so any phone picture works.

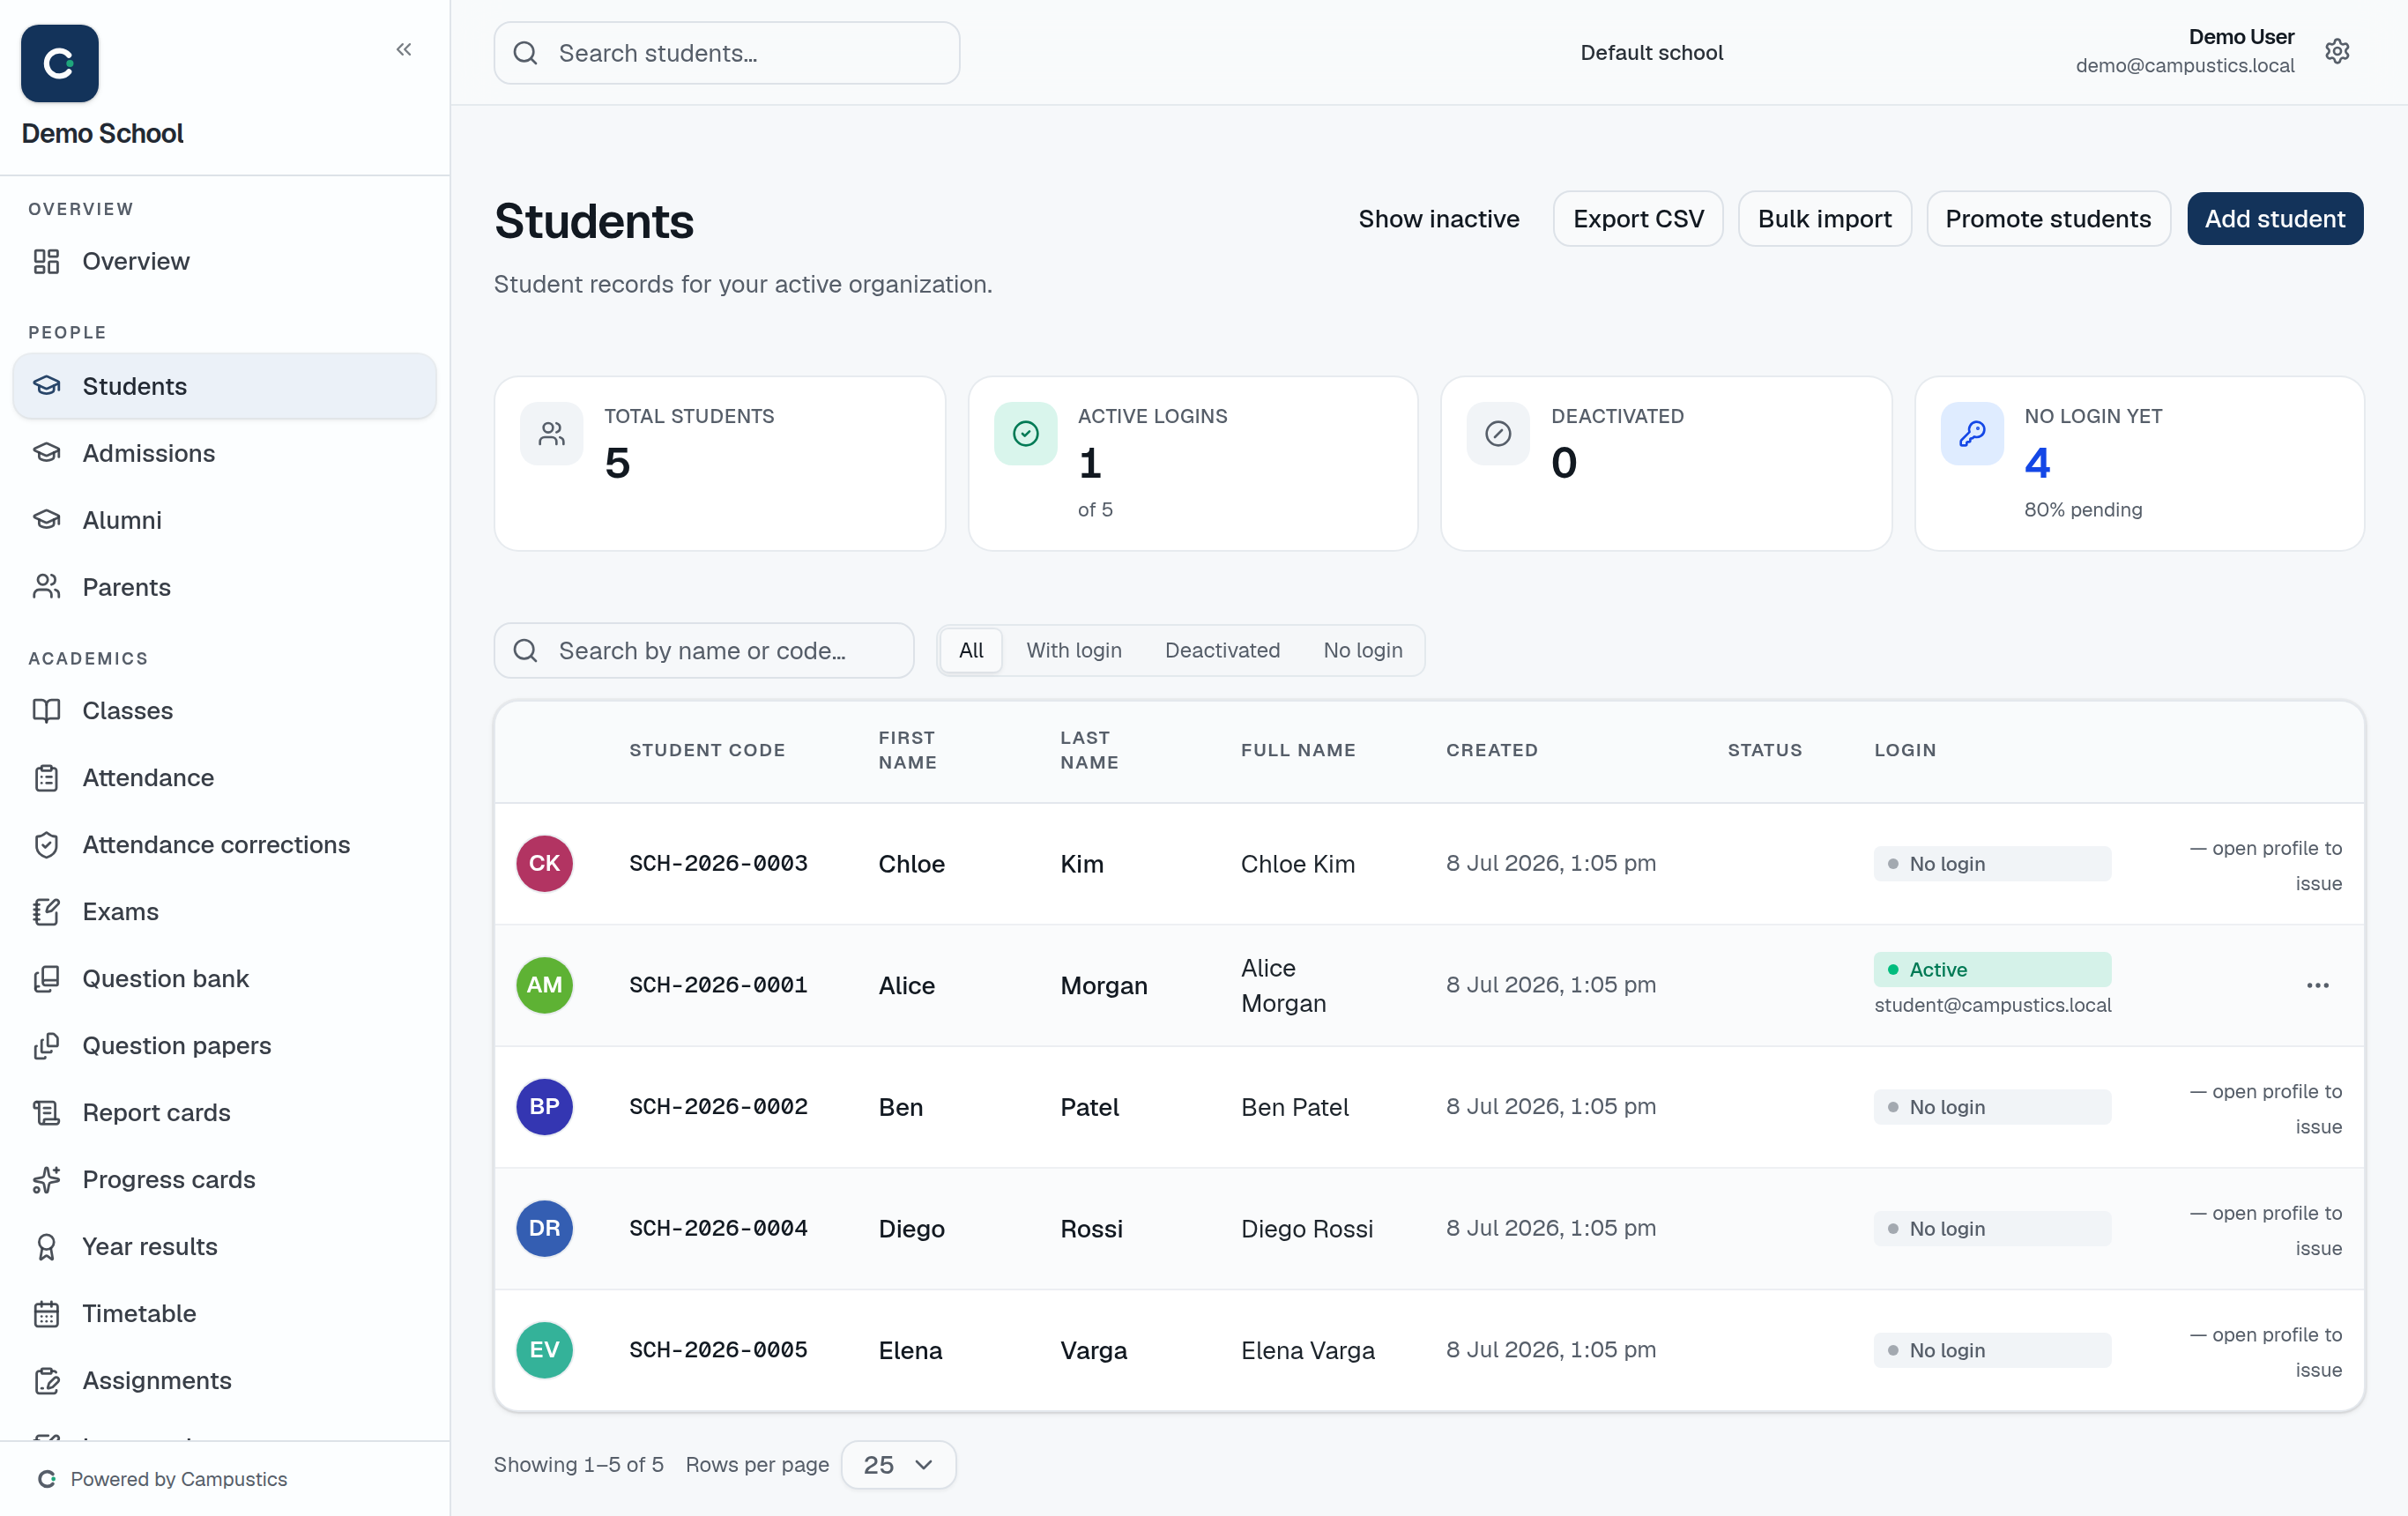
    The Students list

Give a parent portal access

Admin · 2 min

Create a parent login so families can see attendance, marks, fees, and circulars.

  1. 1

    Open the student's profile

    From Students, open the child's profile and find the Parents / guardians section.

    The Students list
  2. 2

    Add or link the parent

    Add the parent's details (or link an existing parent). Use Create login to generate their portal credentials.

  3. 3

    Share the login

    The parent signs in at the same school URL and lands on the parent portal for their child.

    Tip: One parent account can be linked to several children — siblings show up under a single login.

Add or import students

Admin · 3 min

Enter one student, bulk-import a CSV, or collect them via your public admission form.

  1. 1

    Add one, or import many

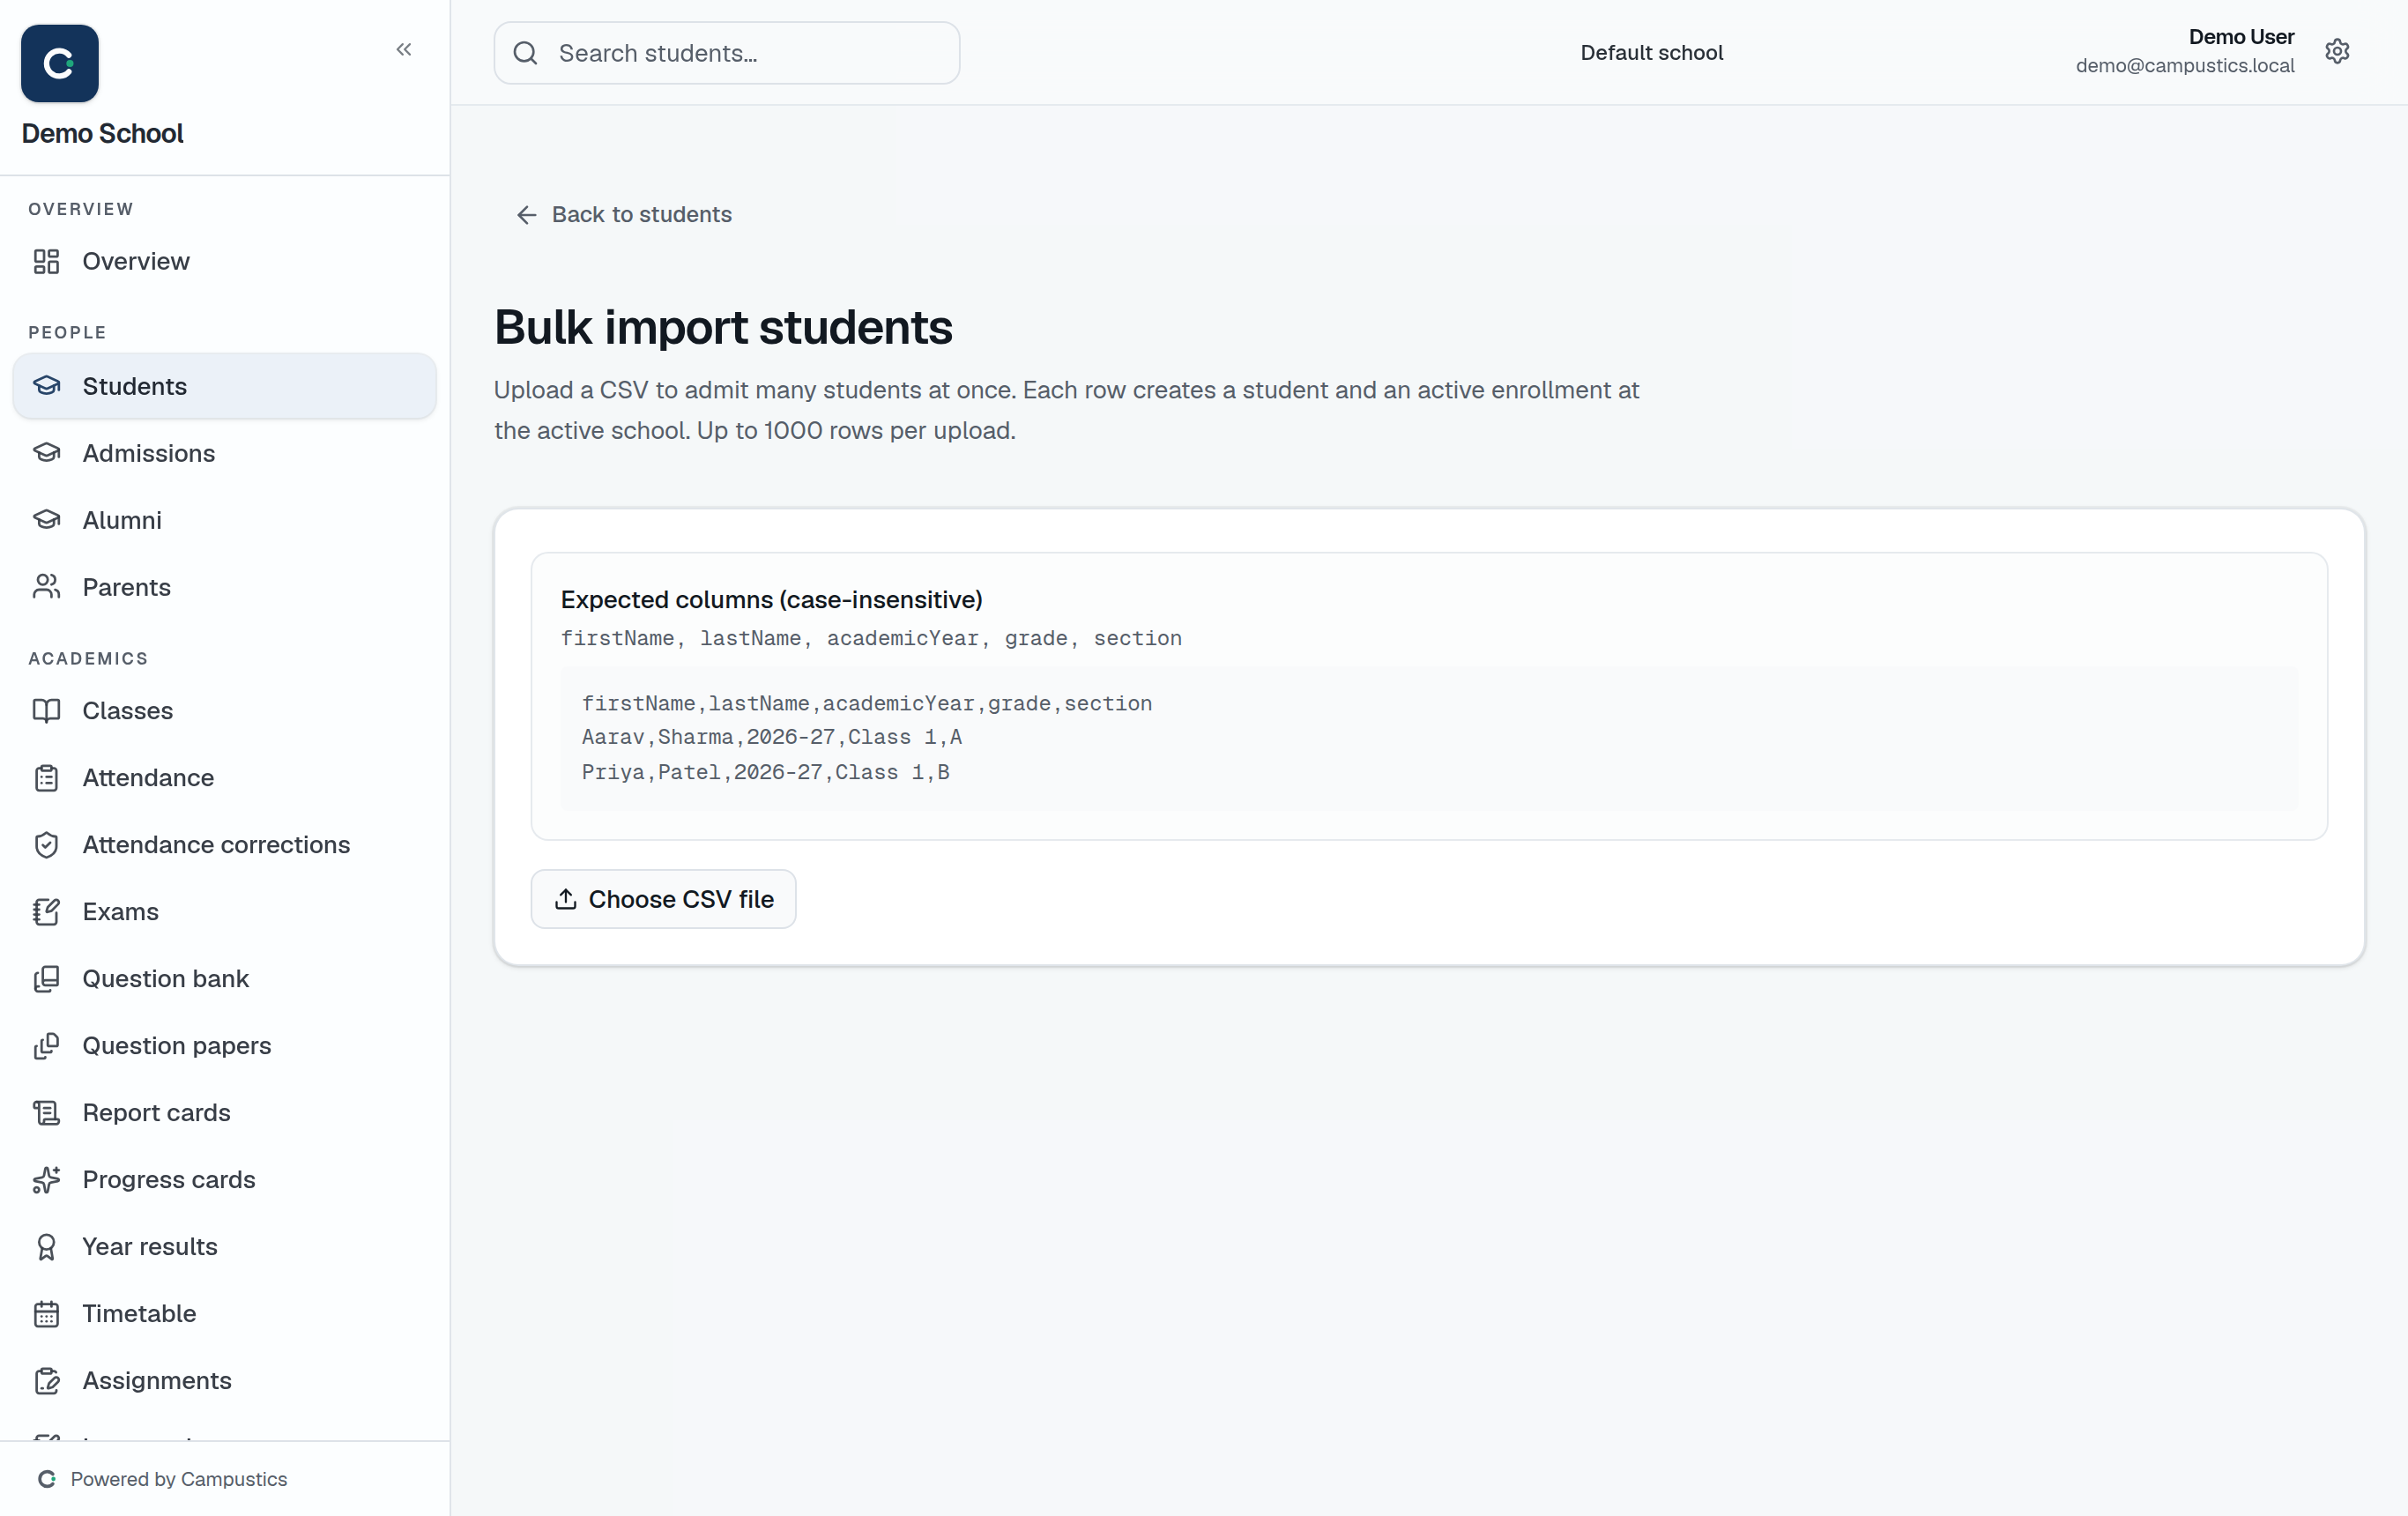
    Use Students → Add student for a single entry, or Students → Import to upload a CSV of many at once.

    Import students (CSV)
  2. 2

    Or open the public form

    Share your public link (yourhost/apply/your-school) with parents — their submissions land in Admissions for you to accept.

    Tip: Bulk import is fastest at the start of the year; the public form is best for ongoing enquiries.

  3. 3

    Add photos later

    Open any student's profile to upload a photo — it's auto-resized, so a phone picture is fine.

Promote students to the next year

Admin · 3 min

Move a whole class up a grade at year-end in one action.

  1. 1

    Open Promote

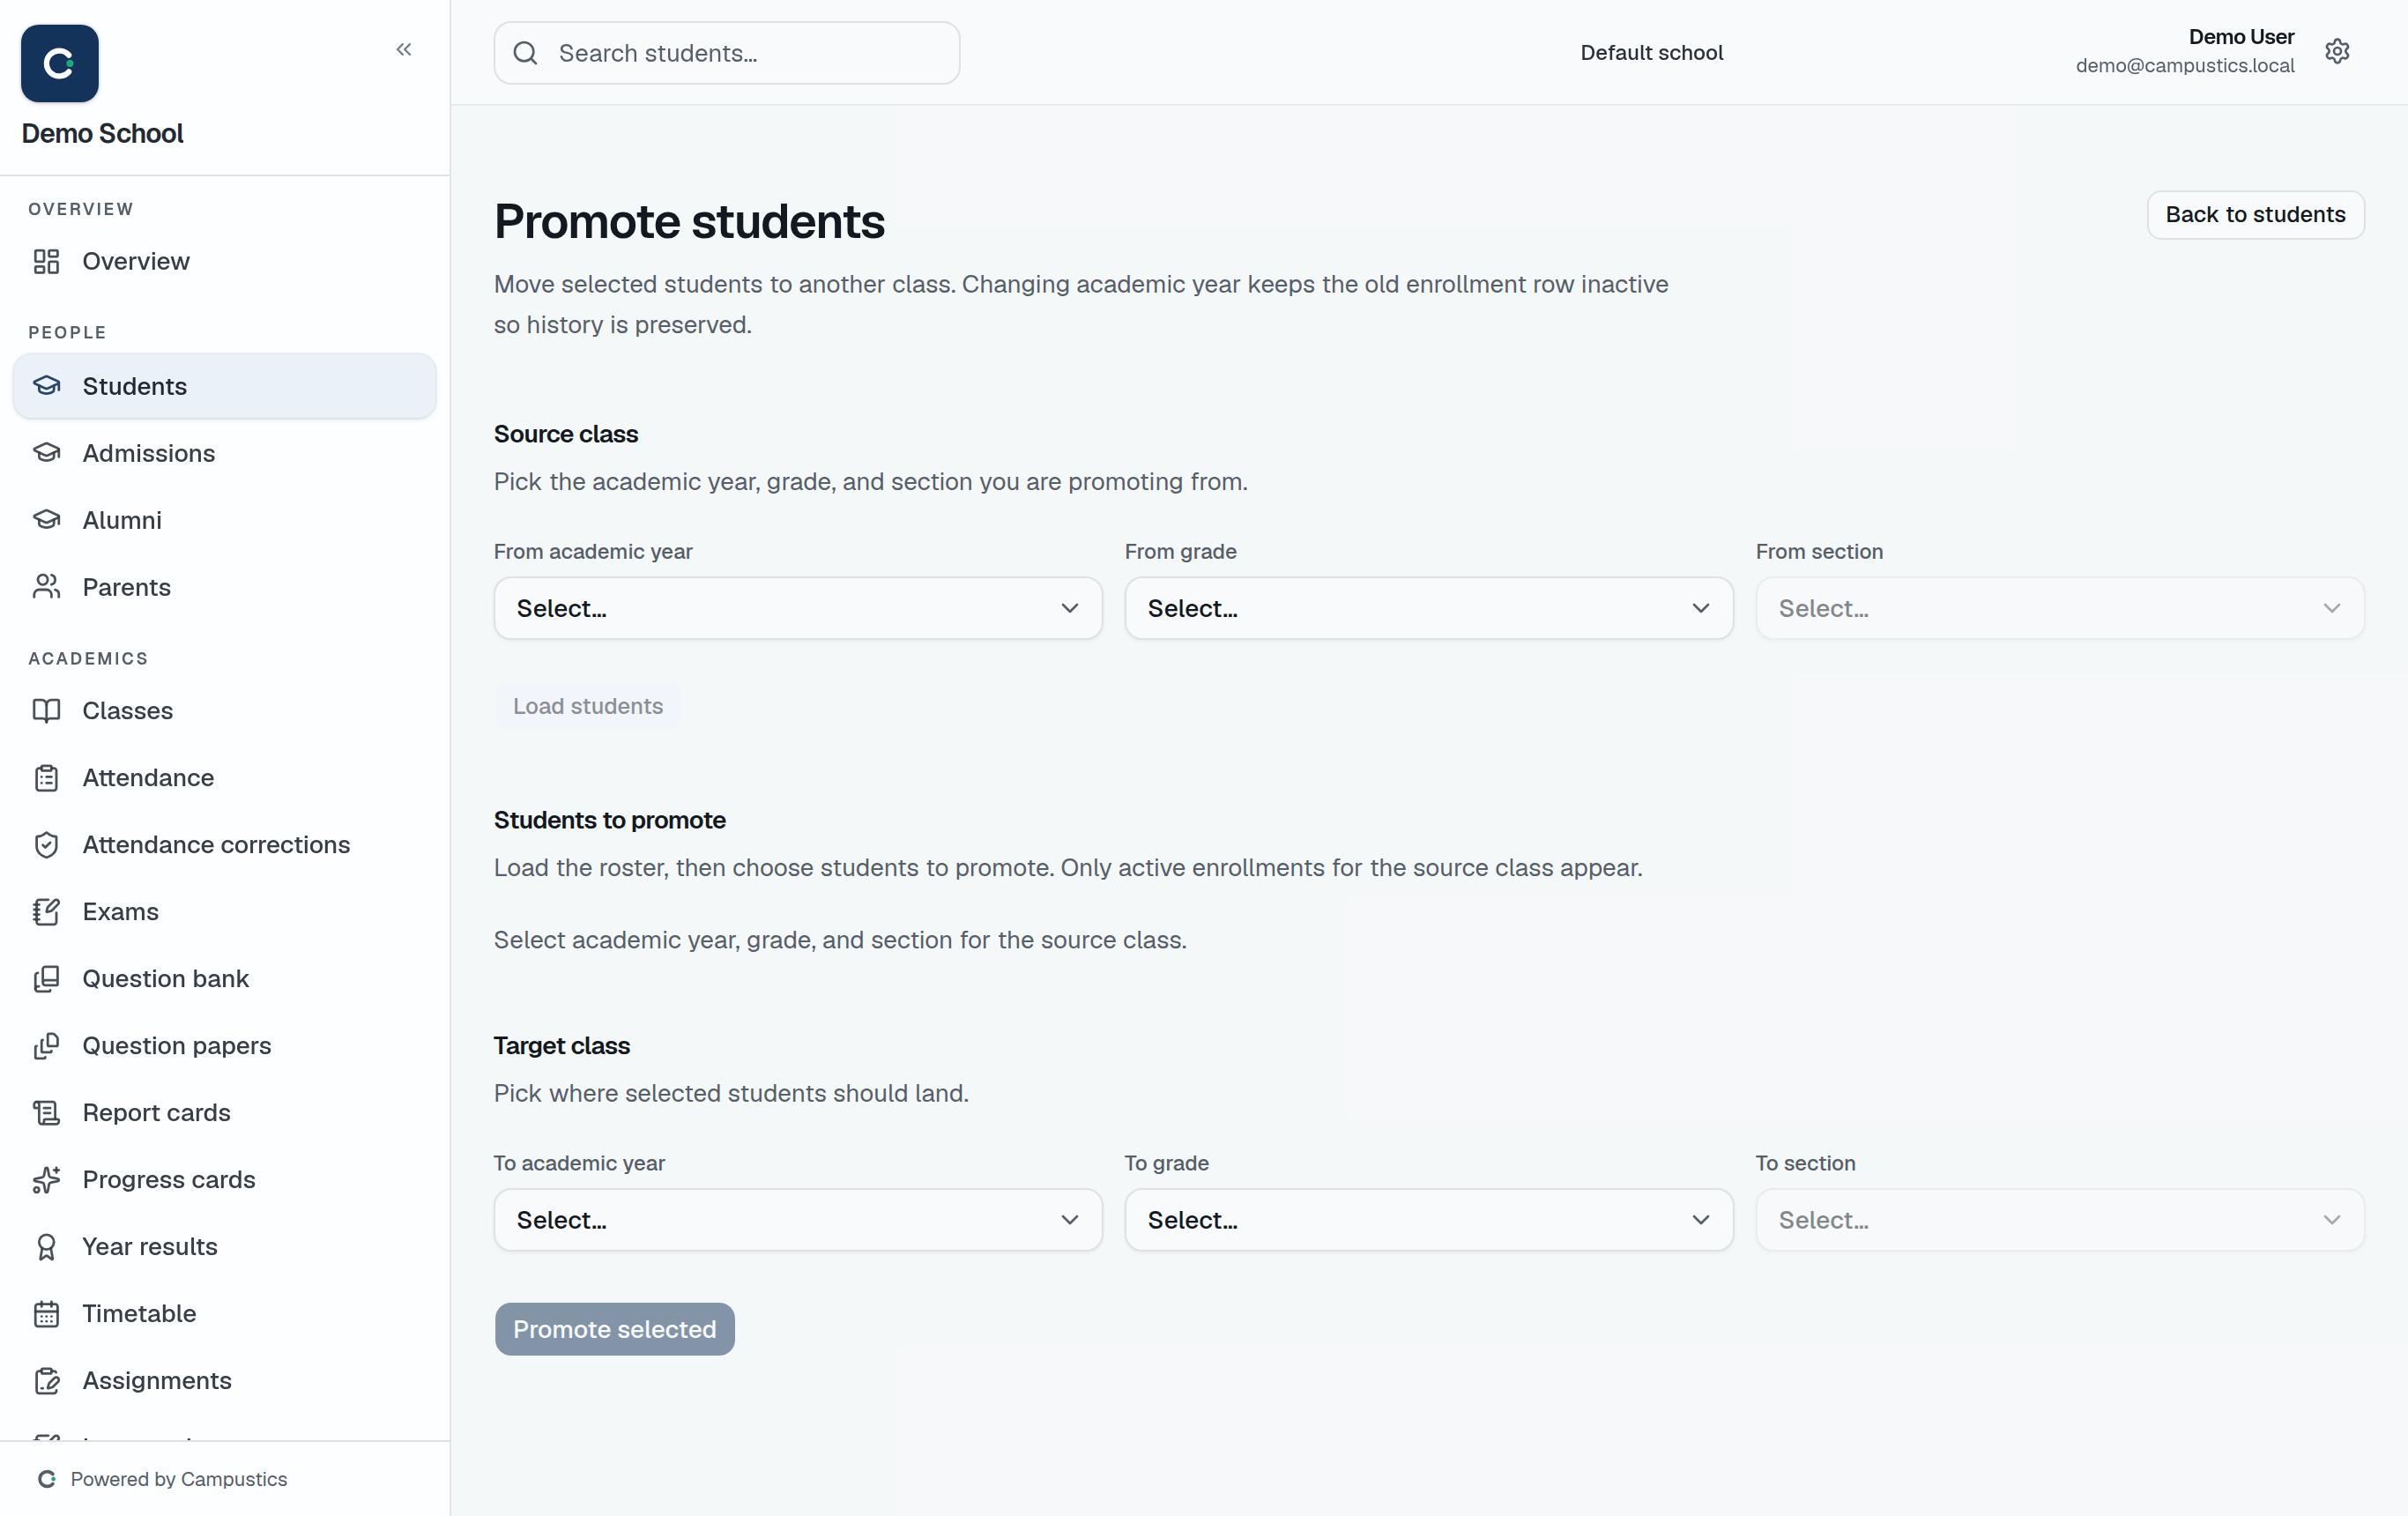
    Go to Students → Promote. Pick the academic year, grade, and section to load the class.

    Promote students
  2. 2

    Choose the target and confirm

    Pick the next grade/section for the class and confirm. New enrolments are created for the new year; passed students move up.

    Tip: Run this AFTER you've published year results, so PASS/FAIL is settled before students move up. Use Transfer on a profile to move a single student instead.

Publish yearly results (PASS / FAIL)

Admin · 3 min

Roll up each student's final-exam total into a PASS or FAIL for the year.

  1. 1

    Load the class

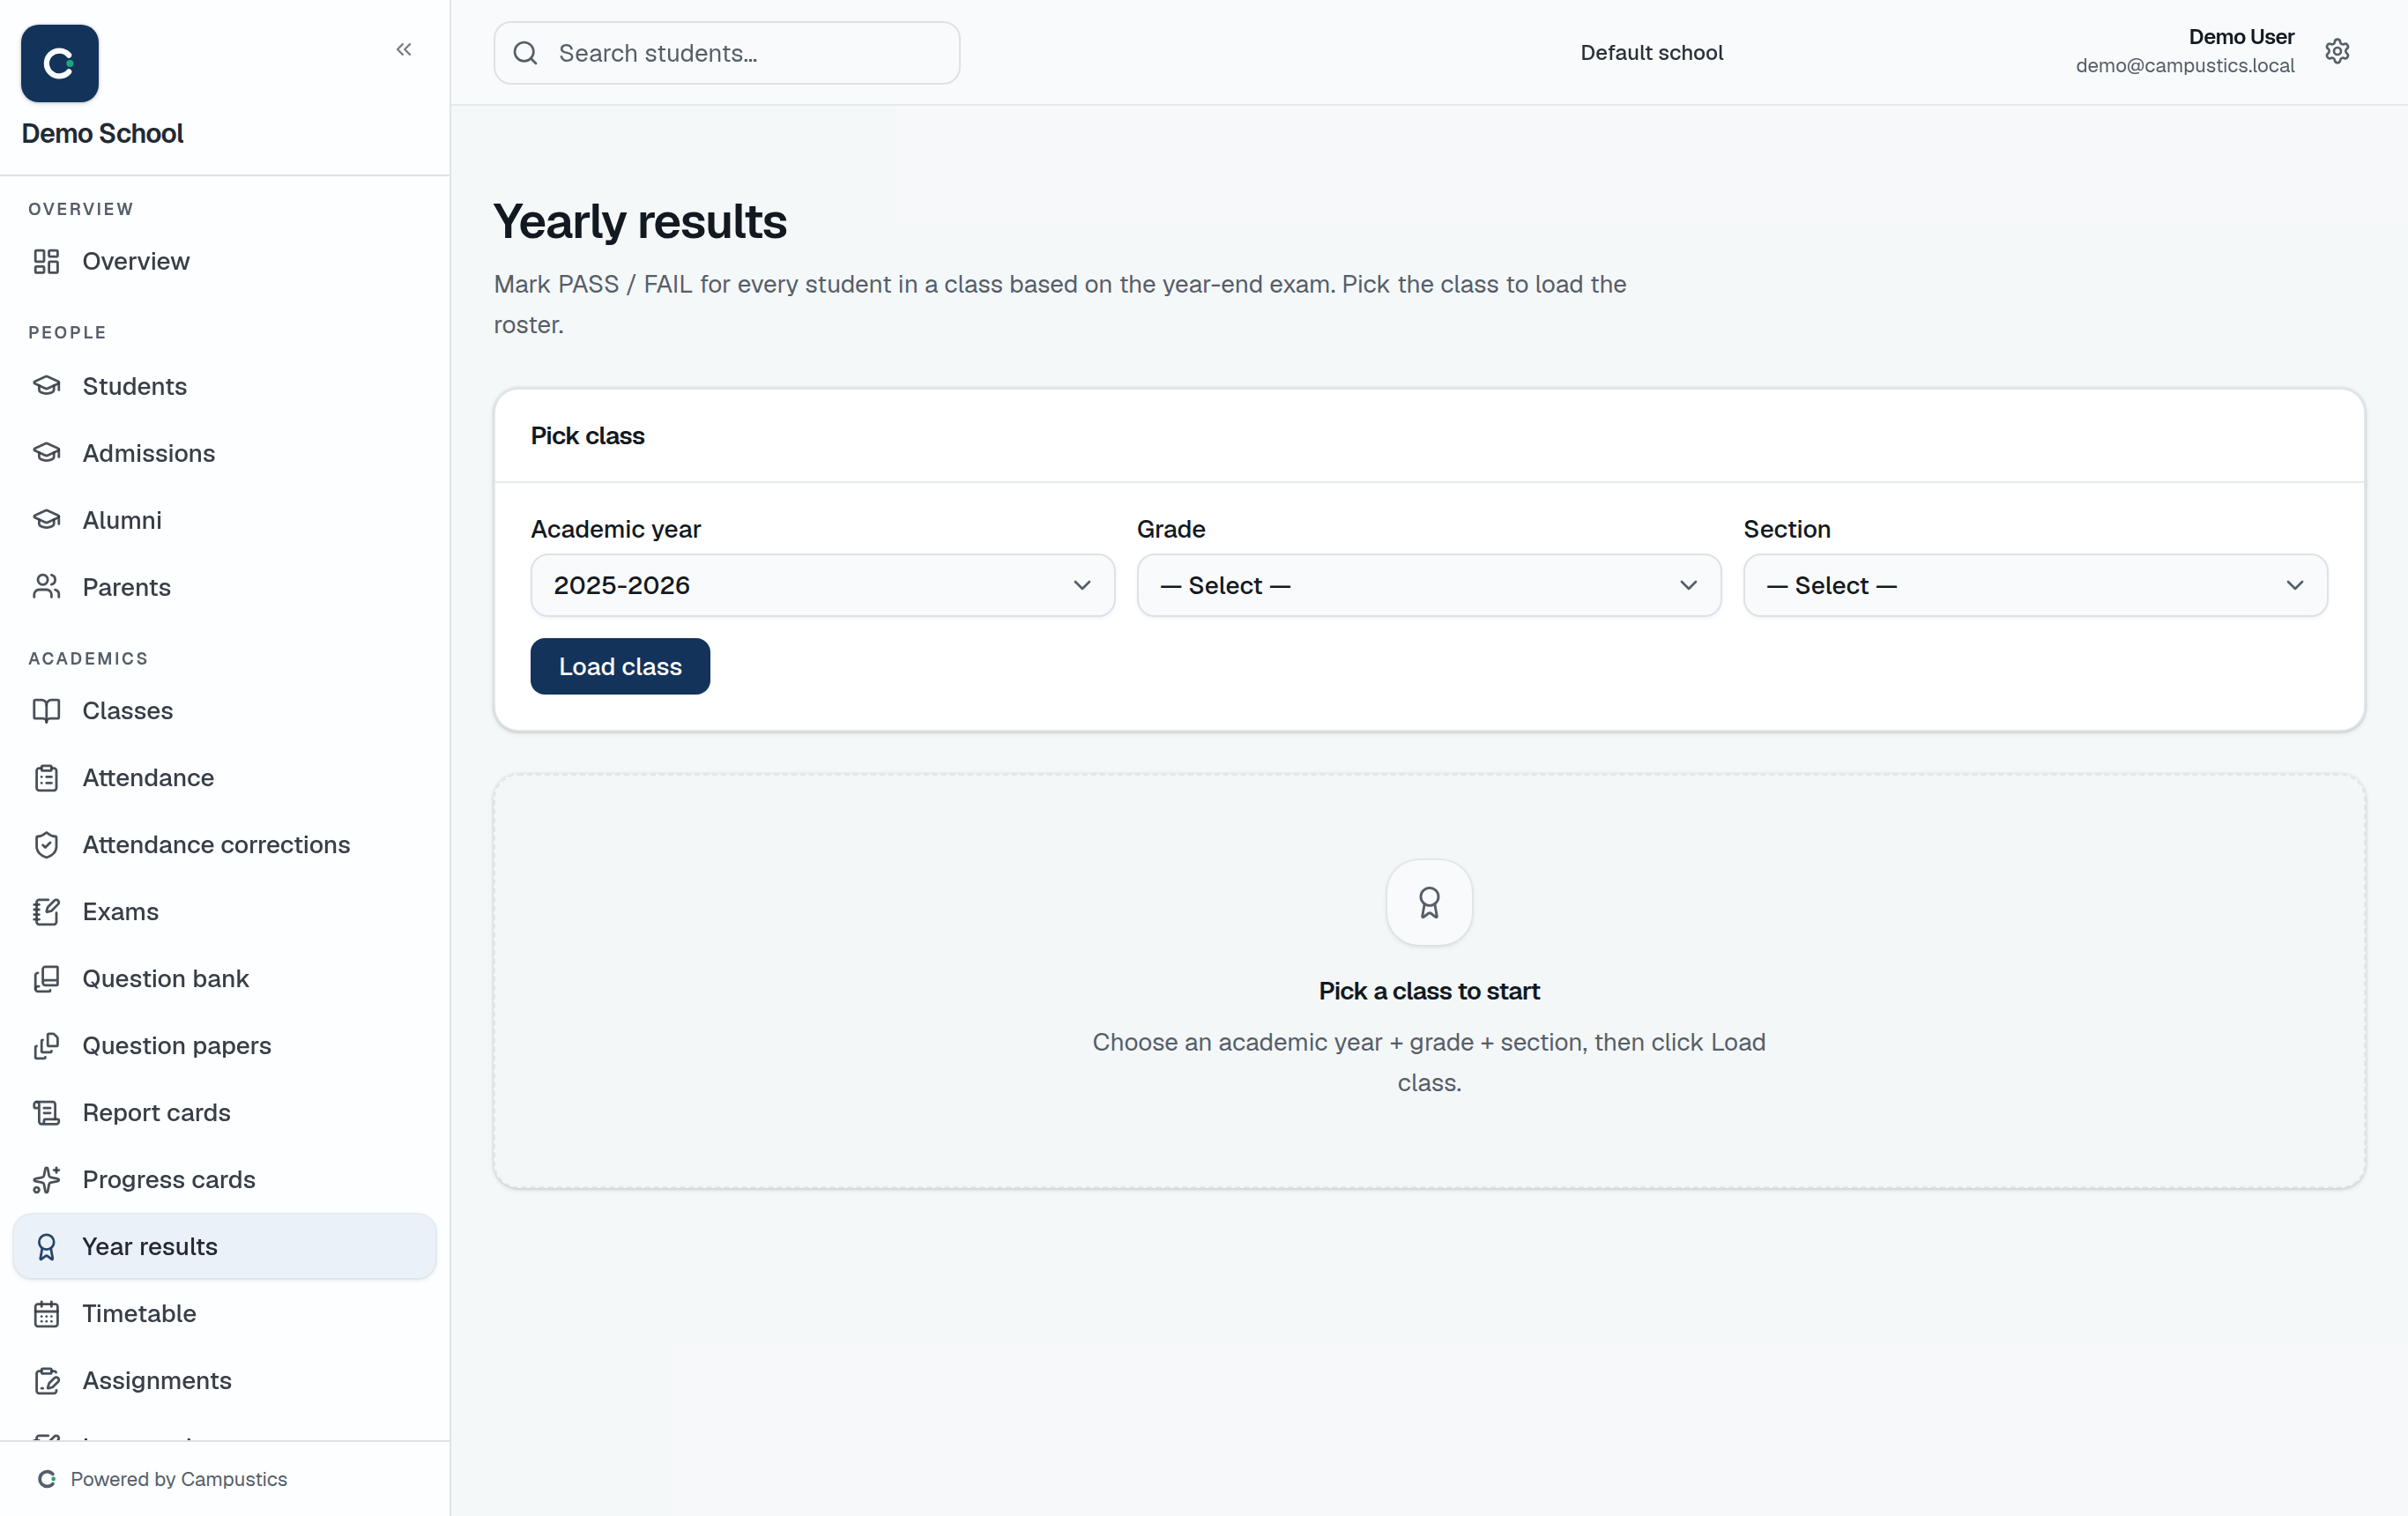
    Go to Year results, pick the academic year + grade + section, and click Load class. The roster appears with each student's total and percentage from the FINAL exam.

    Year results
  2. 2

    Auto-fill and adjust

    Click Auto-fill from marks — every row gets PASS or FAIL by the pass threshold. Adjust individual rows and add remarks as needed.

  3. 3

    Save

    Click Save year results to write the result for the class.

    Tip: Do this before promoting students, so the roll-up decides who moves up.

Attendance, exams & report cards

Record daily attendance

Teacher · 2 min

Mark a class present or absent for the day — absent parents are alerted by SMS.

  1. 1

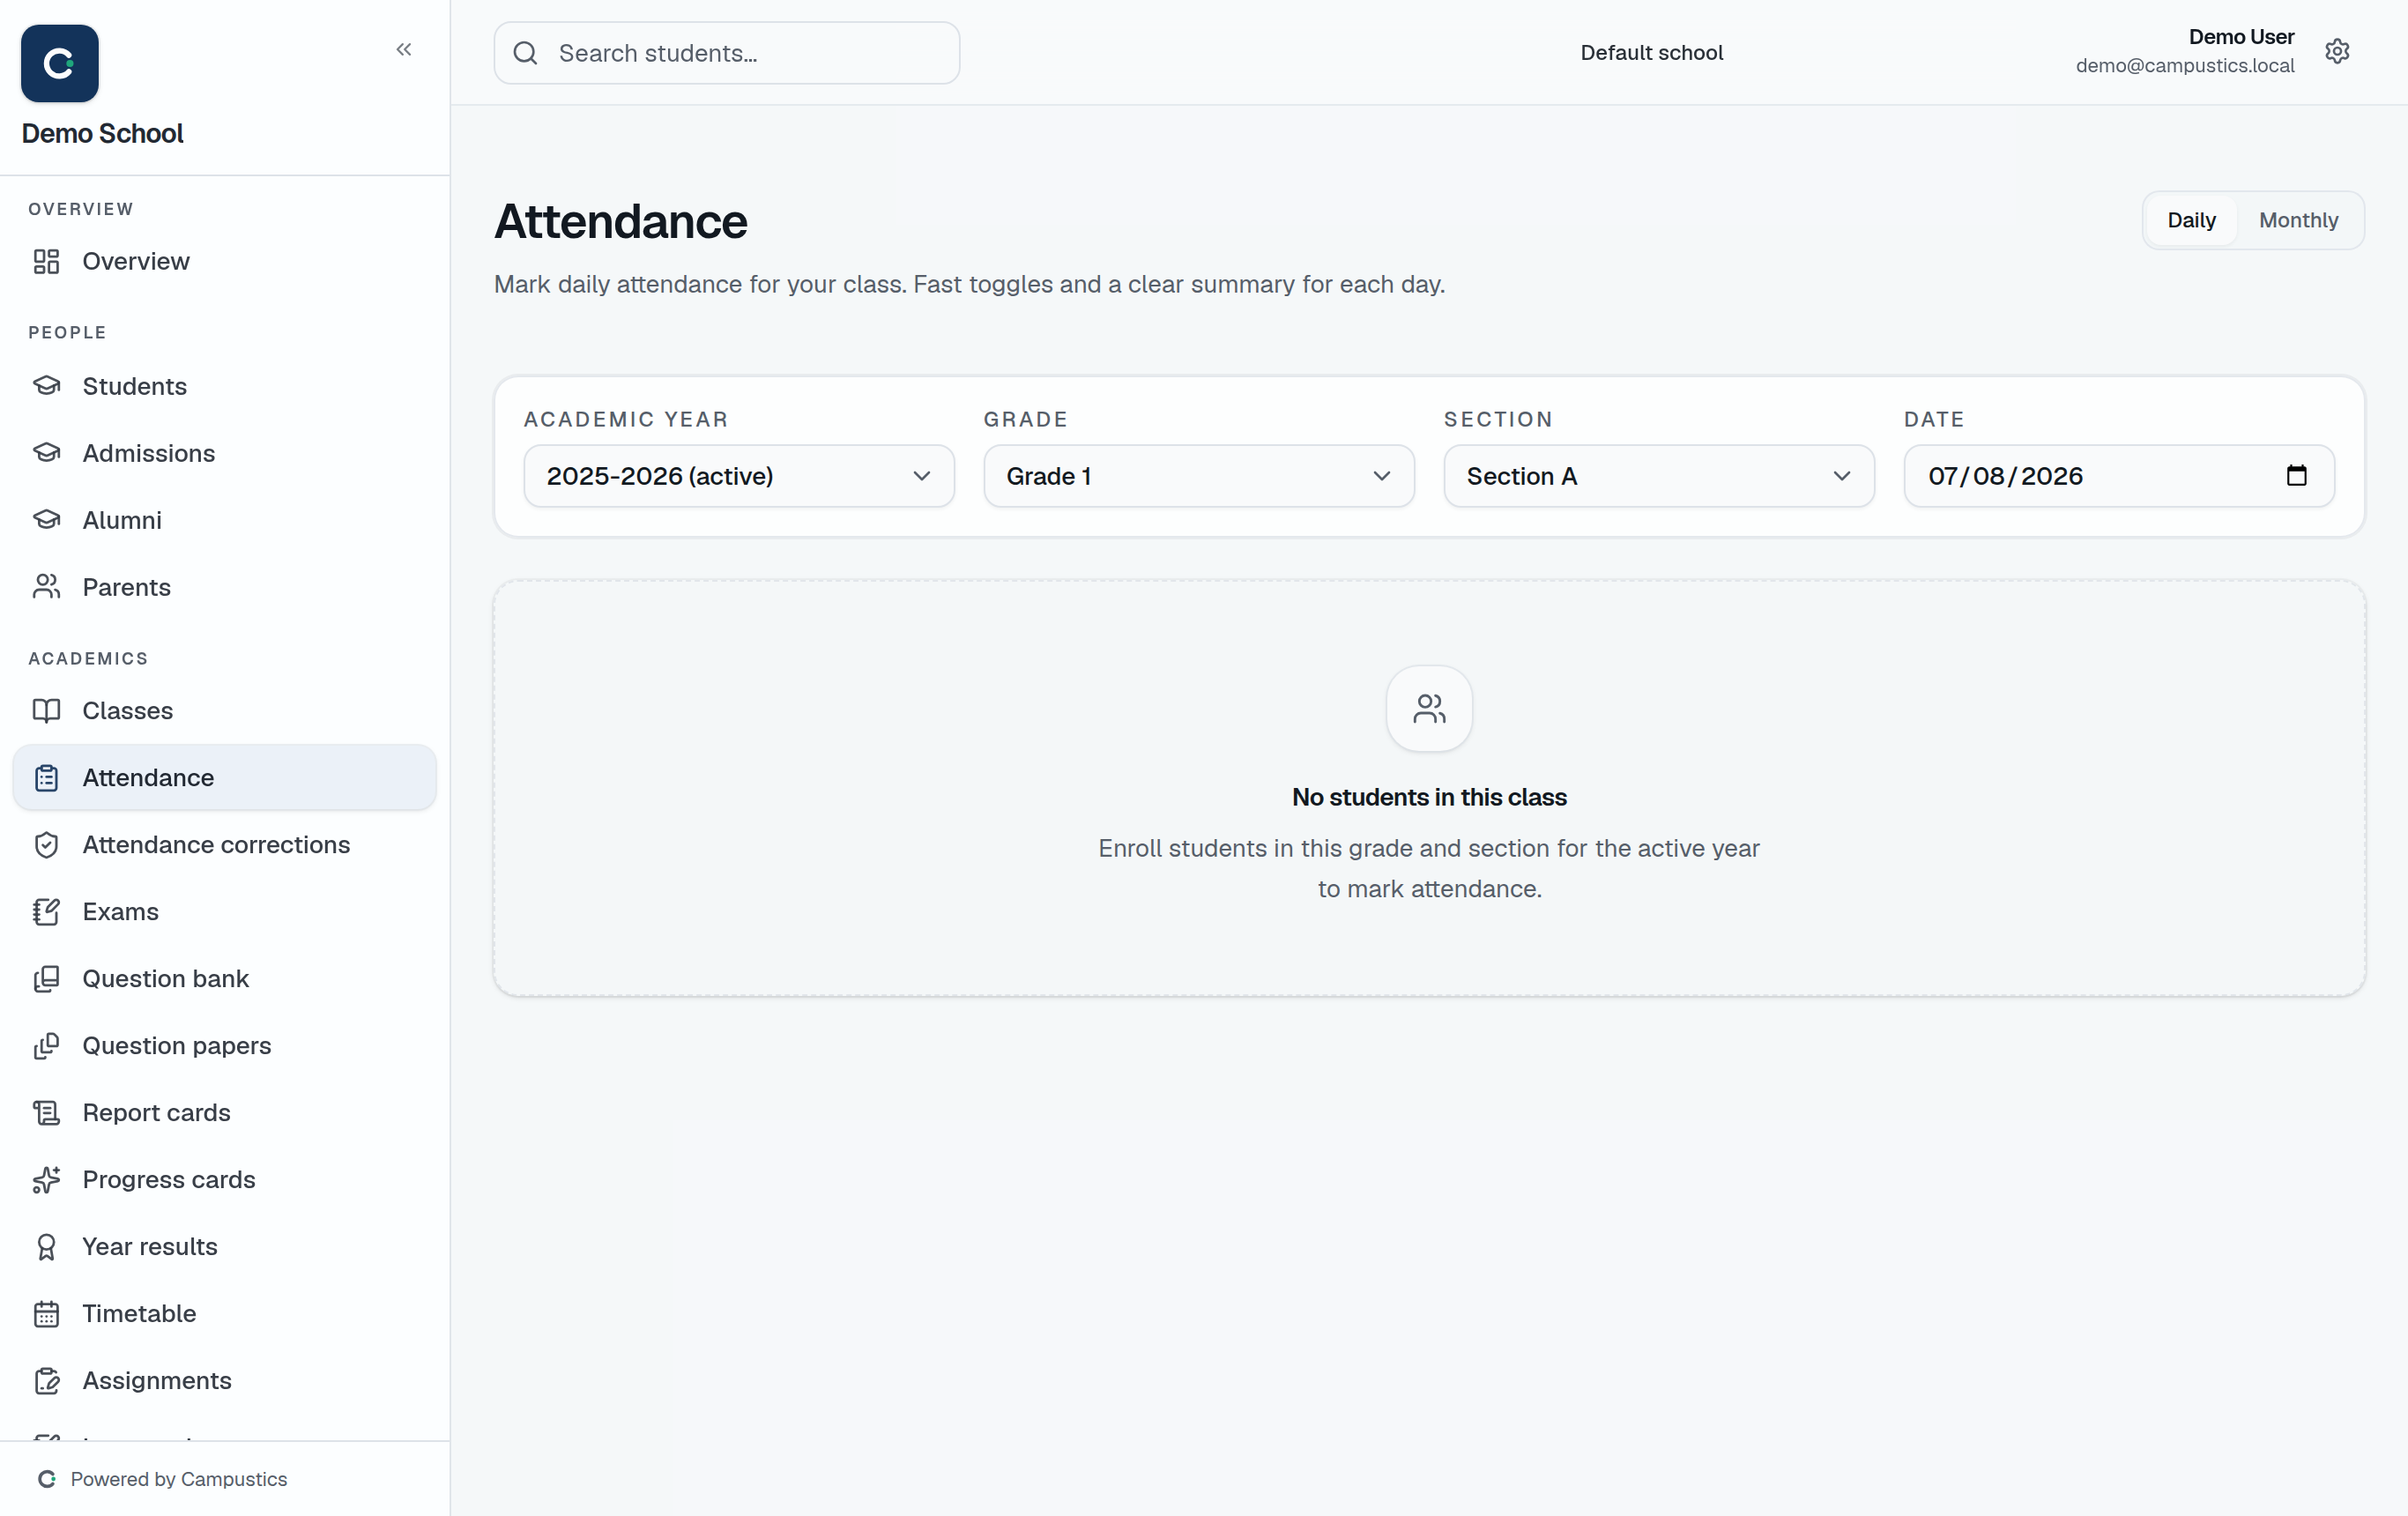
    Open Attendance

    Go to Attendance and pick the year, grade, section, and date. The date defaults to today.

    The Attendance page

    Tip: Class teachers only see their own sections in the pickers; admins see every class.

  2. 2

    Mark the class

    Tap a name to mark that student absent. For a routine day, use 'All present' and then flag the few who are out.

  3. 3

    Save

    Press Save. An SMS goes to the parents of absent students (once SMS is switched on for your school).

    Tip: To edit a past day, a class teacher submits a correction request that an admin approves under Attendance → Corrections. Admins can edit past days directly.

Enter marks and publish report cards

Teacher · 10 min

Create an exam, enter marks, generate report cards, and publish them to parents.

  1. 1

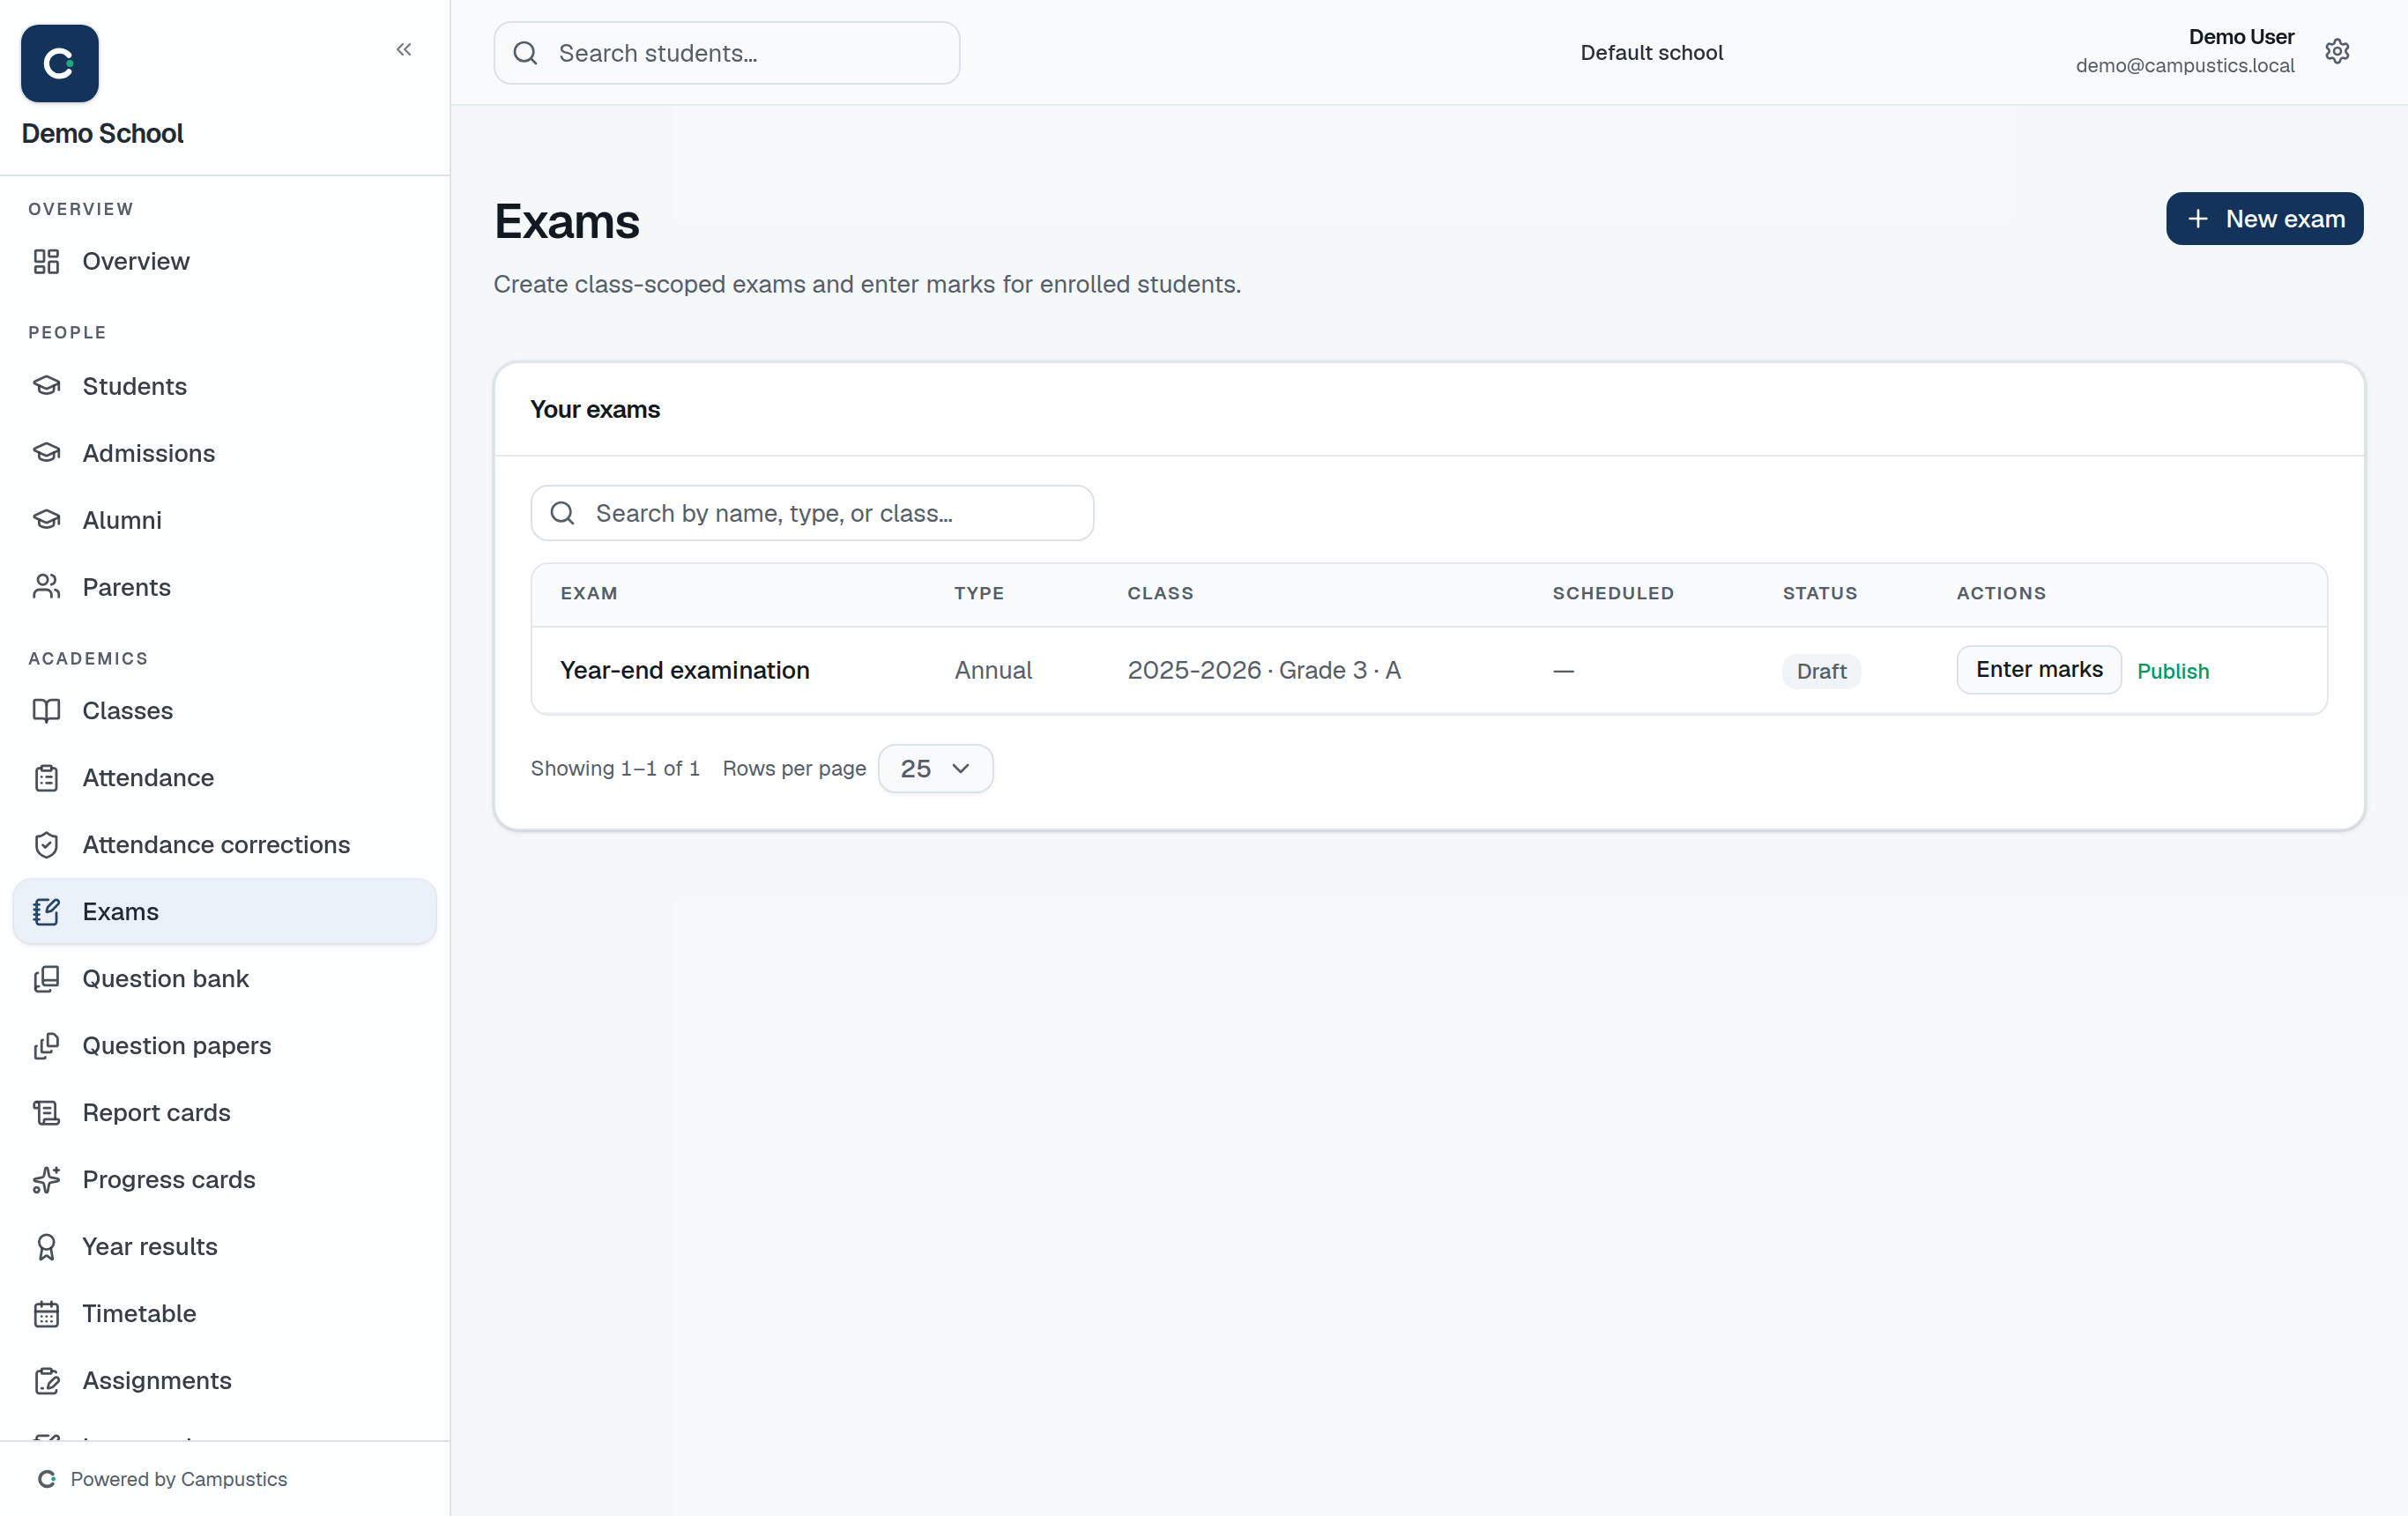
    Create the exam

    Go to Exams → New exam, pick the class, exam type, and date, then click 'Load grade subjects' to auto-fill the subject papers with max and pass marks.

    The Exams page
  2. 2

    Enter marks

    Open the exam's Marks grid and type each student's score. You can also export a CSV, mark offline, and re-import it.

    Tip: Every change is versioned under Marks → History, so there's a full audit trail if a mark is ever questioned.

  3. 3

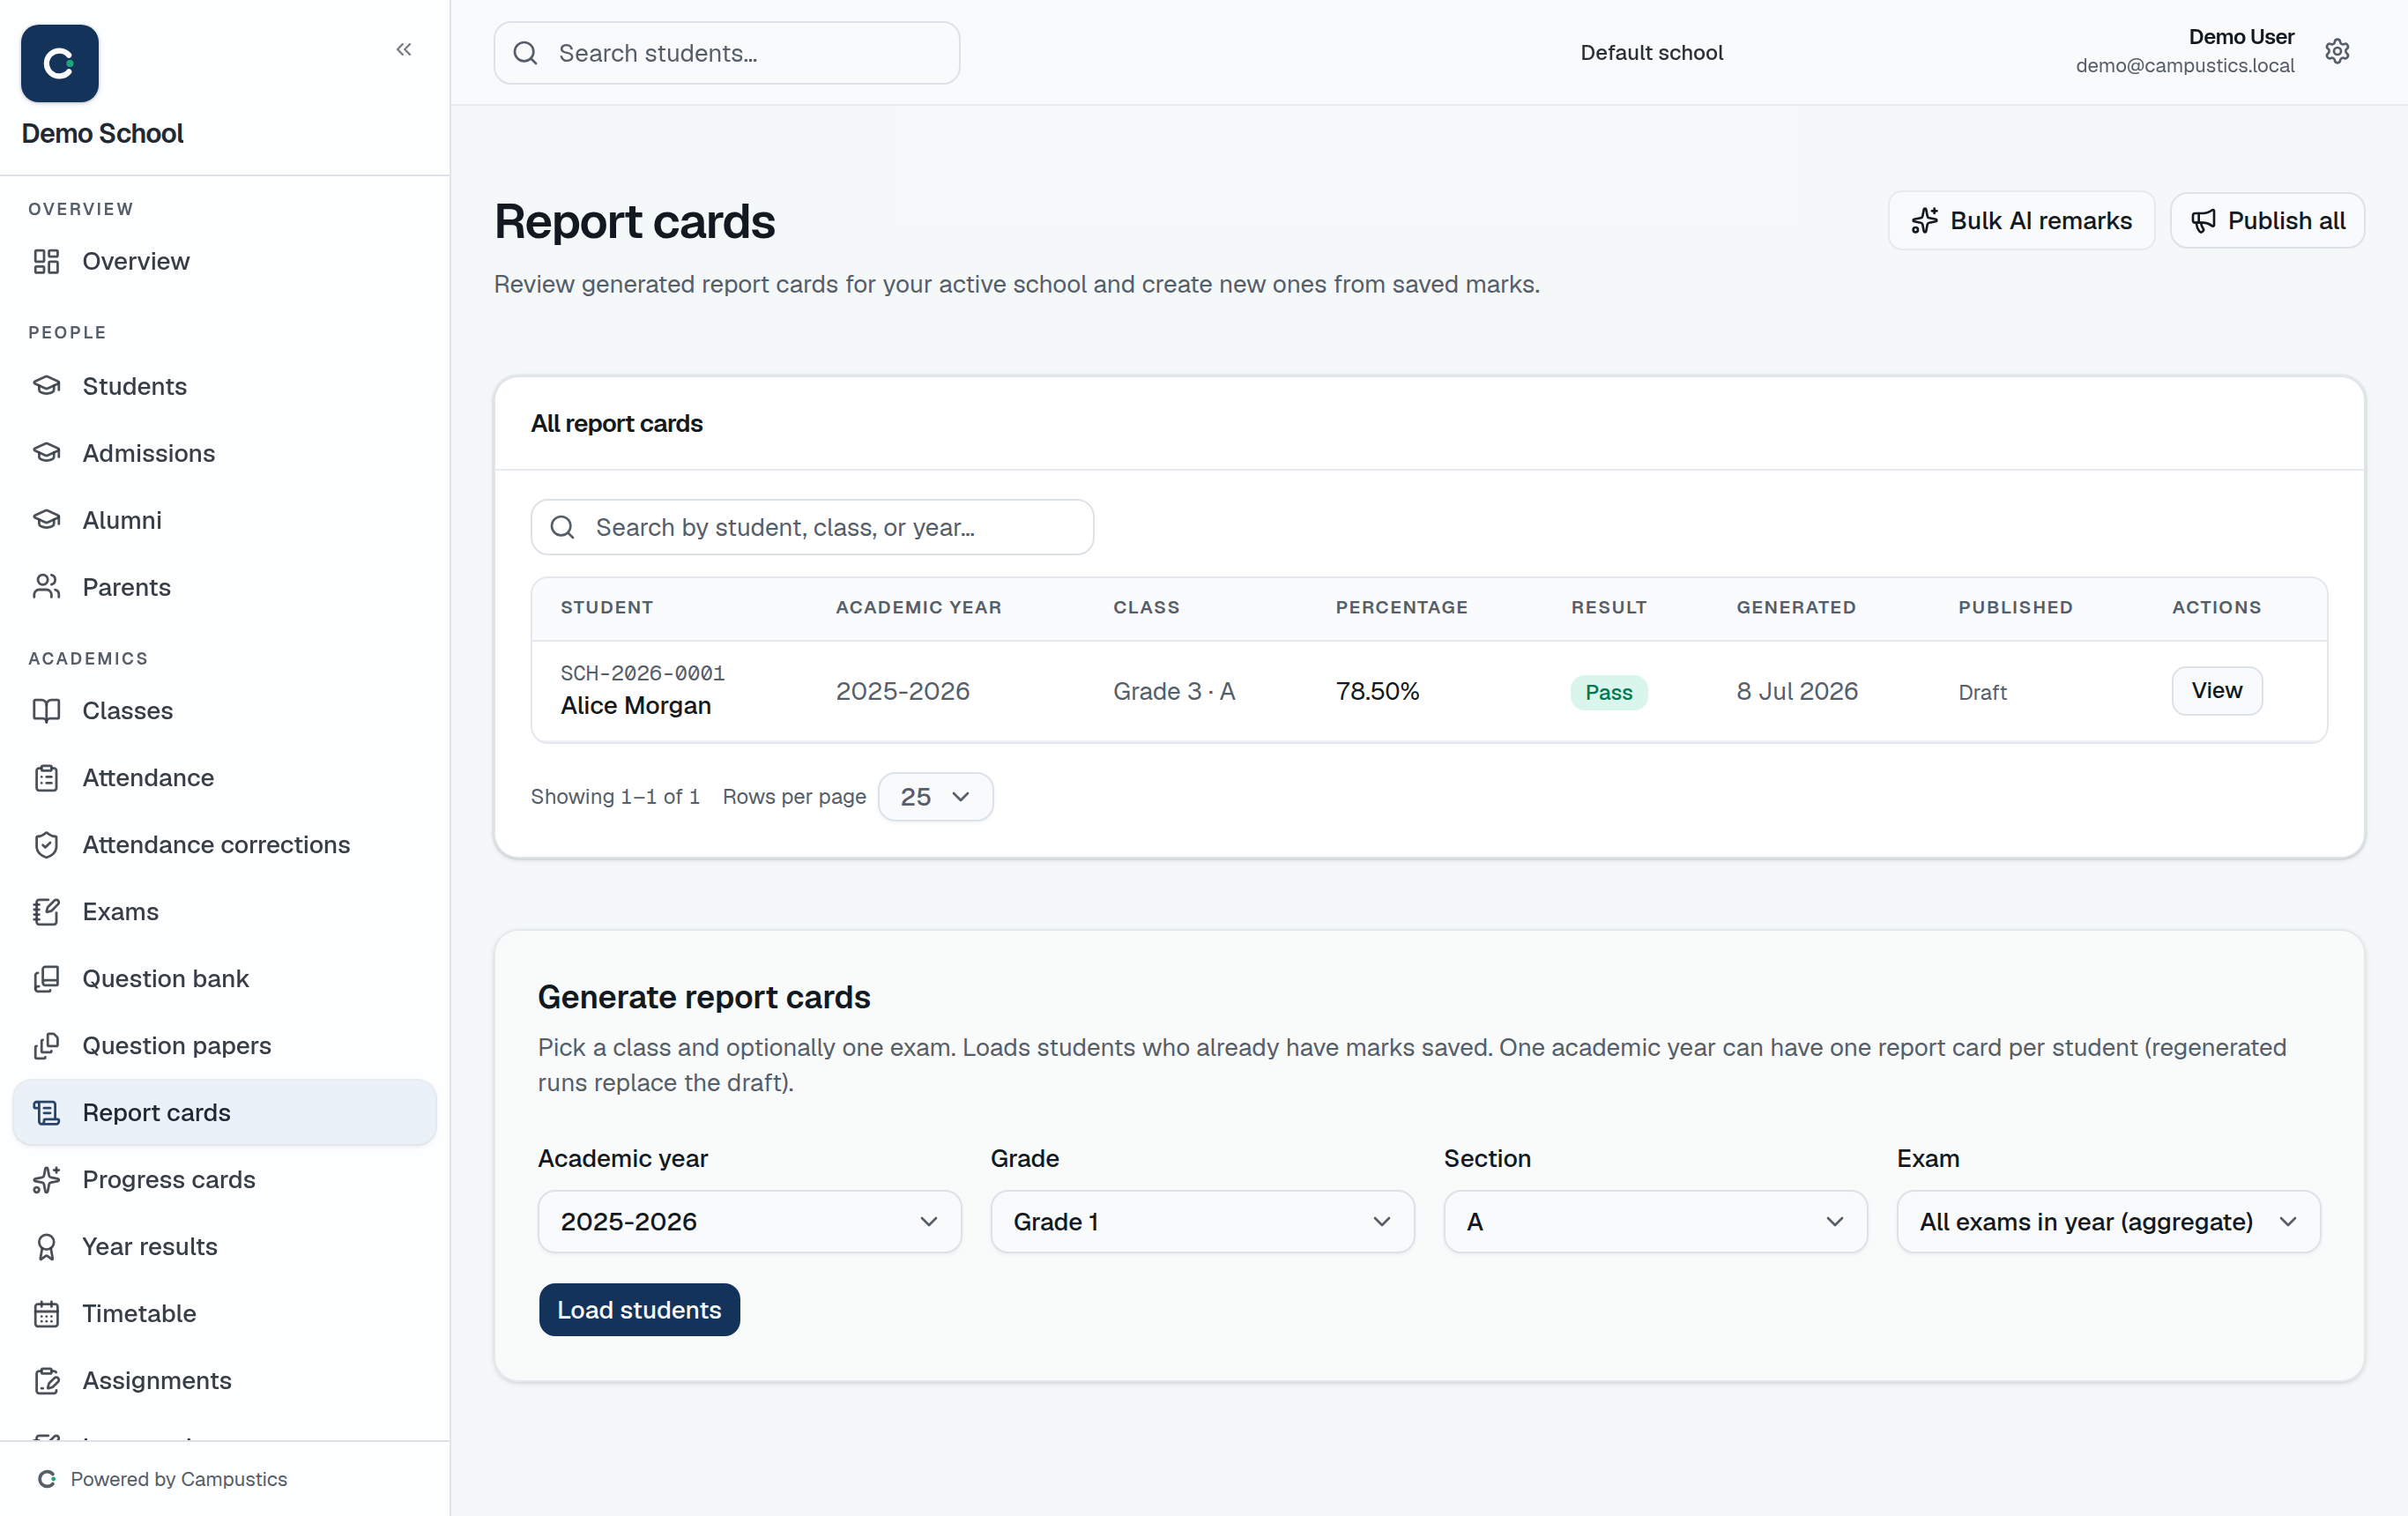
    Generate report cards

    Go to Report cards → Generate and choose the scope. Every matching student gets a report-card row.

    The Report cards page
  4. 4

    Add remarks (optional)

    Open a card to edit remarks inline. The AI suggest button drafts a remark from the marks; 'AI bulk remarks' does the whole class at once.

  5. 5

    Publish

    Use Publish on a single card, or 'Publish all' on the list. Publishing notifies the student and their linked parents by SMS and in-app alert.

    Tip: Grades follow your school's board grading scheme (CBSE, ICSE, Karnataka State, or General), set under Settings → Schools.

Build a class timetable

Admin · 8 min

Lay out each class's weekly periods, and cover absent teachers with substitutions.

  1. 1

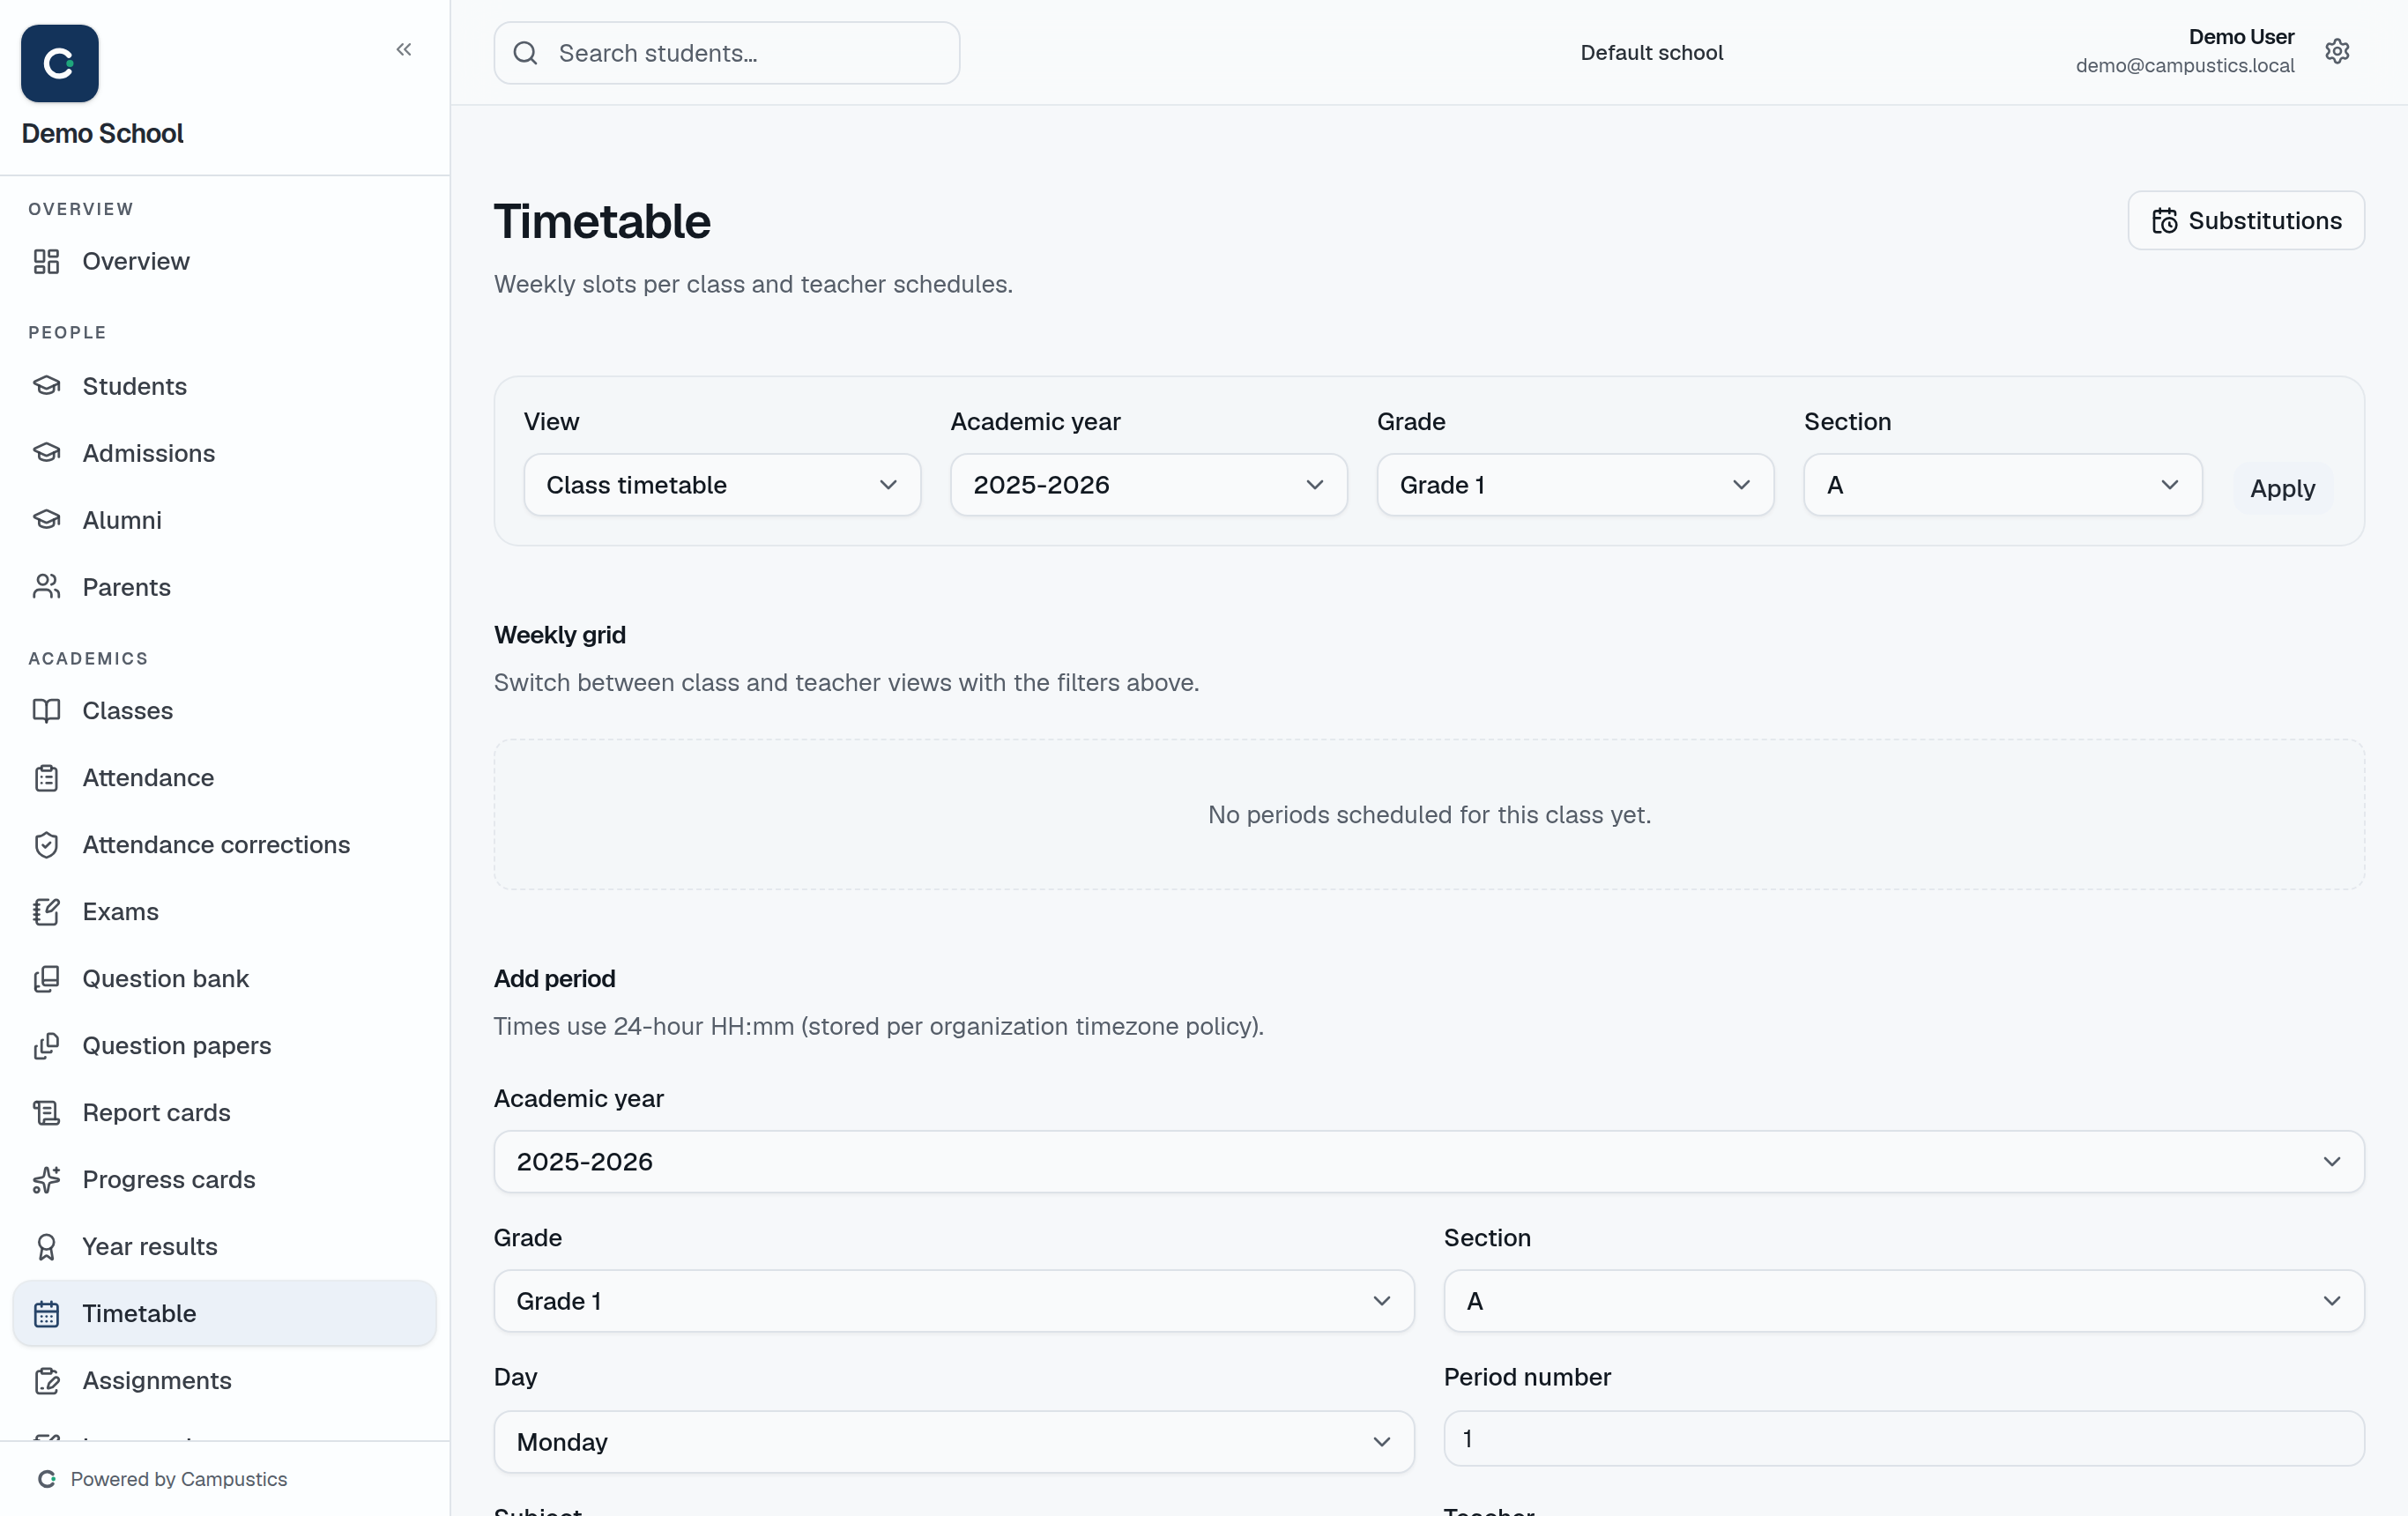
    Open Timetable

    Go to Timetable and pick the class. Add each period with its day, time, subject, and teacher.

    The Timetable page
  2. 2

    Fill the week

    Add periods across the week. If a teacher is double-booked at the same time in another class, Campustics flags the clash as you go.

  3. 3

    Cover an absent teacher

    When a teacher is out, open Timetable → Substitutions, pick the absent teacher and day, and Campustics ranks free teachers for each of their periods.

    Tip: Substitution suggestions put subject-matched, already-on-campus teachers first.

Set assignments and lesson plans

Teacher · 4 min

Give homework, track who submitted, and plan your syllabus by date.

  1. 1

    Create an assignment

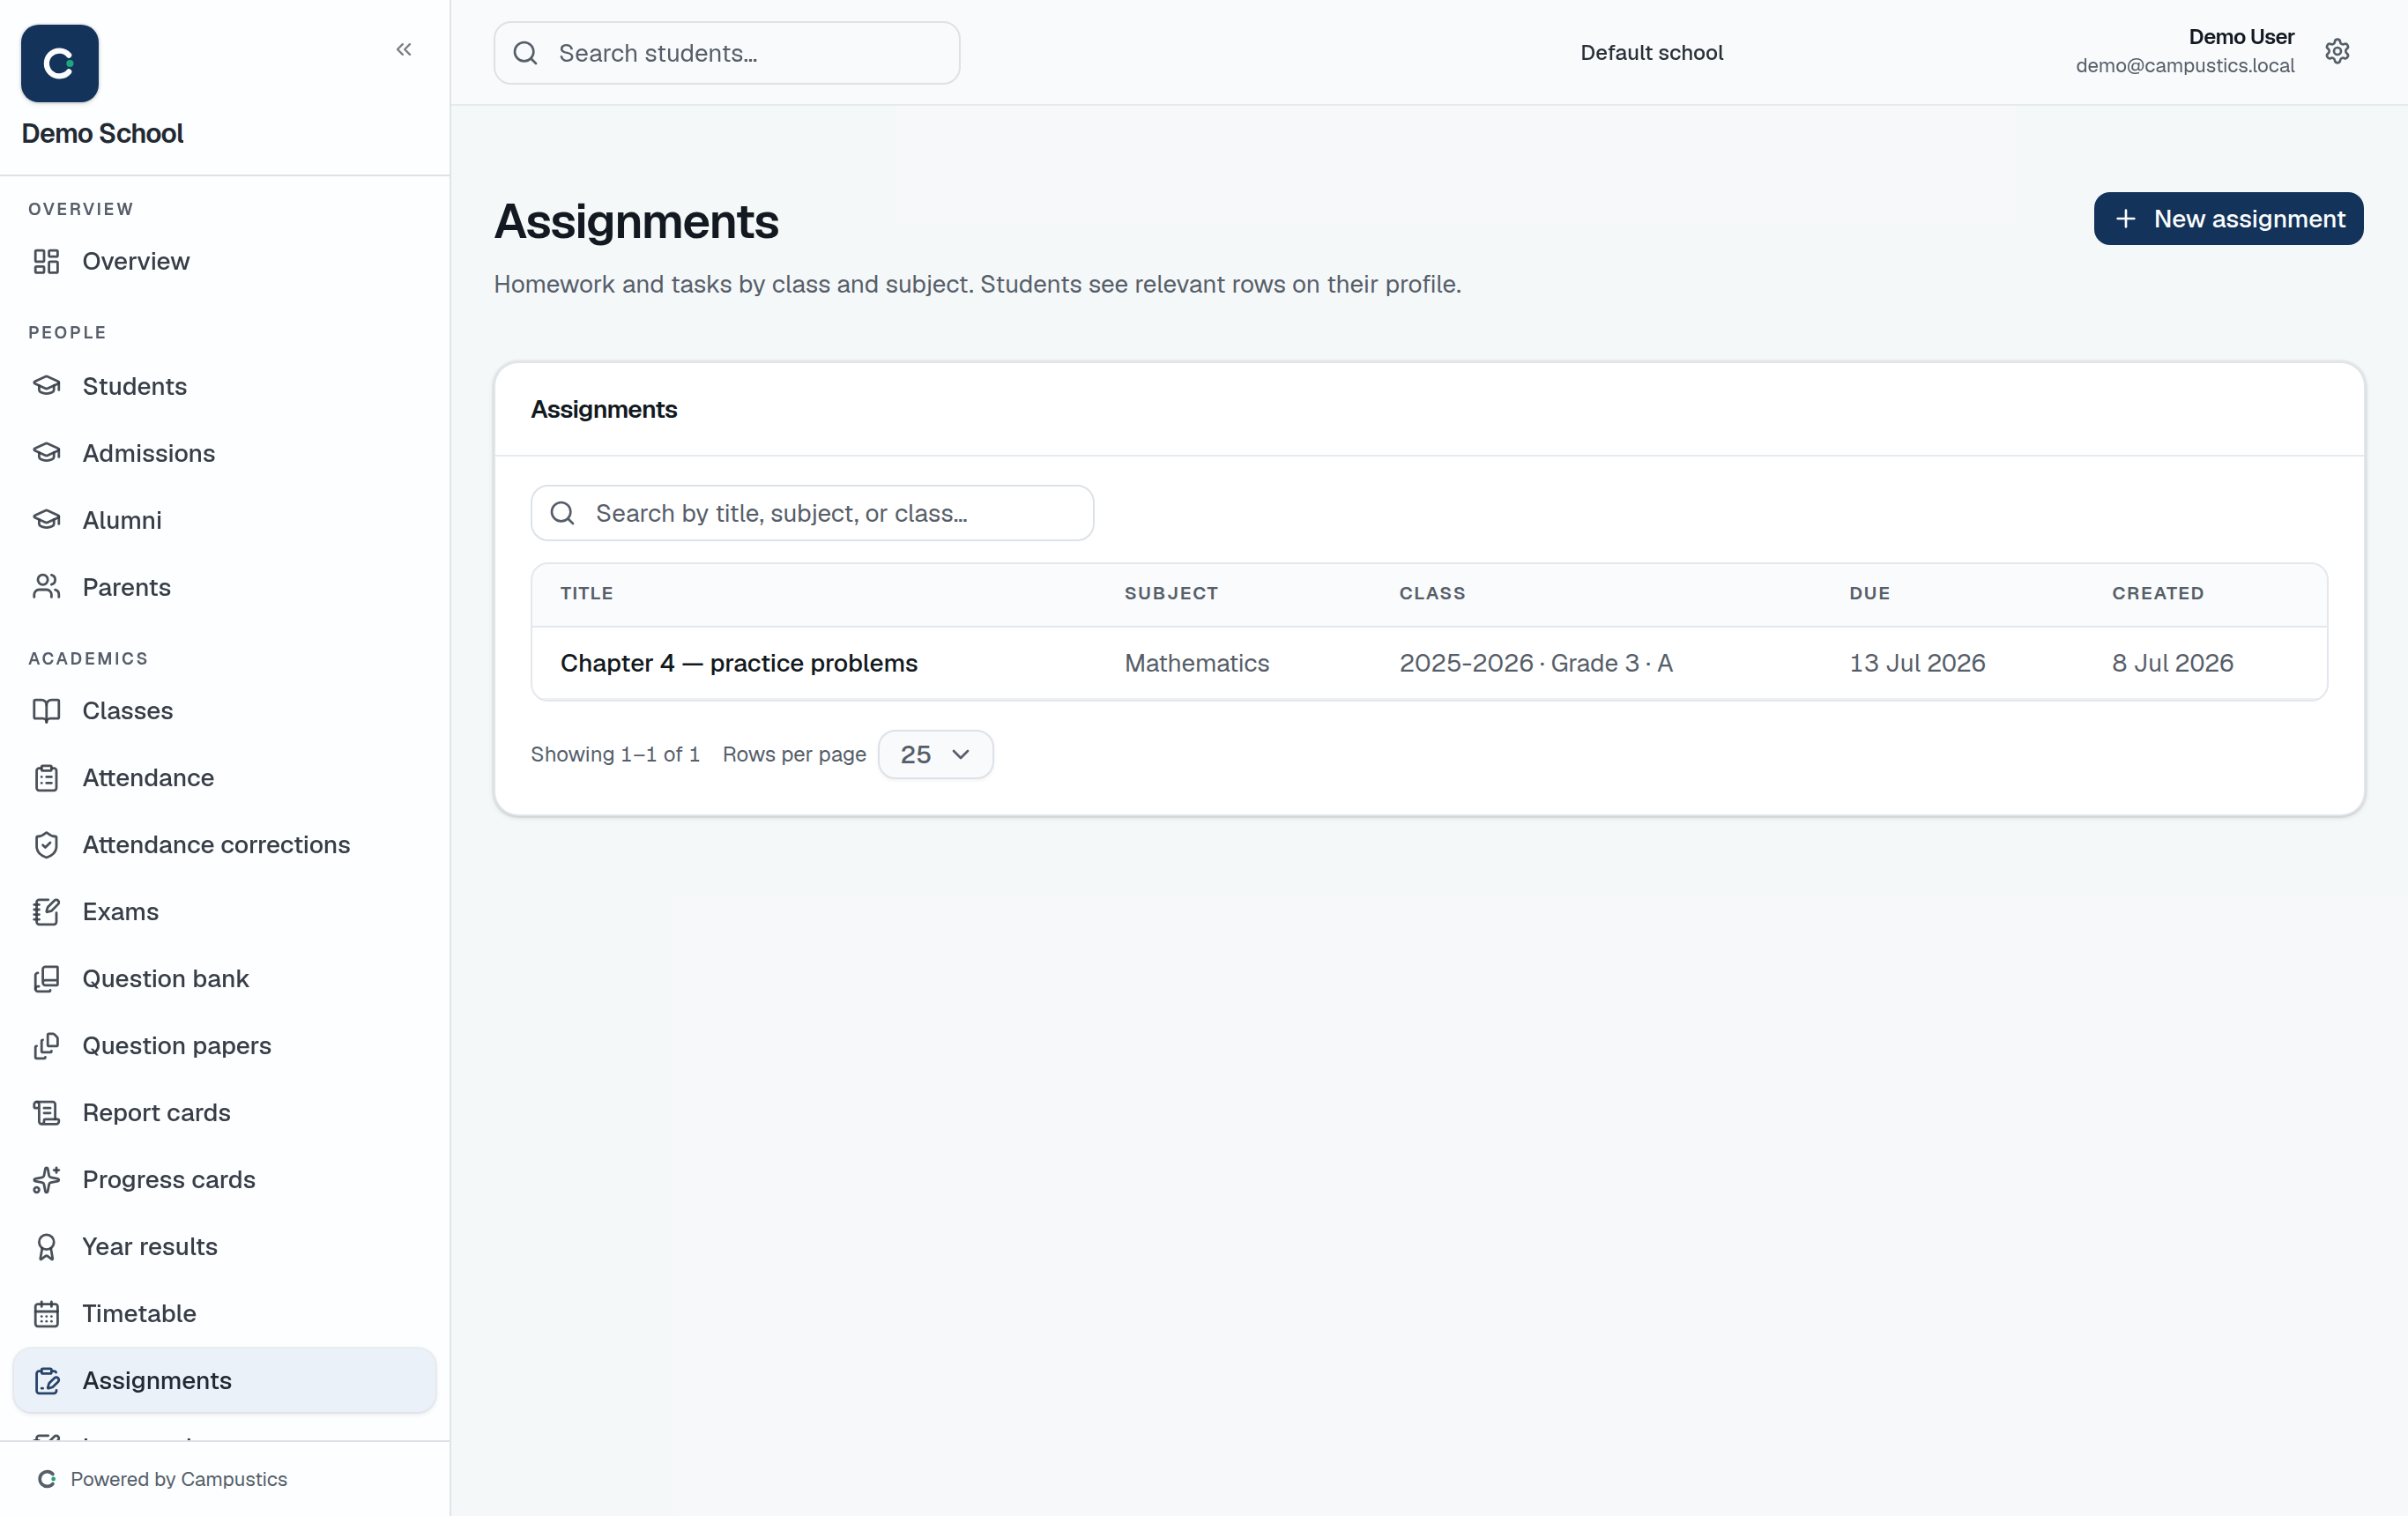
    Go to Assignments → New and set the class, subject, due date, and instructions.

    The Assignments page
  2. 2

    Track submissions

    Students submit from their portal; the submission tracker shows submitted / late / missing per class, and you grade inline.

    Tip: Students see pending assignments on their dashboard, so nothing slips through.

  3. 3

    Plan your lessons

    Use Lesson plans to map syllabus chapters to dates and mark them complete — the principal can see progress at a glance.

Run an online quiz

Teacher · 5 min

Build a quiz from the question bank and let students attempt it on their portal.

  1. 1

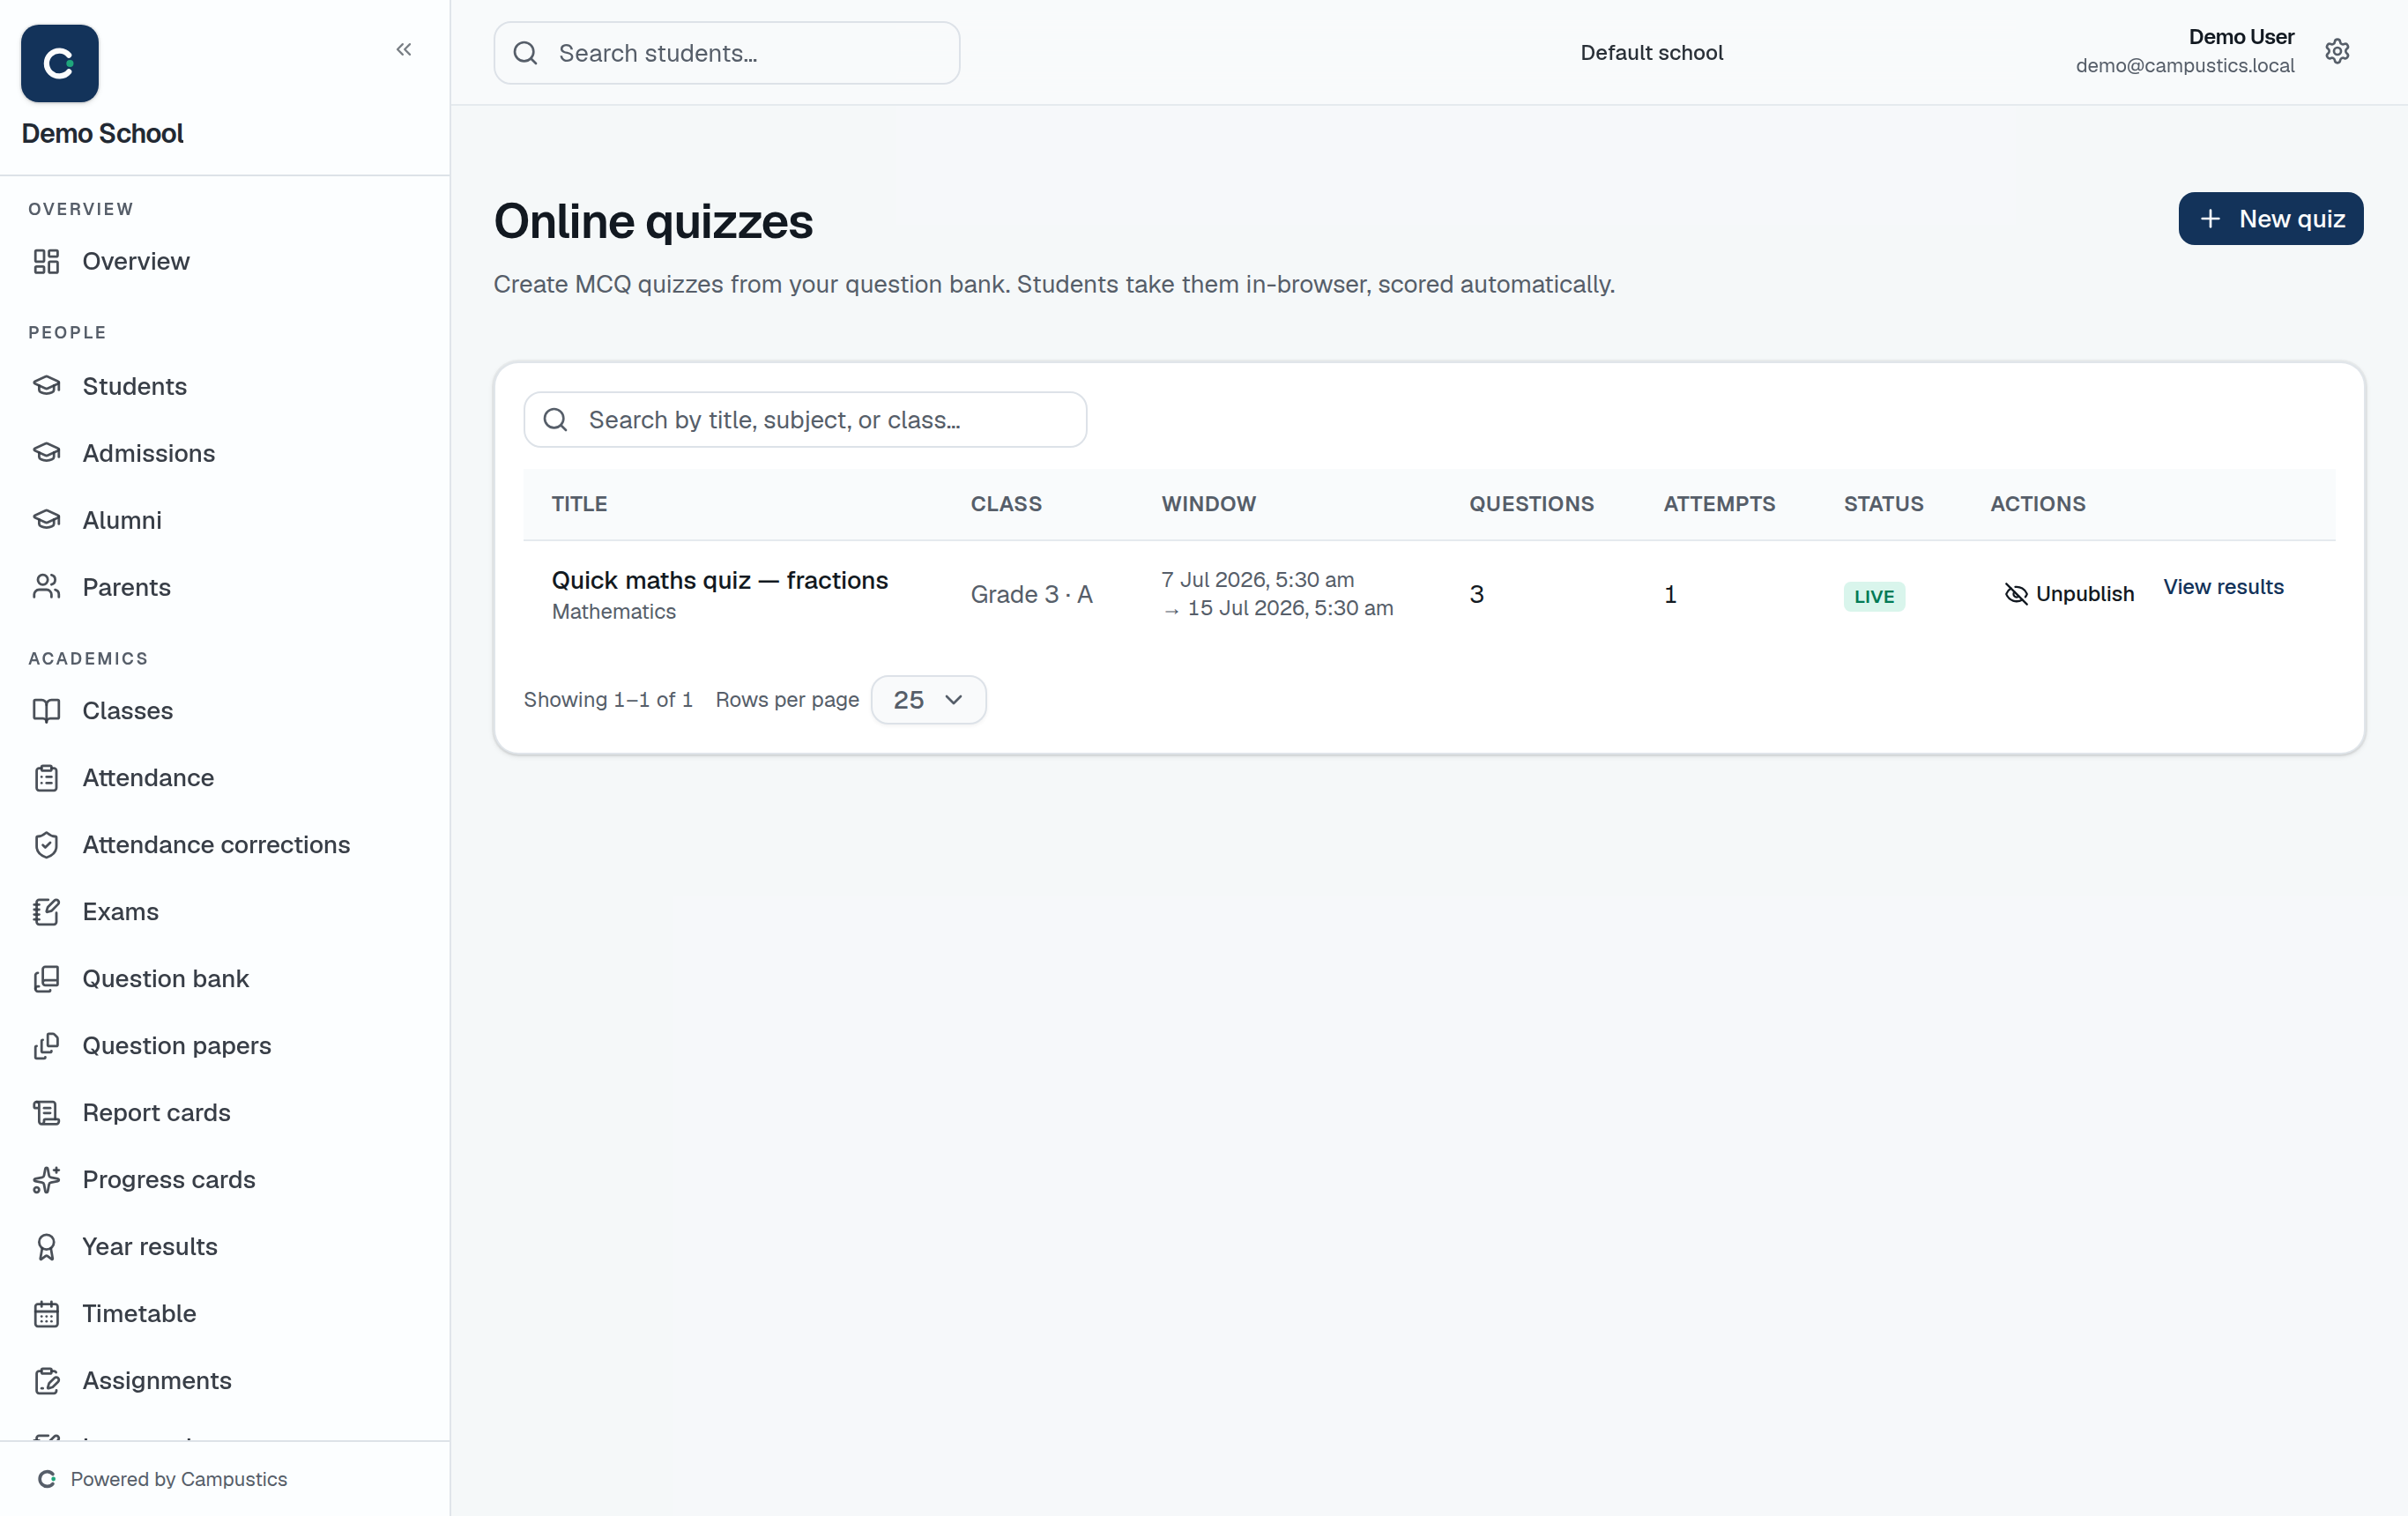
    Build a quiz

    Go to Quizzes → New and pick questions from the question bank.

    The Quizzes page
  2. 2

    Set the window

    Set the date and time window during which students can attempt it.

  3. 3

    Students attempt on their portal

    Students take the quiz from their portal and results are collected automatically.

    Tip: Optional proctoring (webcam + tab-switch detection) flags possible malpractice.

Generate question papers

Teacher · 6 min

Author or AI-generate questions in Assessment Studio, build a blueprint, then generate a print-ready paper with a marking scheme.

  1. 1

    Author & approve questions

    In Assessment Studio, add questions or use Generate for AI drafts, then submit them for review and approve — only approved questions go into a paper.

  2. 2

    Build a blueprint & generate

    Go to Assessment Studio → Blueprints → New and set sections and rules (chapter, difficulty, marks each). Open the blueprint and Generate to assemble labelled paper sets from your approved questions.

    Tip: Generation is blueprint-exact — if a rule can't be filled it reports the exact shortfall instead of a short paper.

  3. 3

    Approve & print

    Approve the generated paper, then print it as A4 — add the marking scheme (answer key and solutions) for the invigilator.

Review attendance corrections

Admin · 2 min

Approve or reject class teachers' requests to amend a past day's attendance.

  1. 1

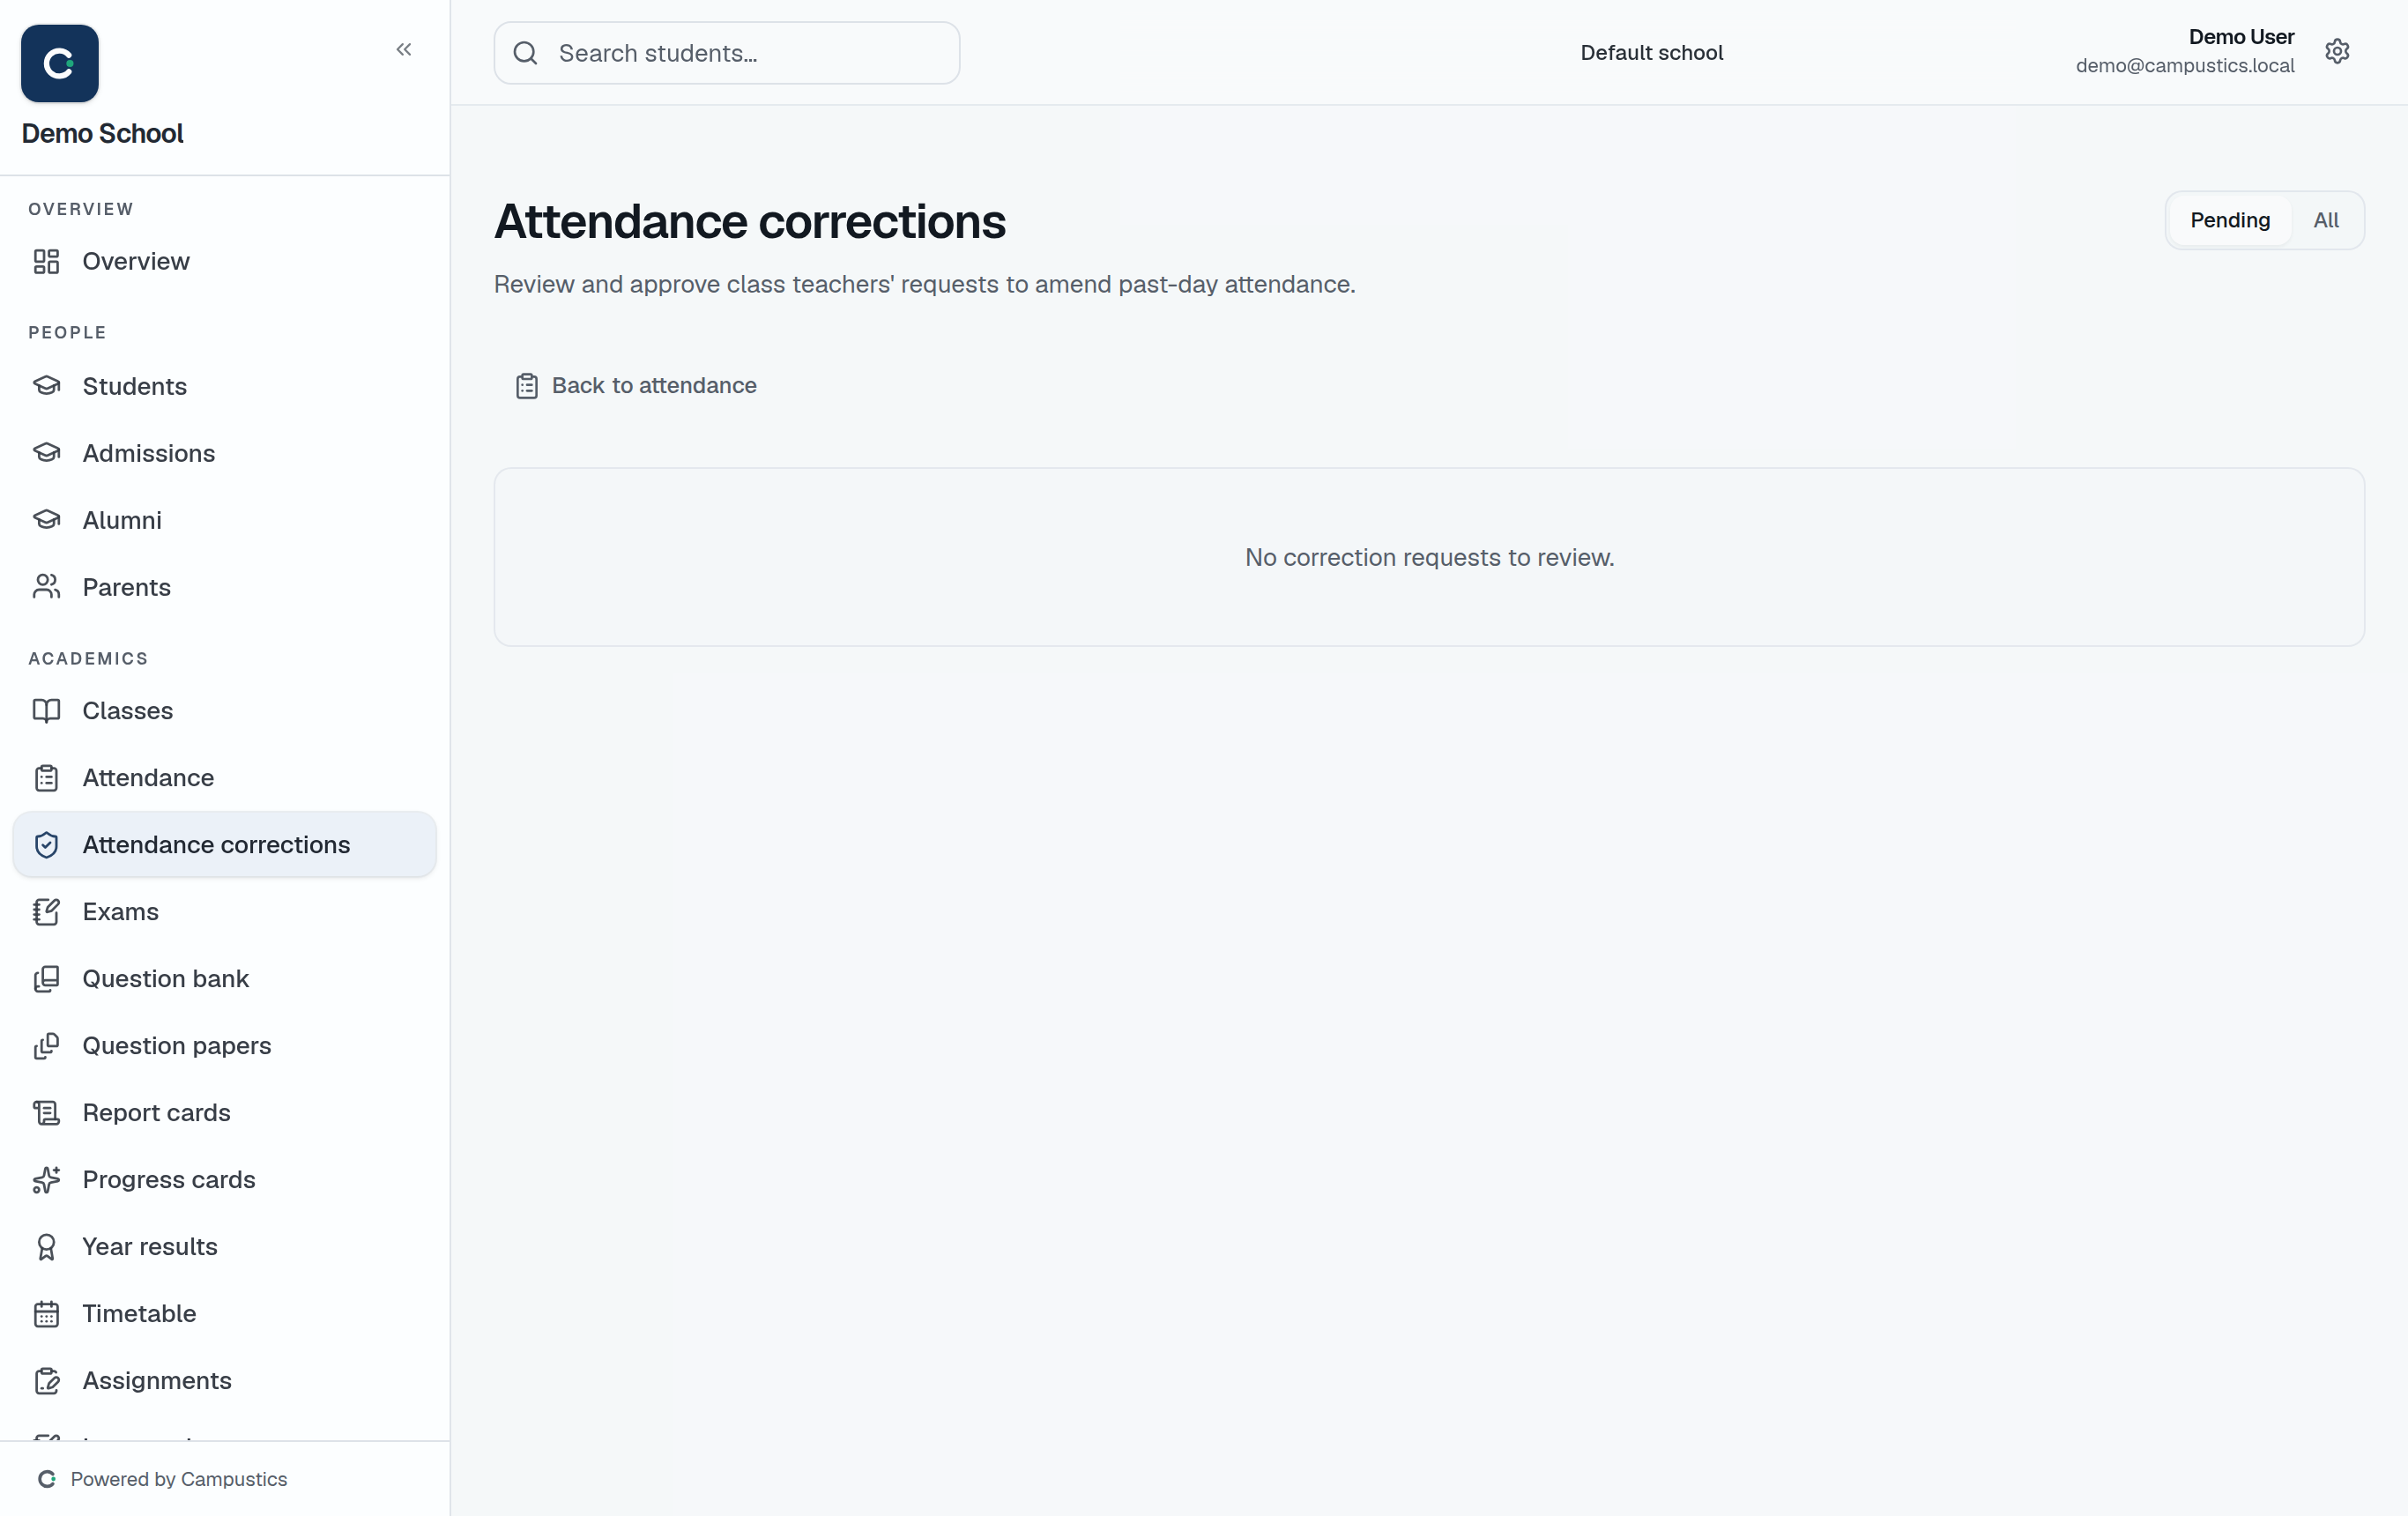
    Open the corrections queue

    Go to Attendance → Corrections. A badge shows pending requests from class teachers who want to change a past day.

    Attendance corrections
  2. 2

    Approve or reject

    Open a request to see the proposed marks and the reason, then Approve to apply them or Reject with an optional note.

    Tip: Teachers can freely edit today's roll-call; only past days need this approval step.

Fees & finance

Set up fees and record a payment

Accountant · 5 min

Create a fee structure, assign it to a class, and record a payment with a printable receipt.

  1. 1

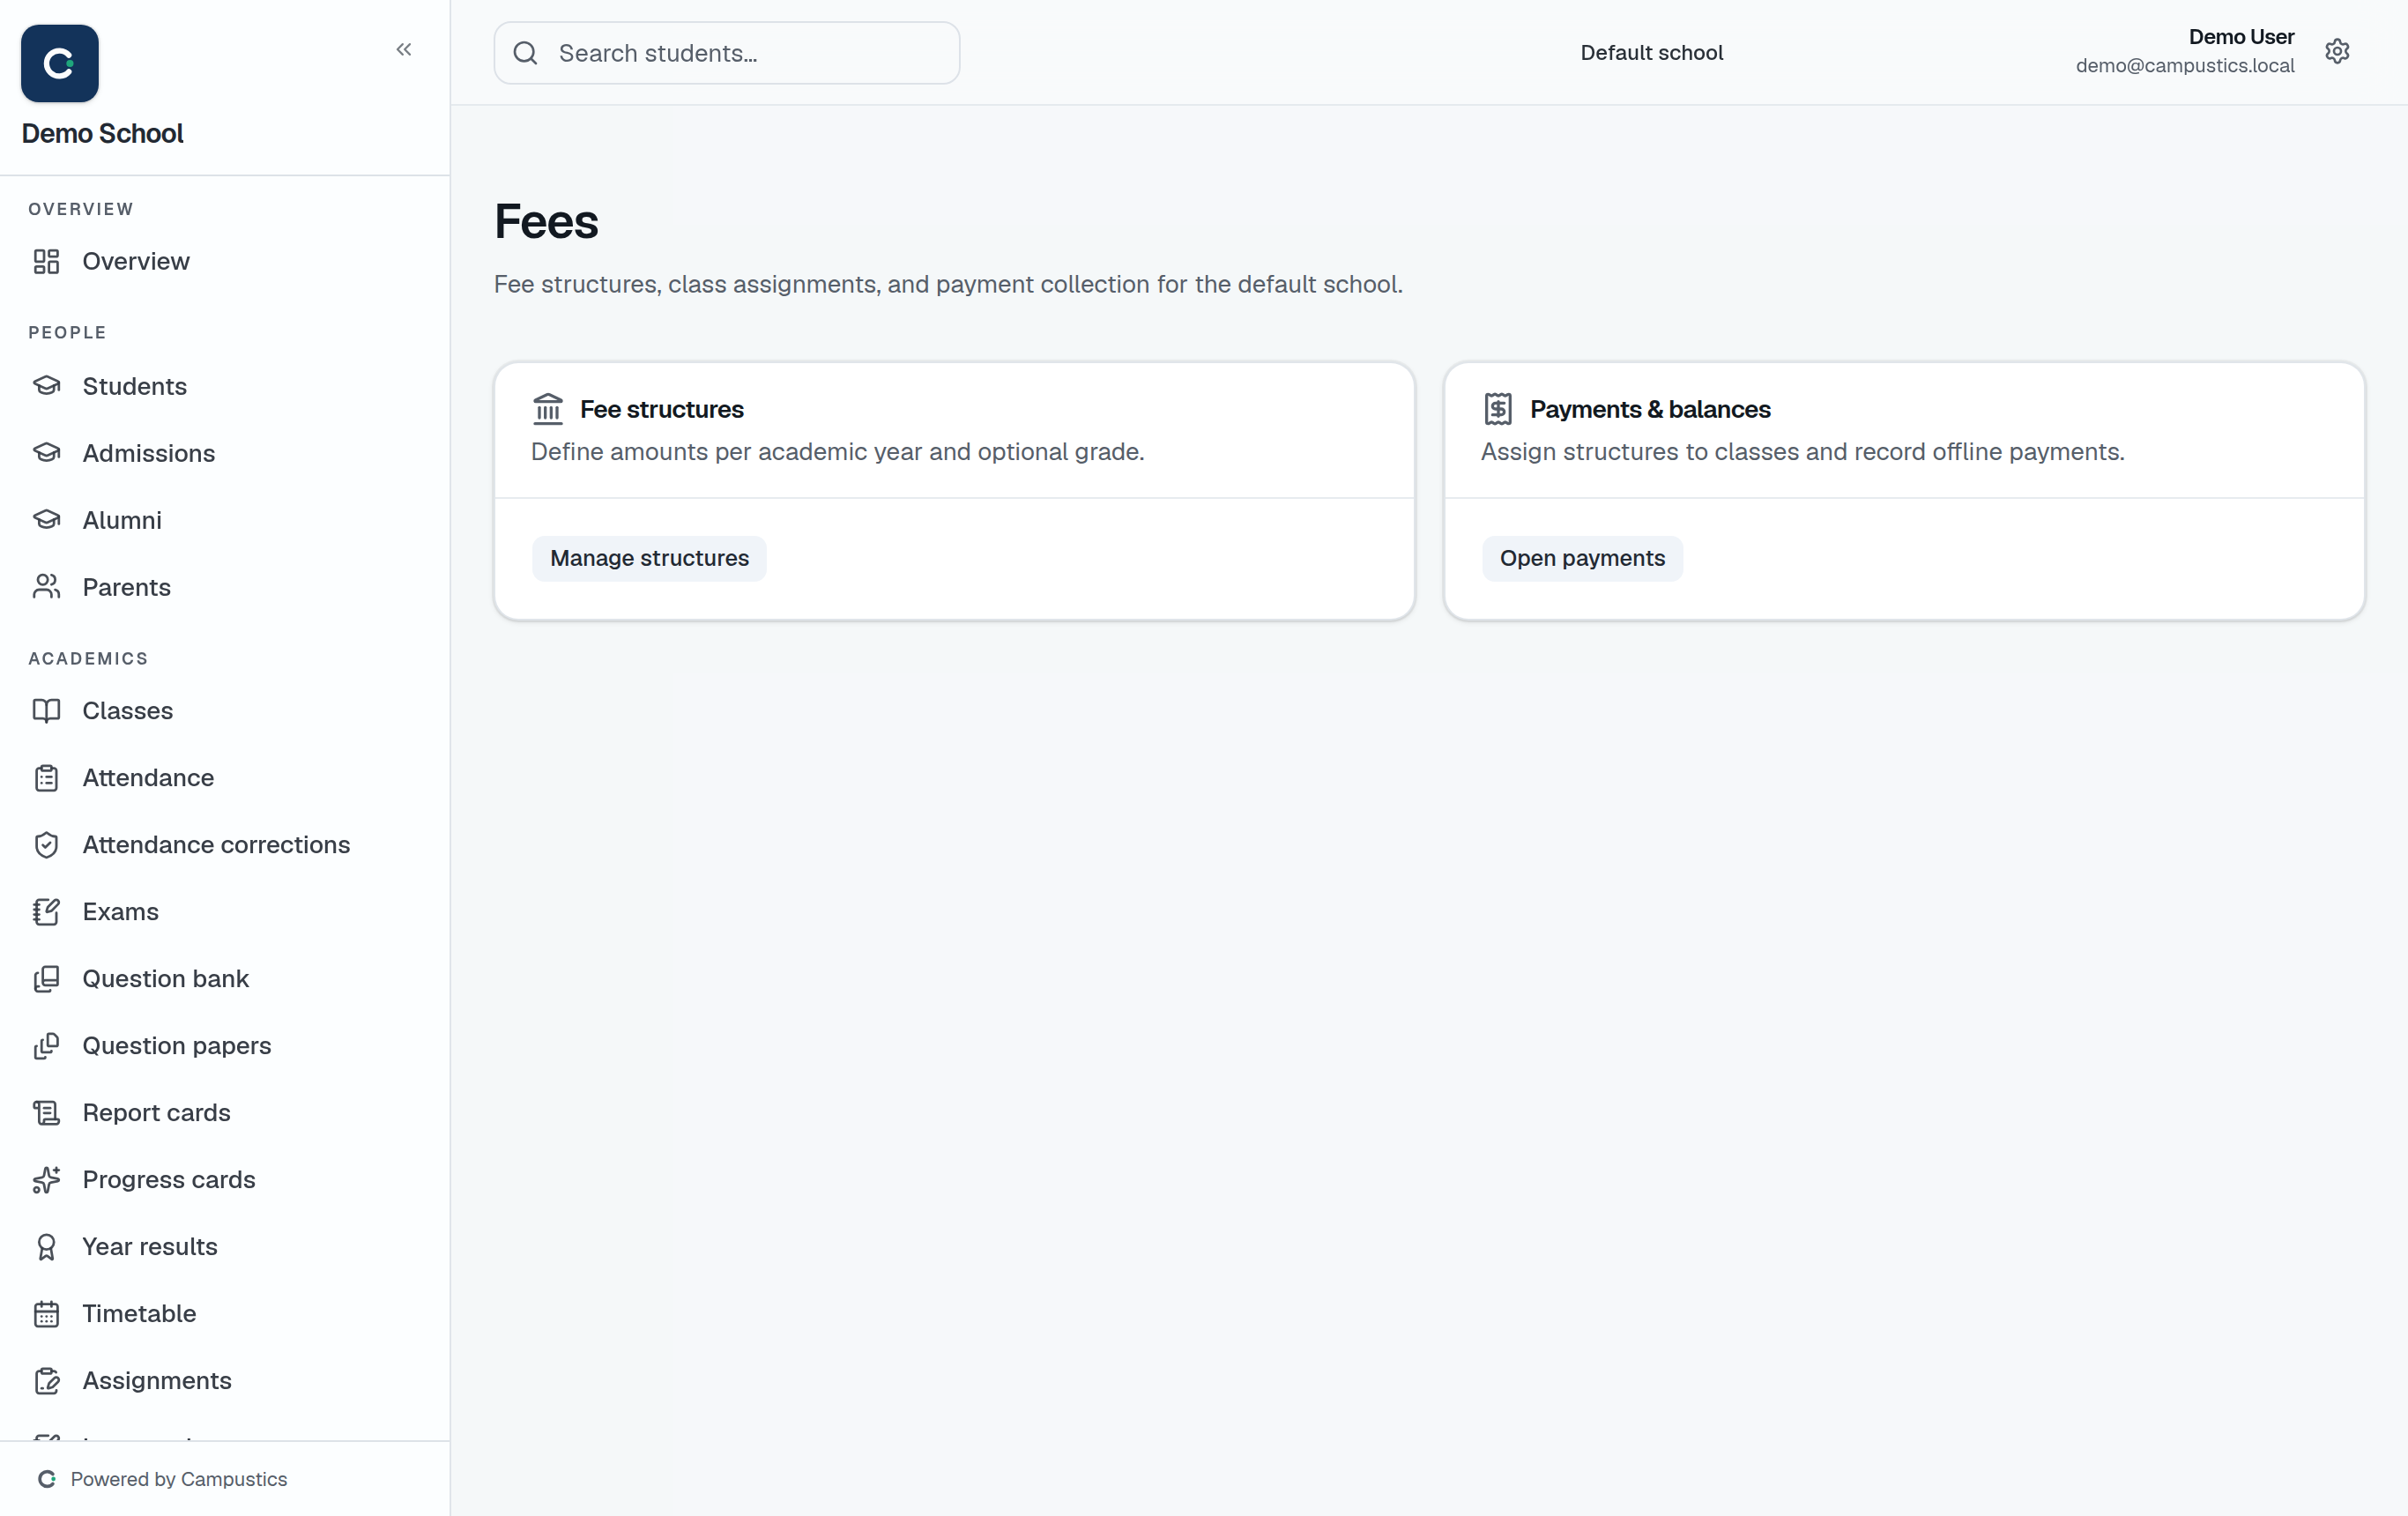
    Create a fee structure

    Go to Fees → Structures and add a structure with its instalments. Assign it to a class to create a fee row for every active student.

    The Fees page
  2. 2

    Record a payment

    Go to Fees → Payments and record an offline payment against a student. Overdue amounts refresh automatically on the dashboard.

    Tip: Online payments (Razorpay) appear on the parent portal once your school connects its own payment keys under Settings → Schools.

  3. 3

    Print the receipt

    Click any payment and choose Print / save as PDF for an A4 receipt with your school header.

Raise an ad-hoc invoice

Accountant · 4 min

Bill anything outside regular fees — uniforms, books, transport — and record payment.

  1. 1

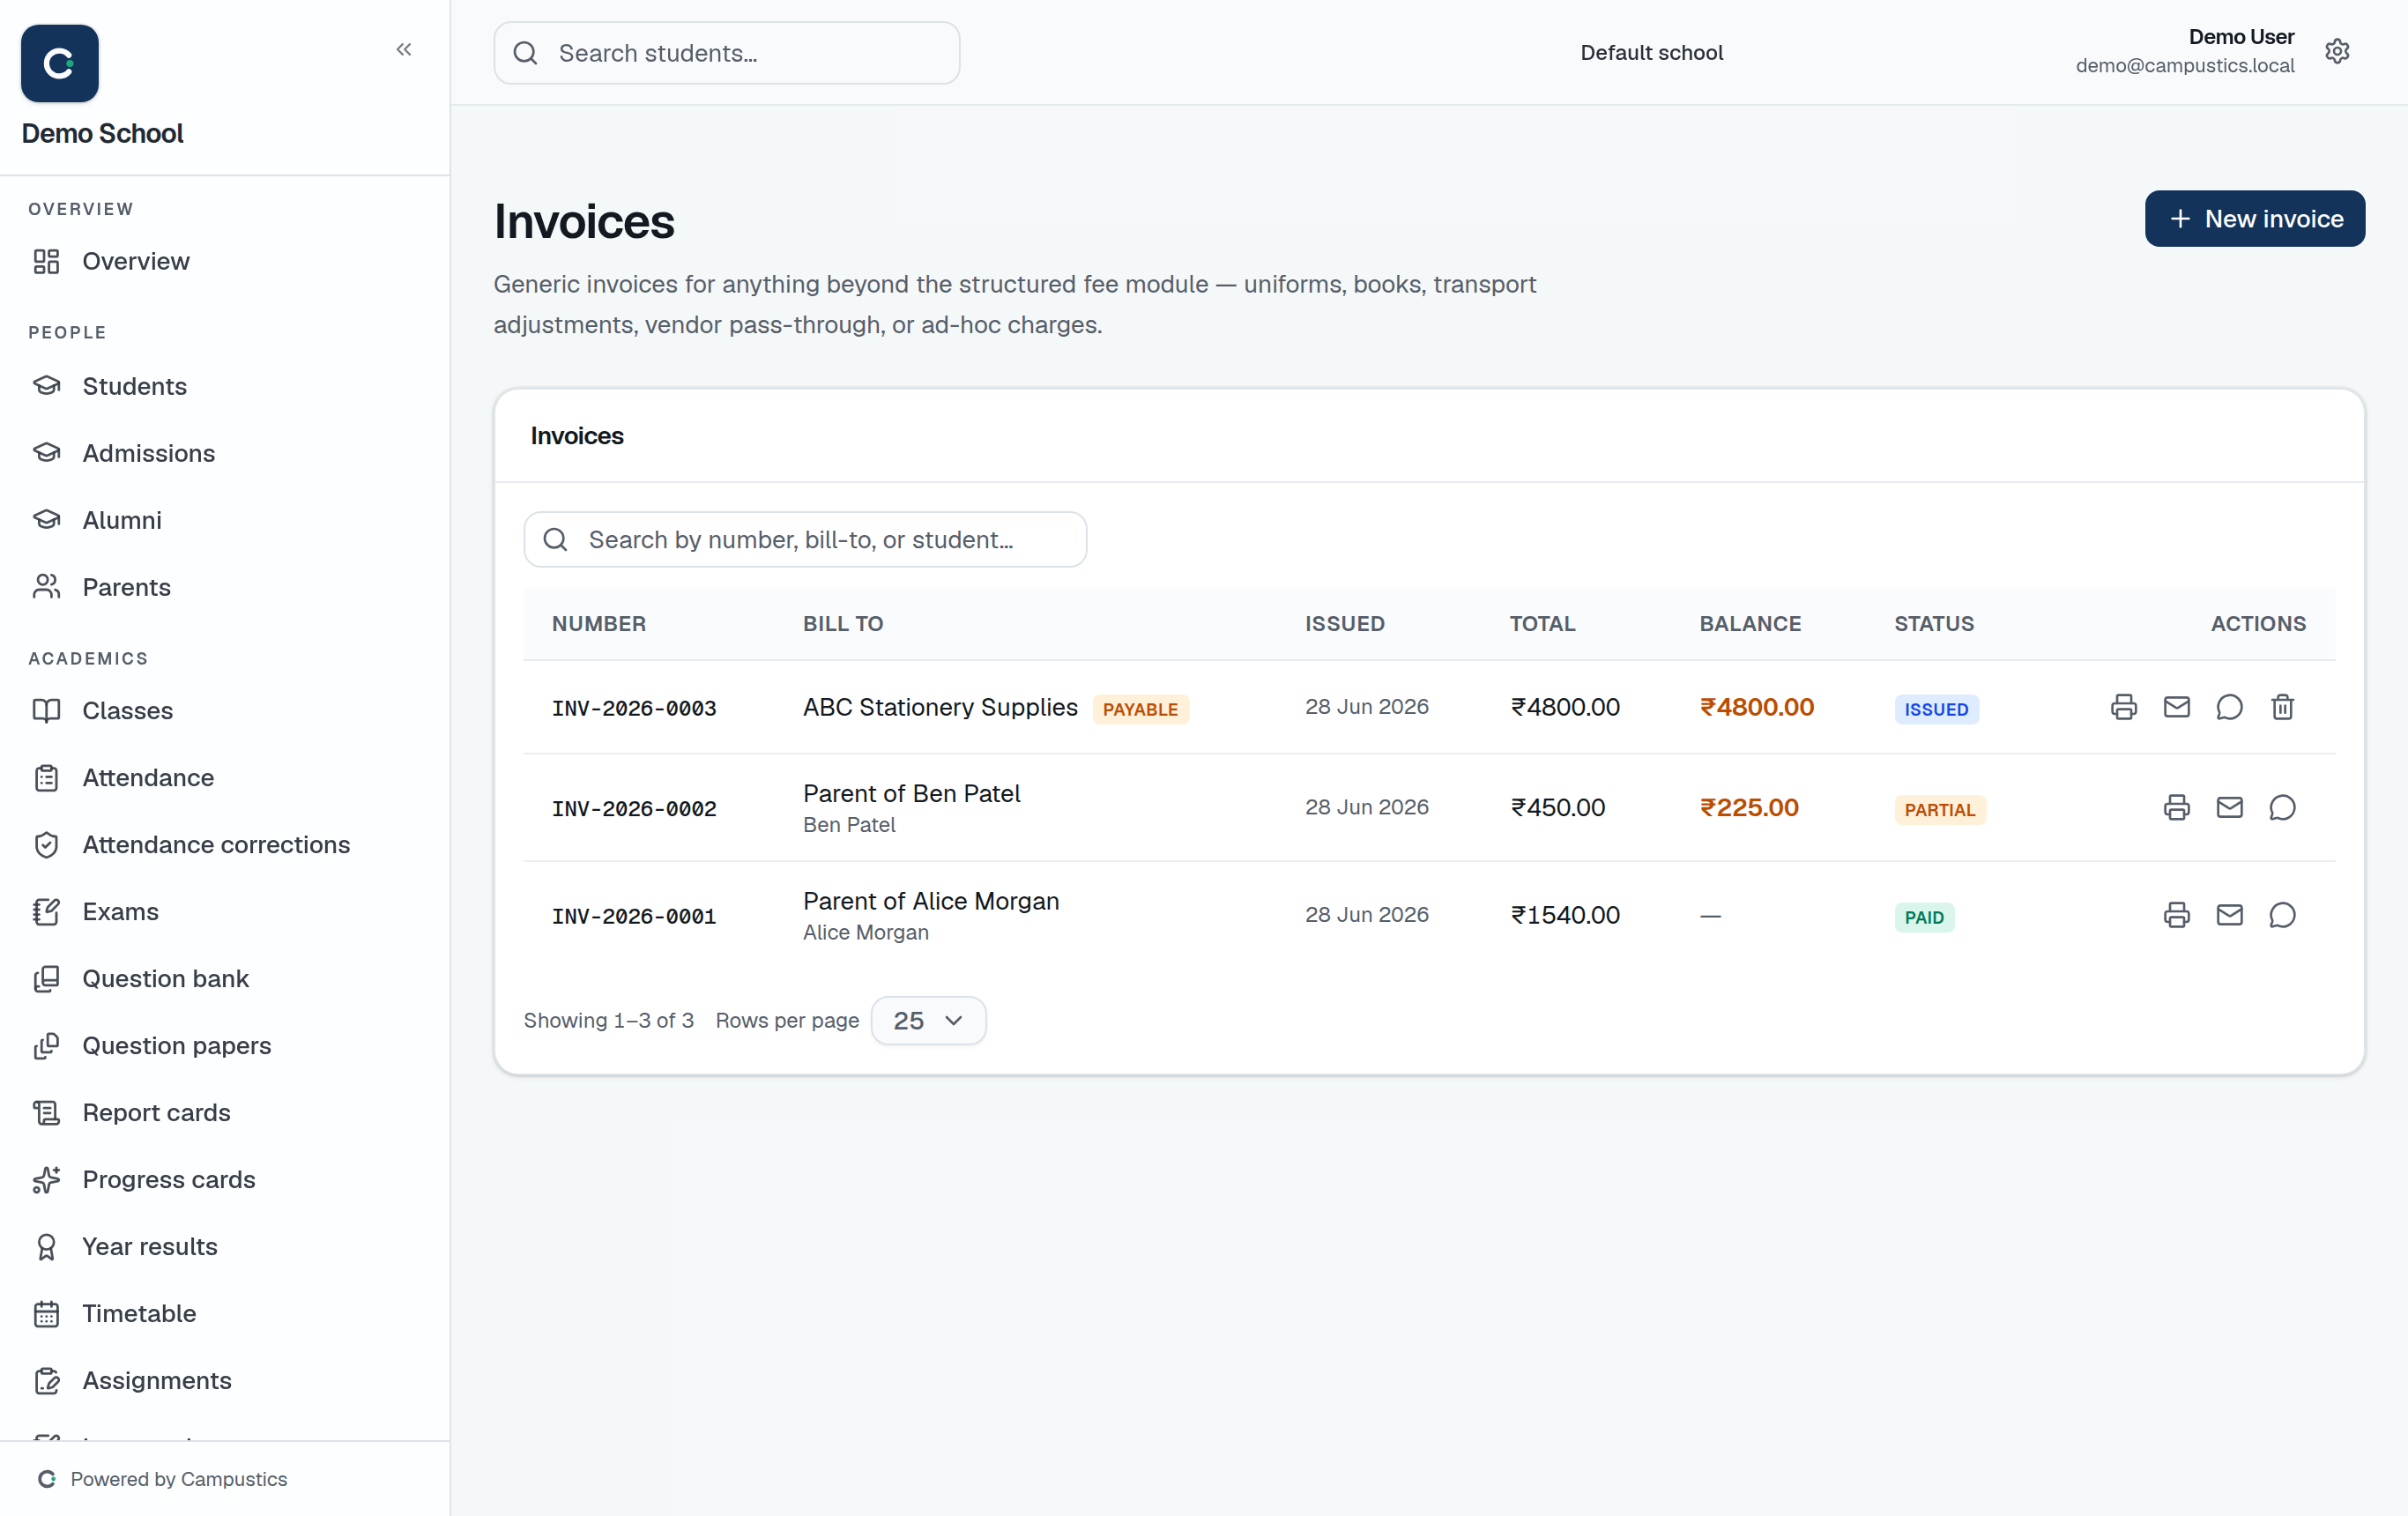
    Start a new invoice

    Go to Invoices → New invoice. Fill the bill-to name (optionally link a student) and add line items — the sub-total updates live.

    The Invoices page
  2. 2

    Add tax or discount, then create

    Optionally add a tax rate or a flat discount, then Create invoice. It's numbered automatically (INV-2026-0001).

  3. 3

    Record payment and share

    Record a full or partial payment — the status moves Draft → Issued → Partial → Paid on its own. Print, save as PDF, or share on WhatsApp.
Accept online payments

Admin · 4 min

Connect your school's own Razorpay keys so parents can pay fees online.

  1. 1

    Open online payments

    Go to Settings → Schools → [your school] → Online payments.

    Settings → Schools
  2. 2

    Connect your Razorpay keys

    Enter your school's own Razorpay key ID and secret so fees settle to your school's bank. They're encrypted before they're saved.

    Tip: Each campus connects its own account, so money goes to the right bank per school.

  3. 3

    Parents pay from their portal

    Once connected, parents see a Pay button on their portal; captured payments record against the fee automatically.

Run payroll

Accountant · 5 min

Set salary structures, generate monthly payslips, and print or share them.

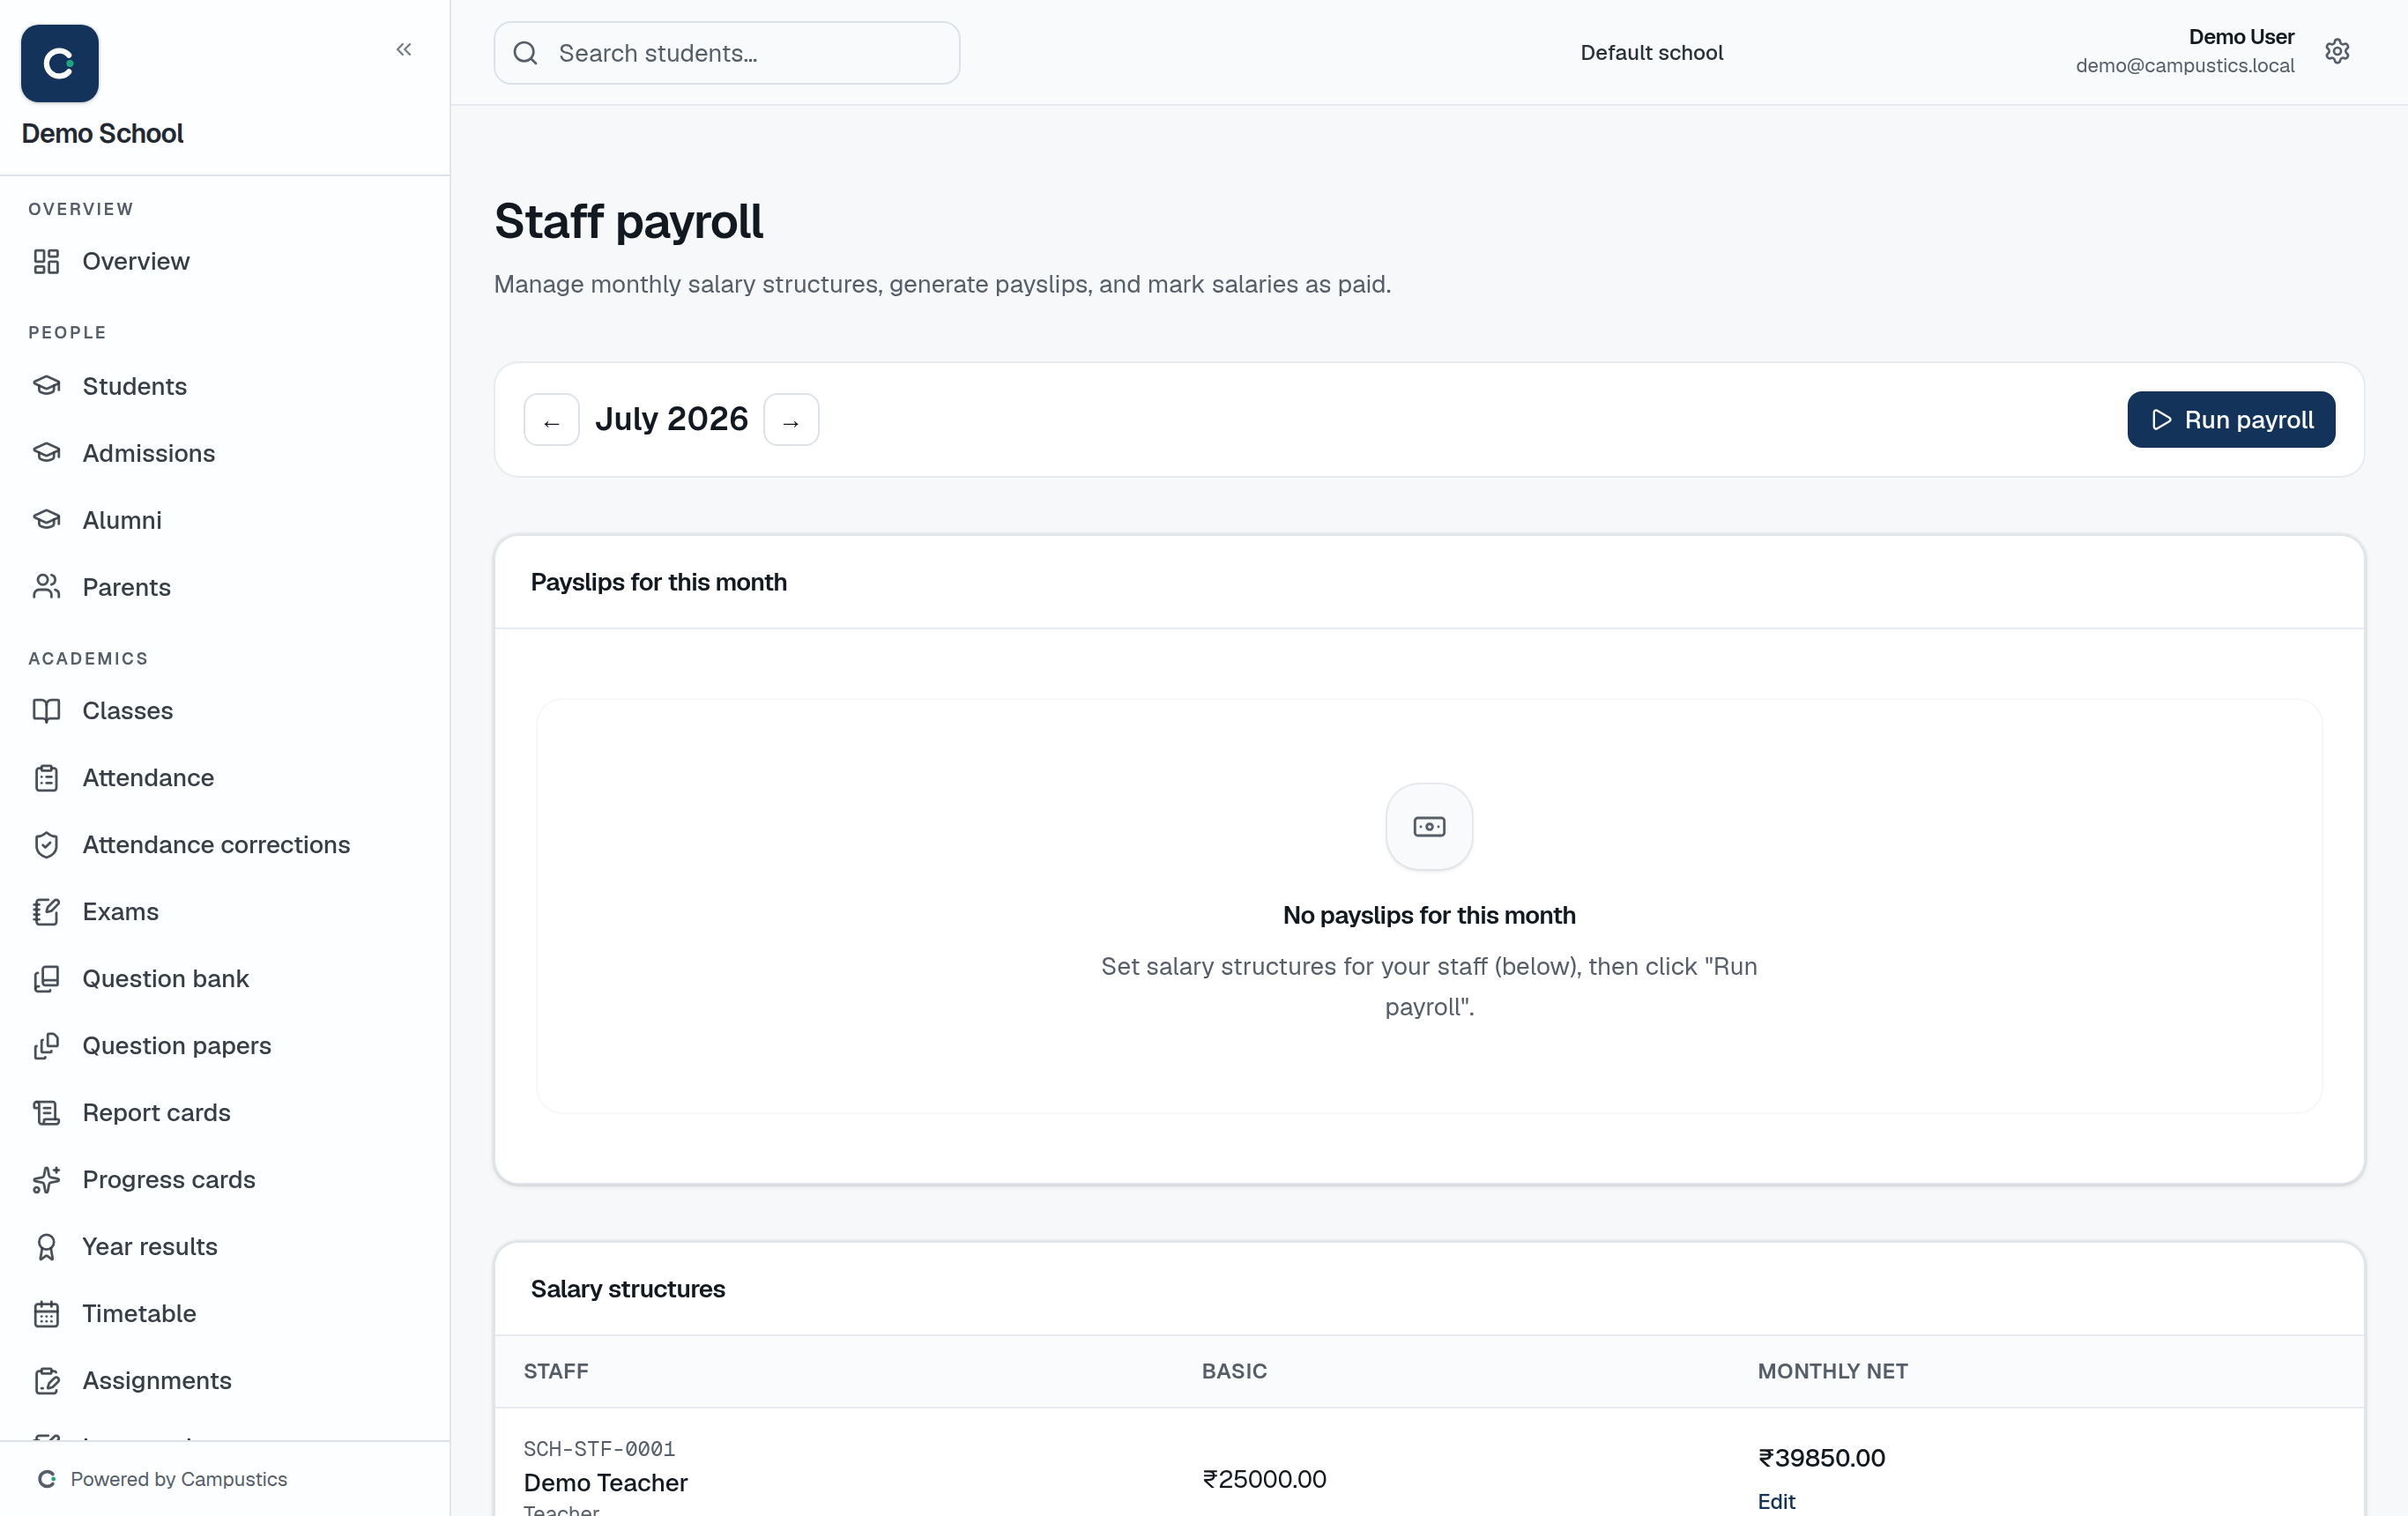
  1. 1

    Set salary structures

    Go to Payroll and set each staff member's salary structure — basic, allowances, and deductions.

    The Payroll page
  2. 2

    Generate payslips

    Generate payslips for the month for the whole staff in one go.

  3. 3

    Print or share

    Open any payslip to print or save as PDF with your school header.

    Tip: Date of joining on the staff record feeds pro-rata pay for new joiners.

Track inventory

Admin · 3 min

Manage uniforms, stationery, and kit — stock, issues, and reorder alerts.

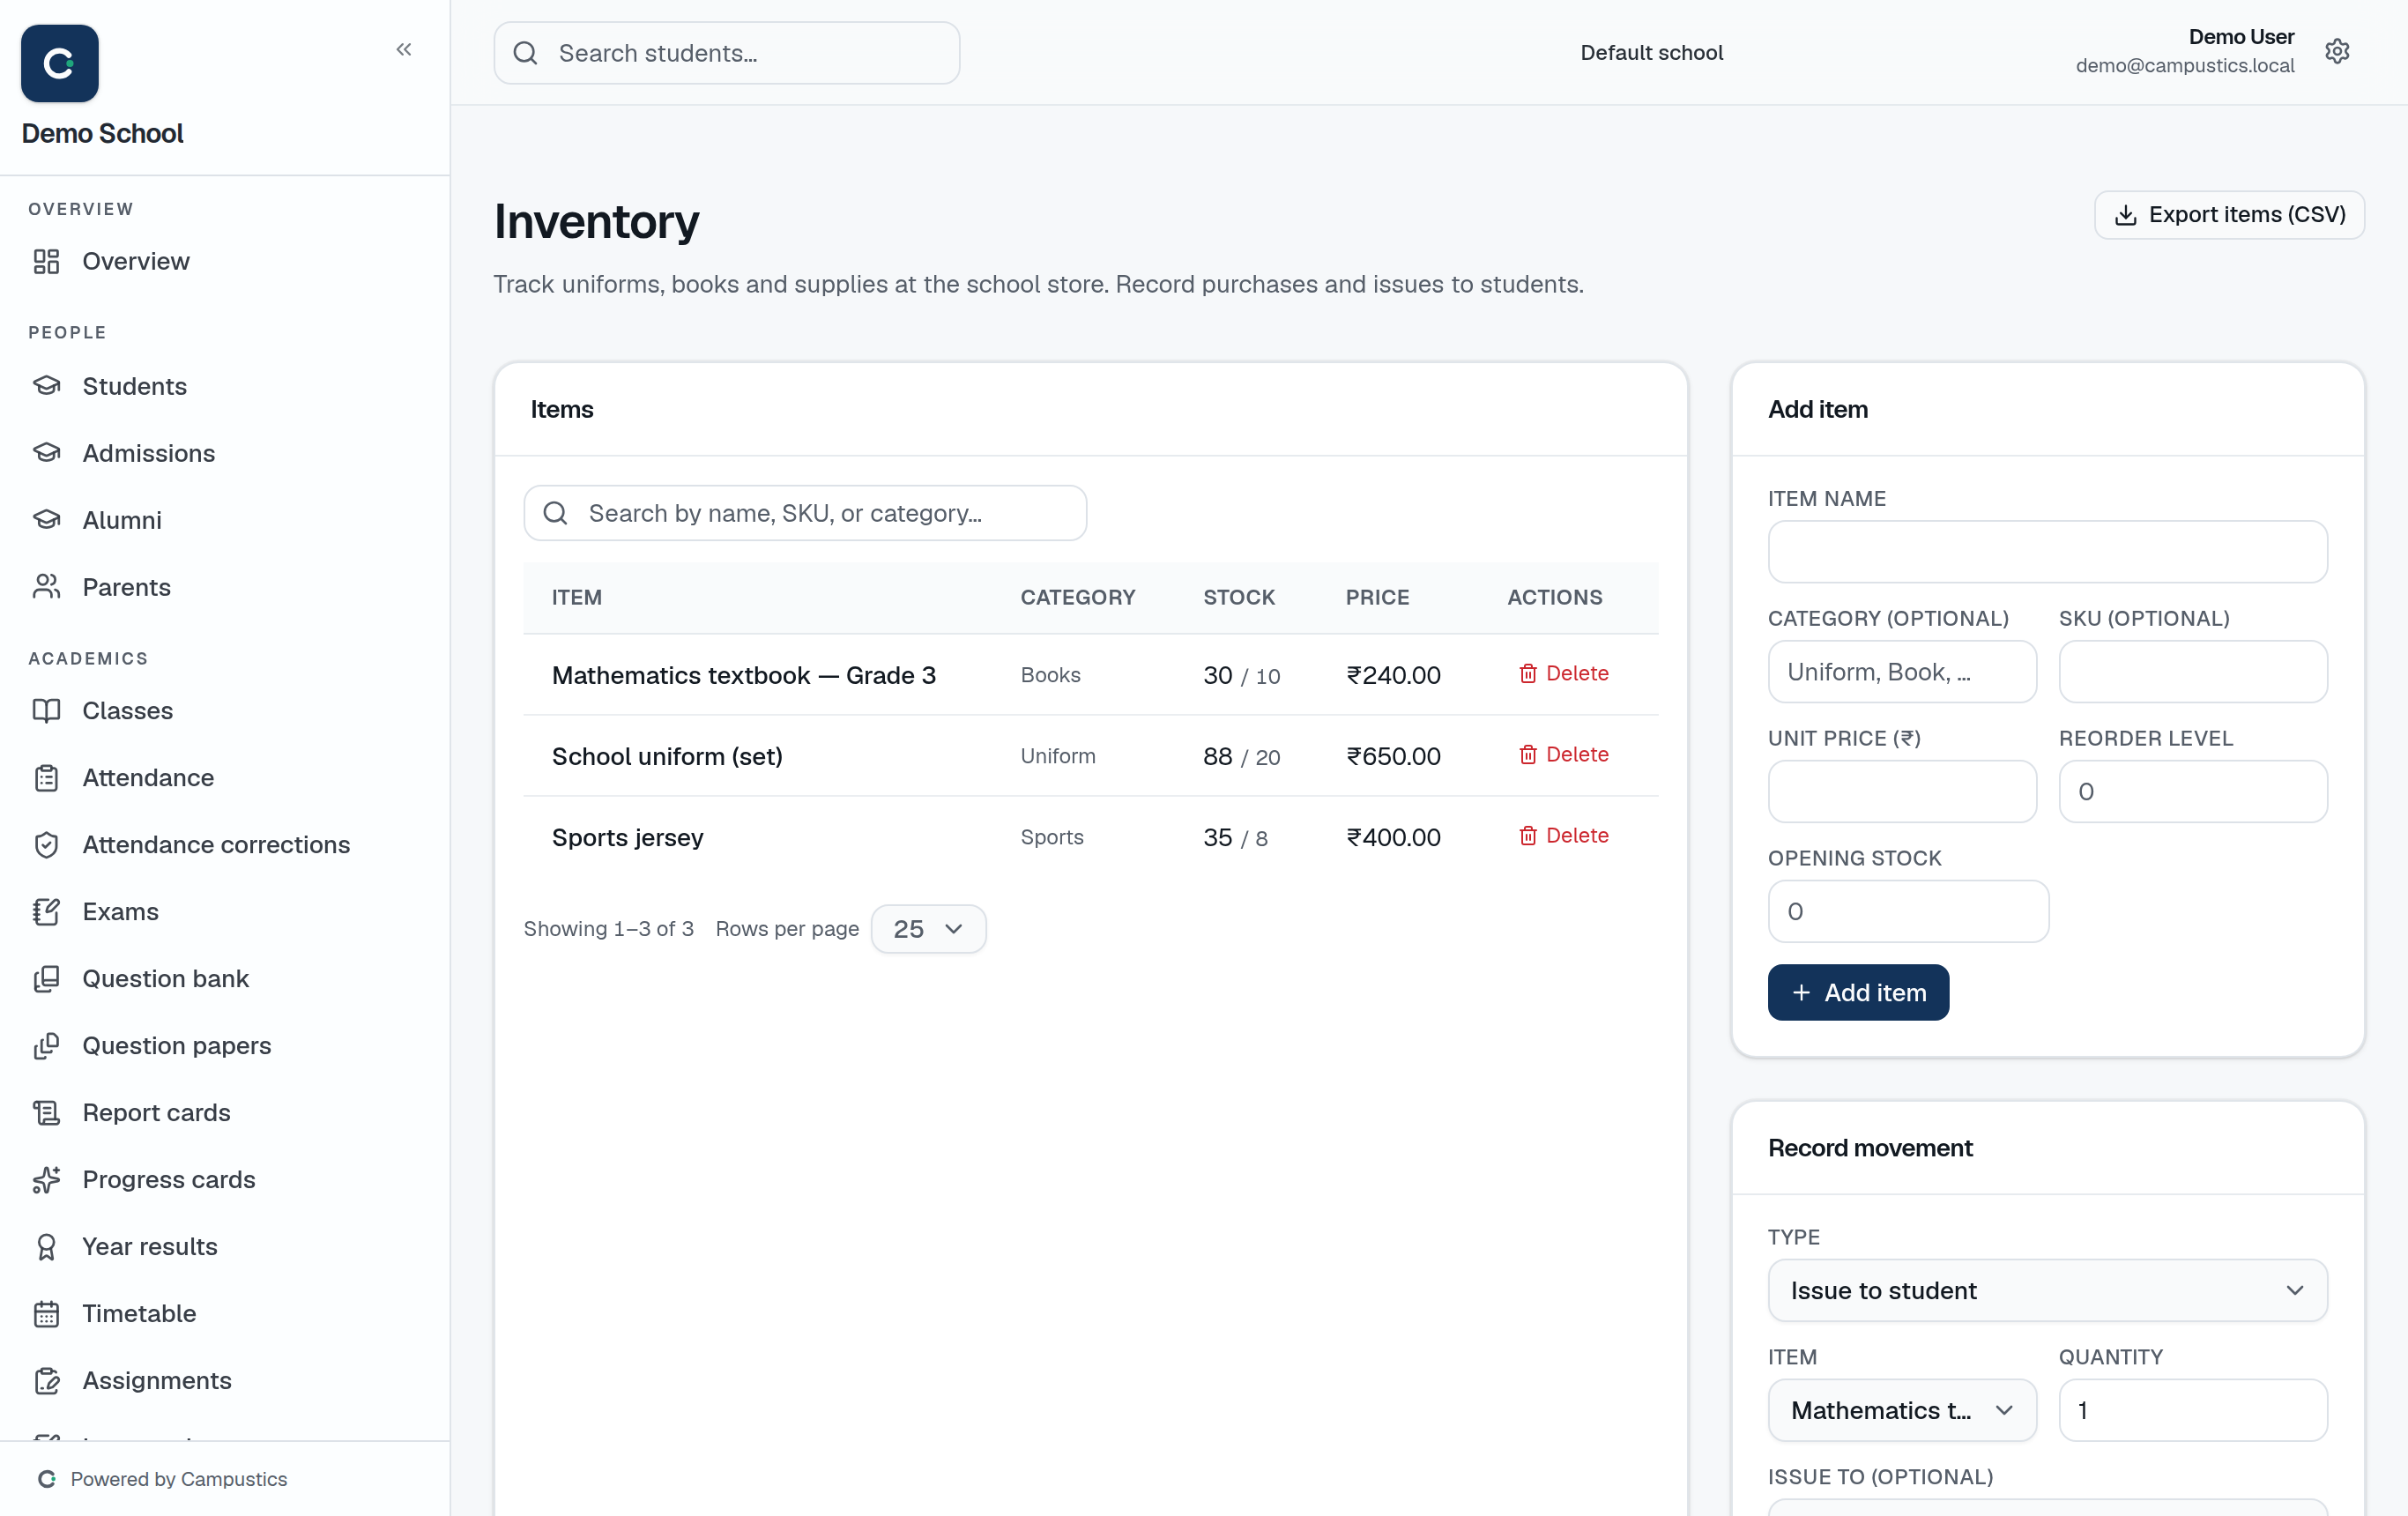
  1. 1

    Add stock items

    Go to Inventory and add non-book items — uniforms, stationery, sports kit — with quantities.

    The Inventory page
  2. 2

    Issue and reorder

    Record purchases and issues to students; set a reorder threshold per item so low stock is flagged.

    Tip: Books live in the Library module; Inventory is for everything else.

View finance reports

Accountant · 2 min

See fee collection, outstanding dues, and defaulters — and export them.

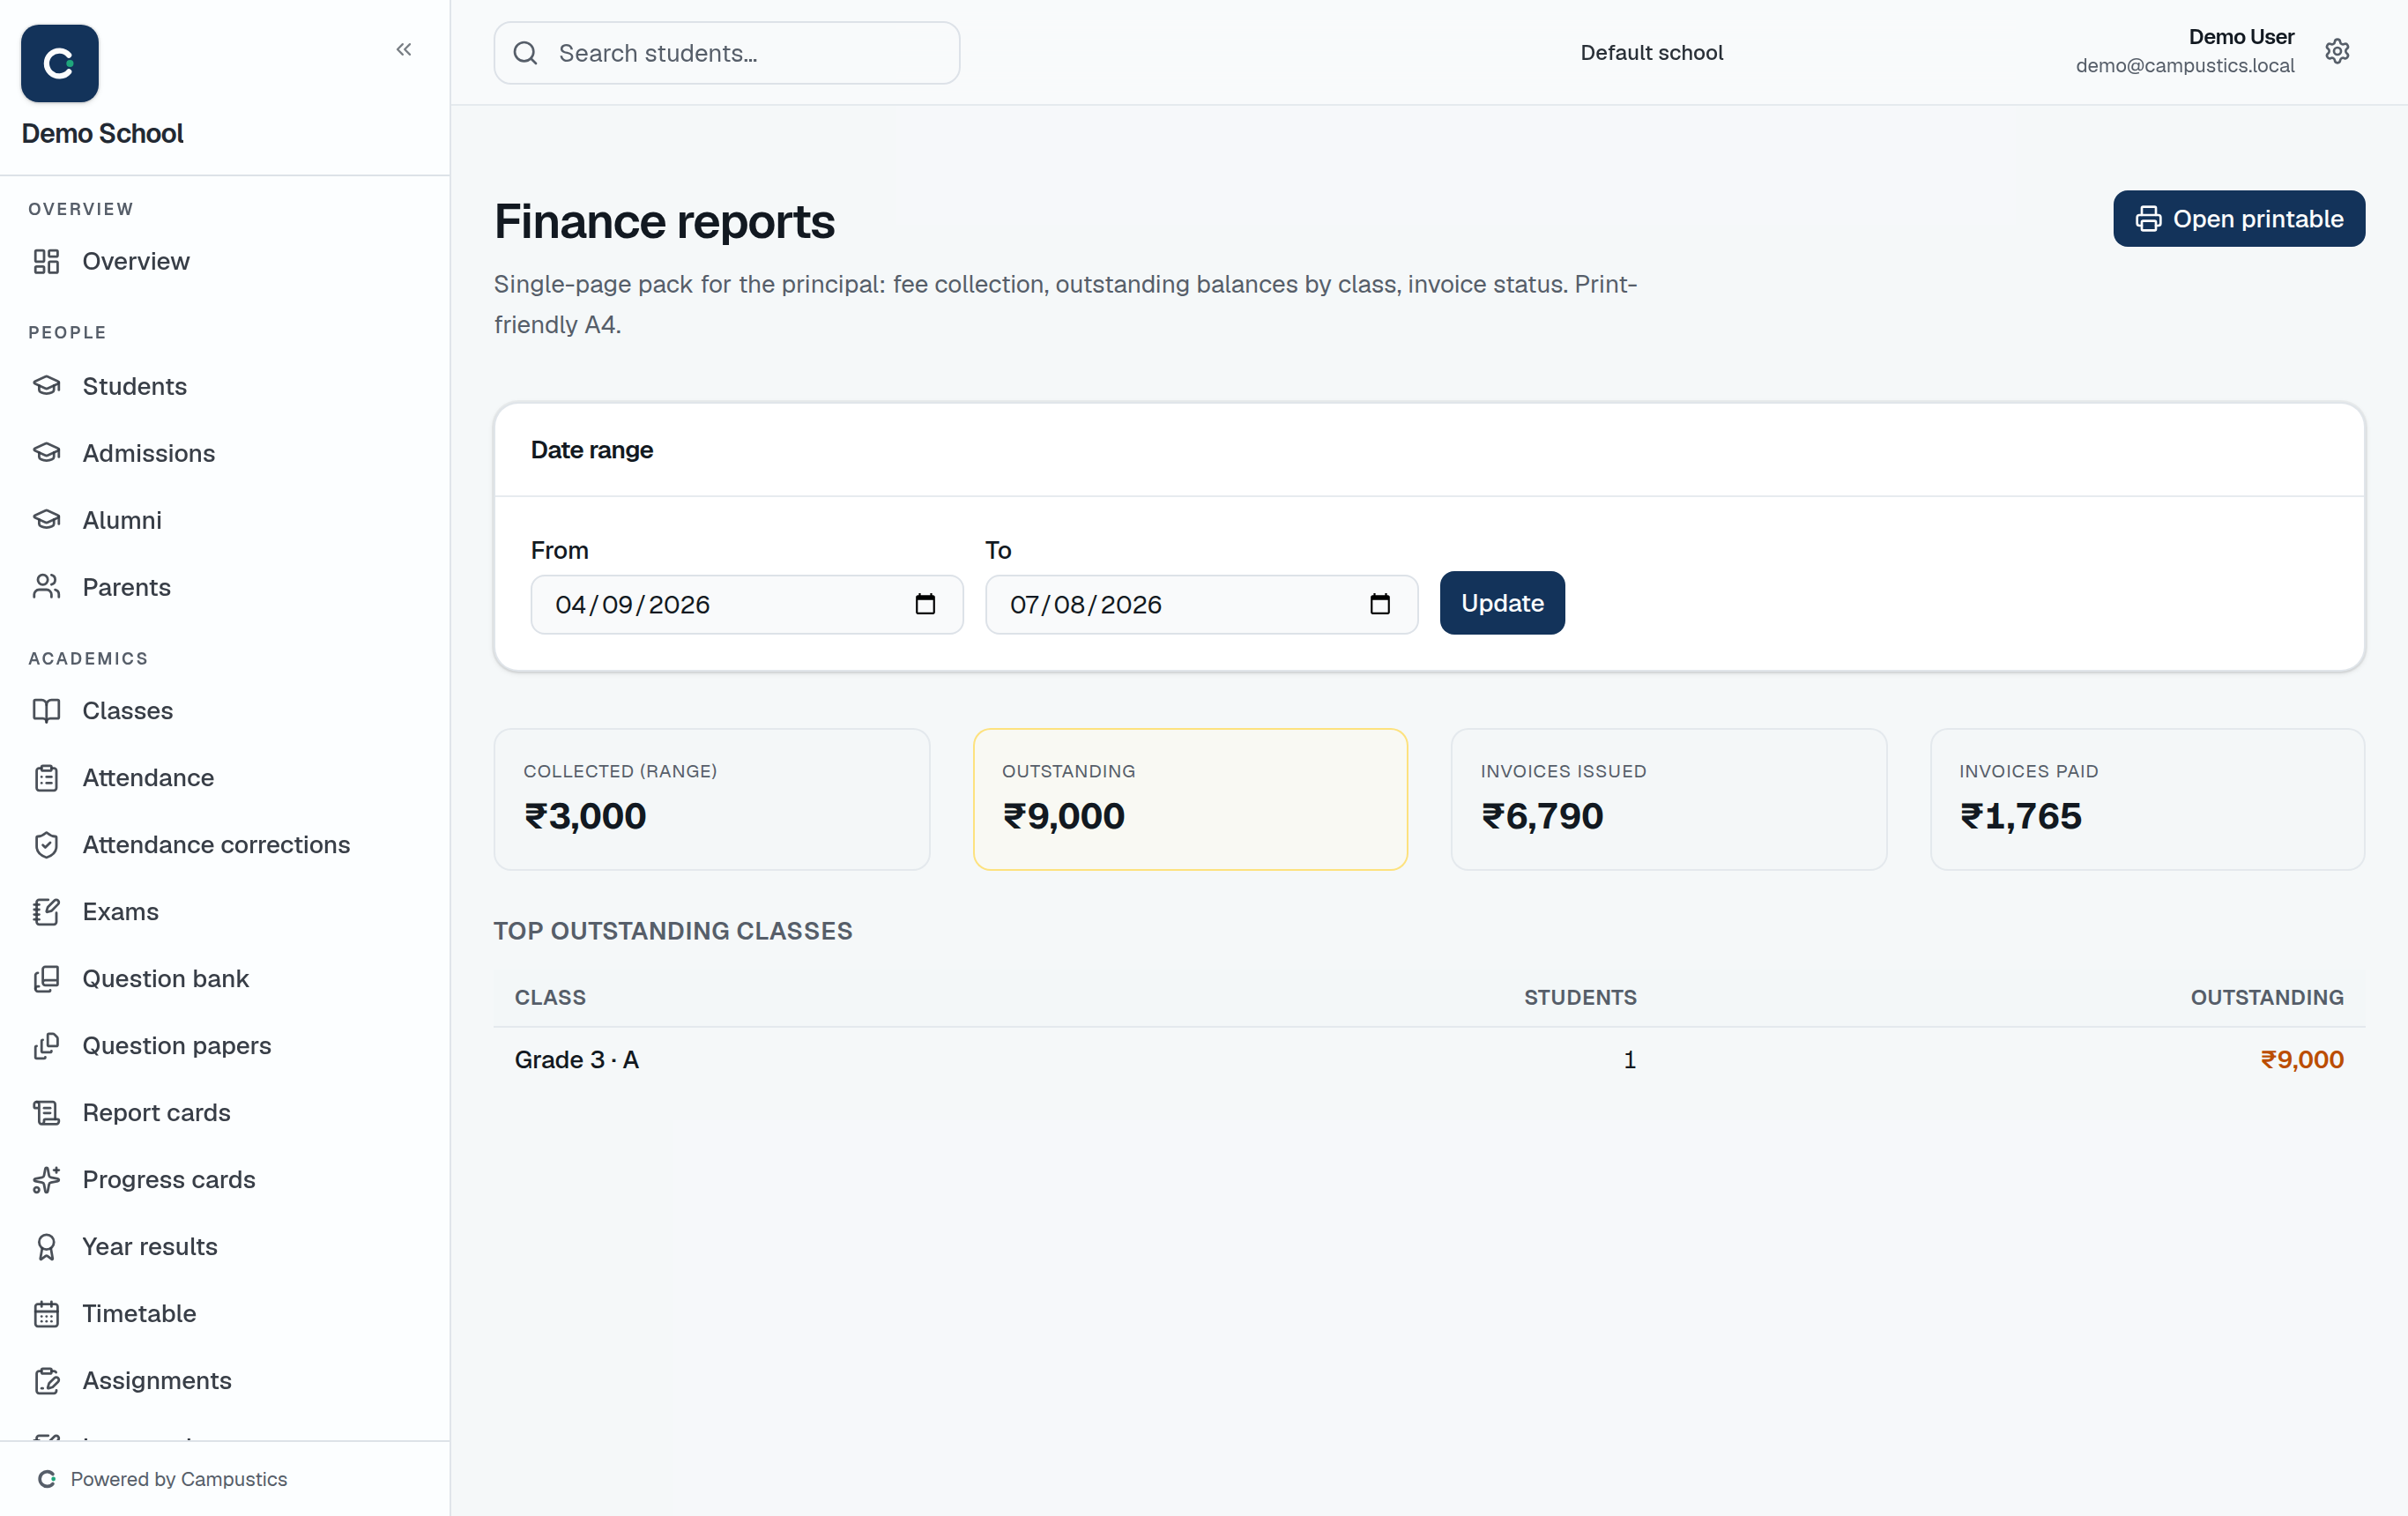
  1. 1

    Open finance reports

    Go to Finance reports for fee collection, outstanding dues, and a defaulters list.

    Finance reports
  2. 2

    Print or export

    Print any report as A4, or download a CSV for your records.

    Tip: Overdue fees refresh automatically, so the defaulter list is always current.

Communication

Send a circular to parents

Admin · 2 min

Broadcast an announcement to everyone, or to a specific audience or class.

  1. 1

    Open Circulars

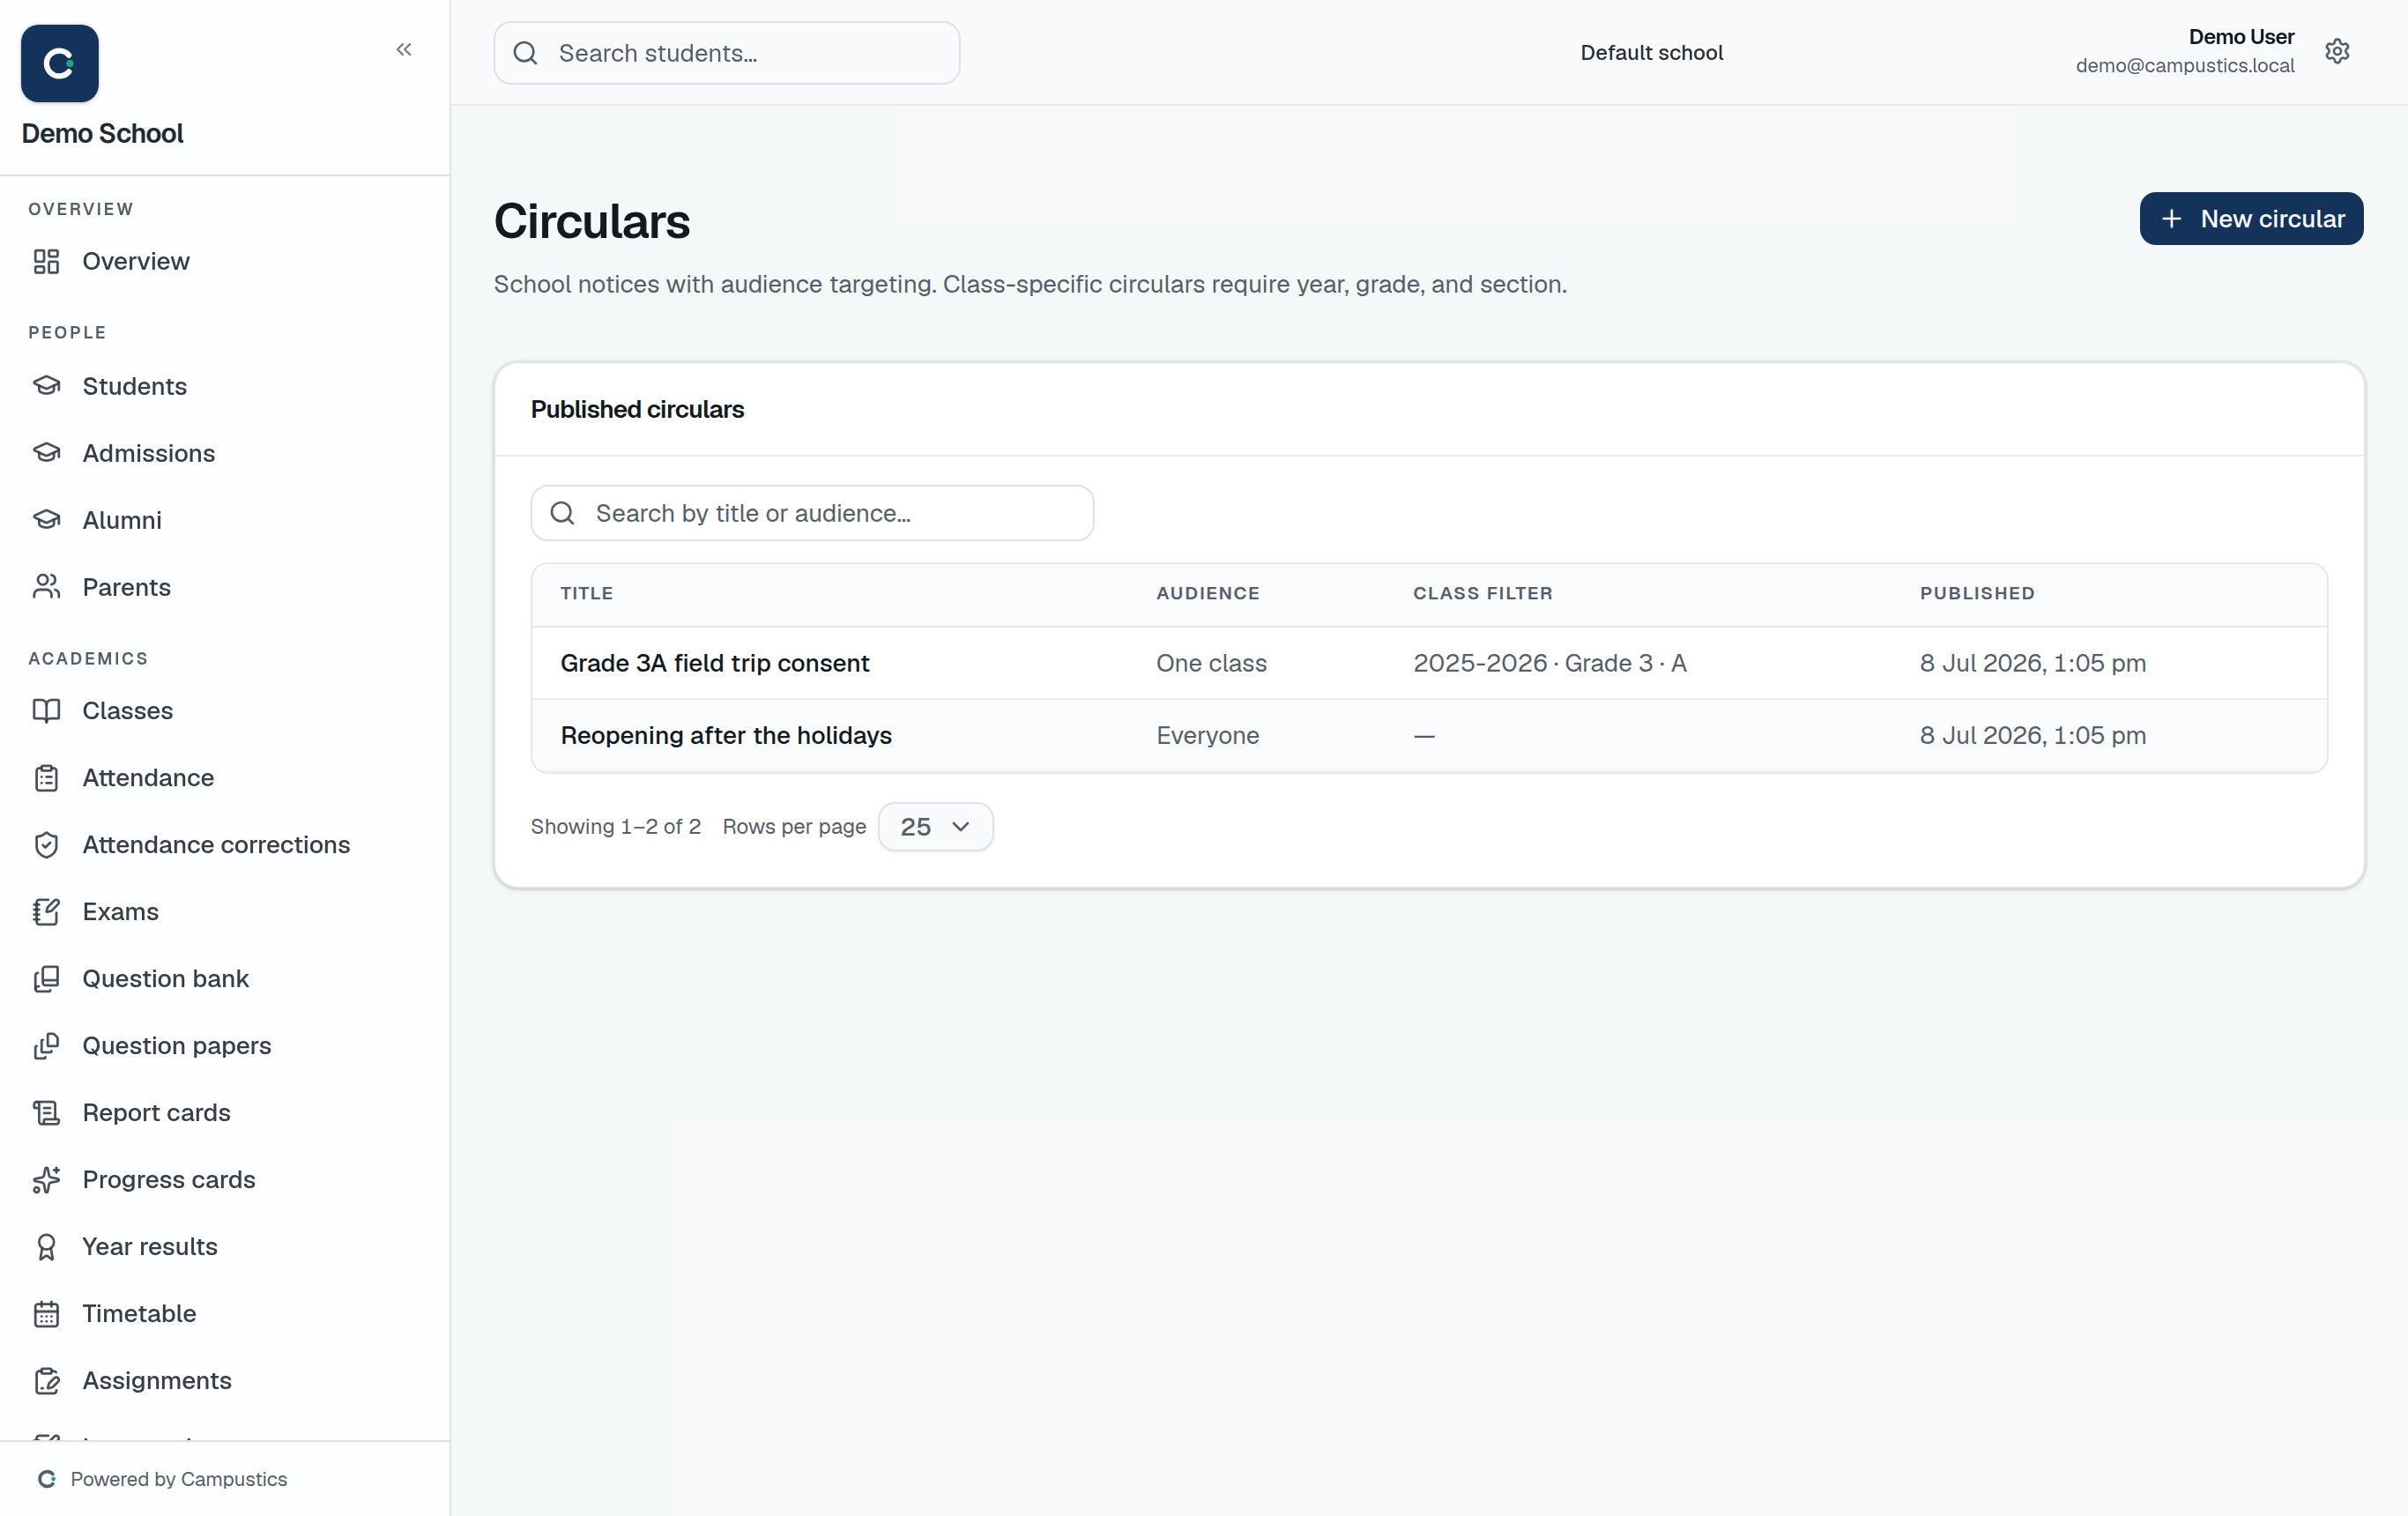
    Go to Circulars and click New circular.

    The Circulars page
  2. 2

    Choose the audience

    Pick who should see it — everyone, parents, students, staff, or a specific class — then write your message.

    Tip: For homework and day-to-day class notes, use the Diary instead — parents see the latest entry for their child on their portal.

  3. 3

    Publish

    Publish the circular. It appears in the recipients' portals and, once SMS is switched on, goes out as a text too.

Notifications and alerts

Admin · 2 min

Understand the automatic alerts Campustics sends to parents and students.

  1. 1

    See what's sent

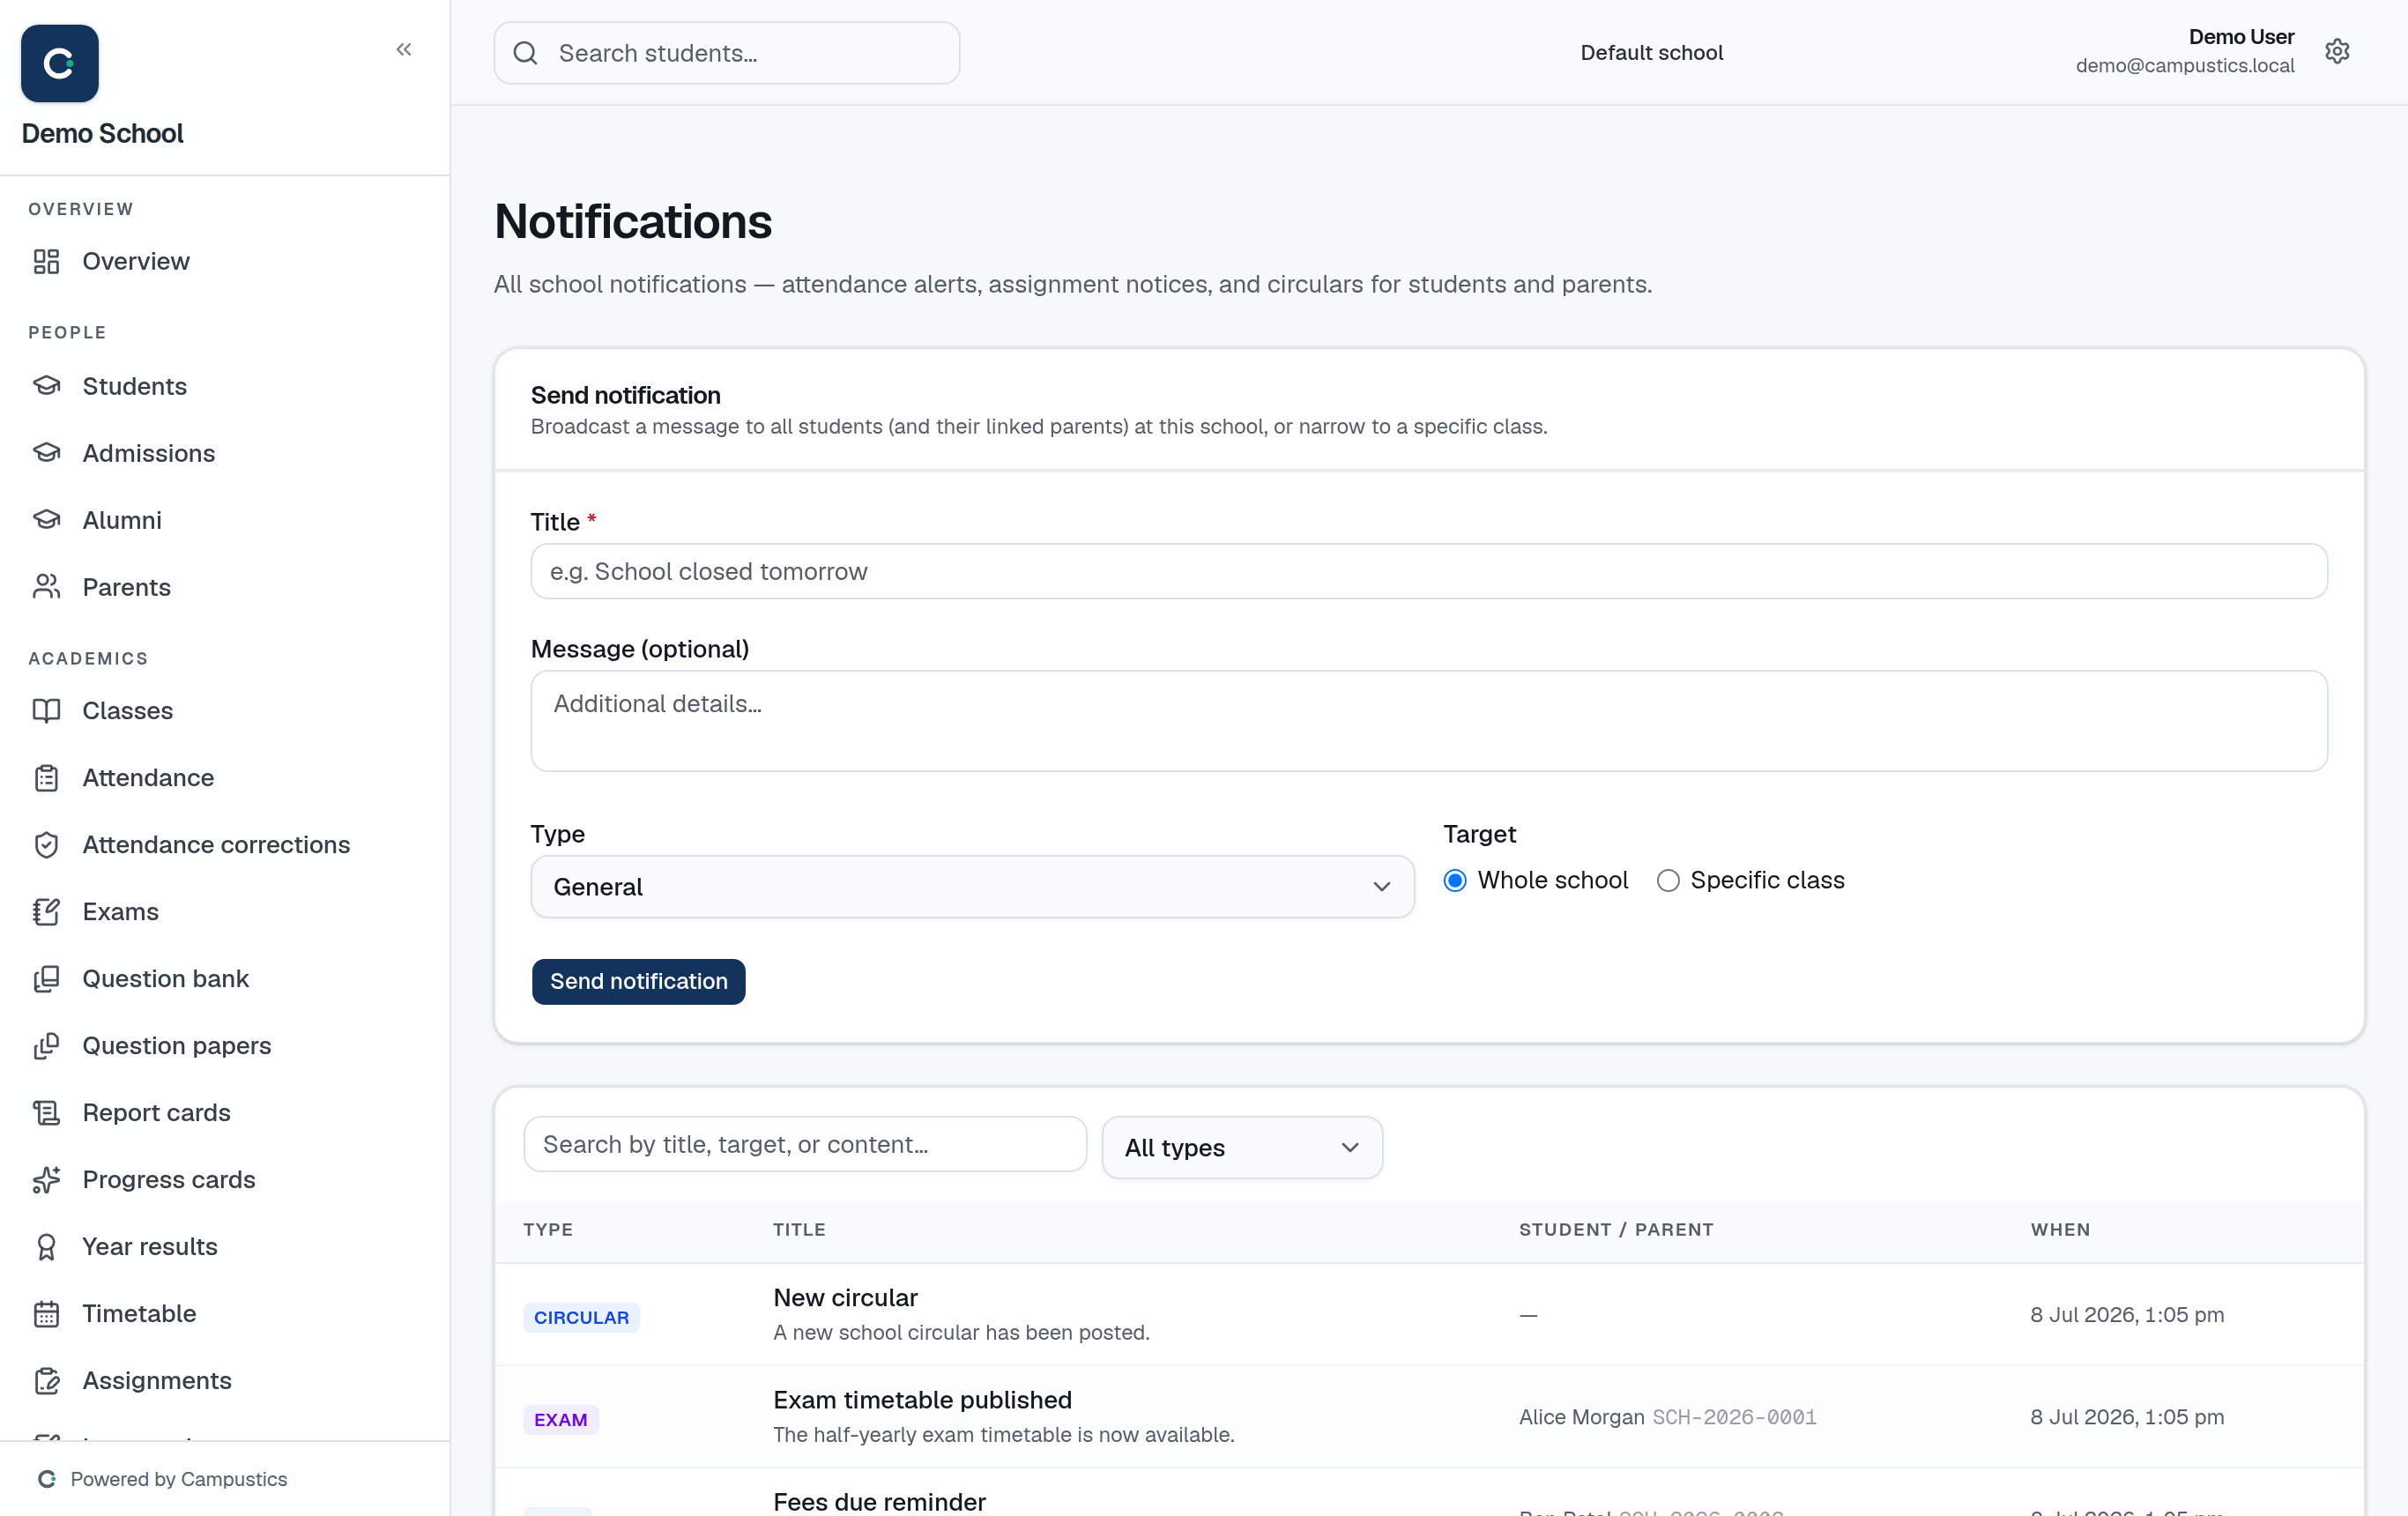
    Notifications collects system alerts — absence, new marks, new assignments, published results, overdue fees — delivered to parents and students in-app.

    The Notifications page
  2. 2

    Absence alerts are automatic

    Every 'absent' attendance mark already triggers an SMS to the parent once SMS is switched on — no action needed.

    Tip: Broadcasts you write yourself go through Circulars; Notifications are system-generated.

Operations

Manage transport

Admin · 5 min

Set up vehicles and routes, assign students, and offer live bus tracking.

  1. 1

    Add vehicles and routes

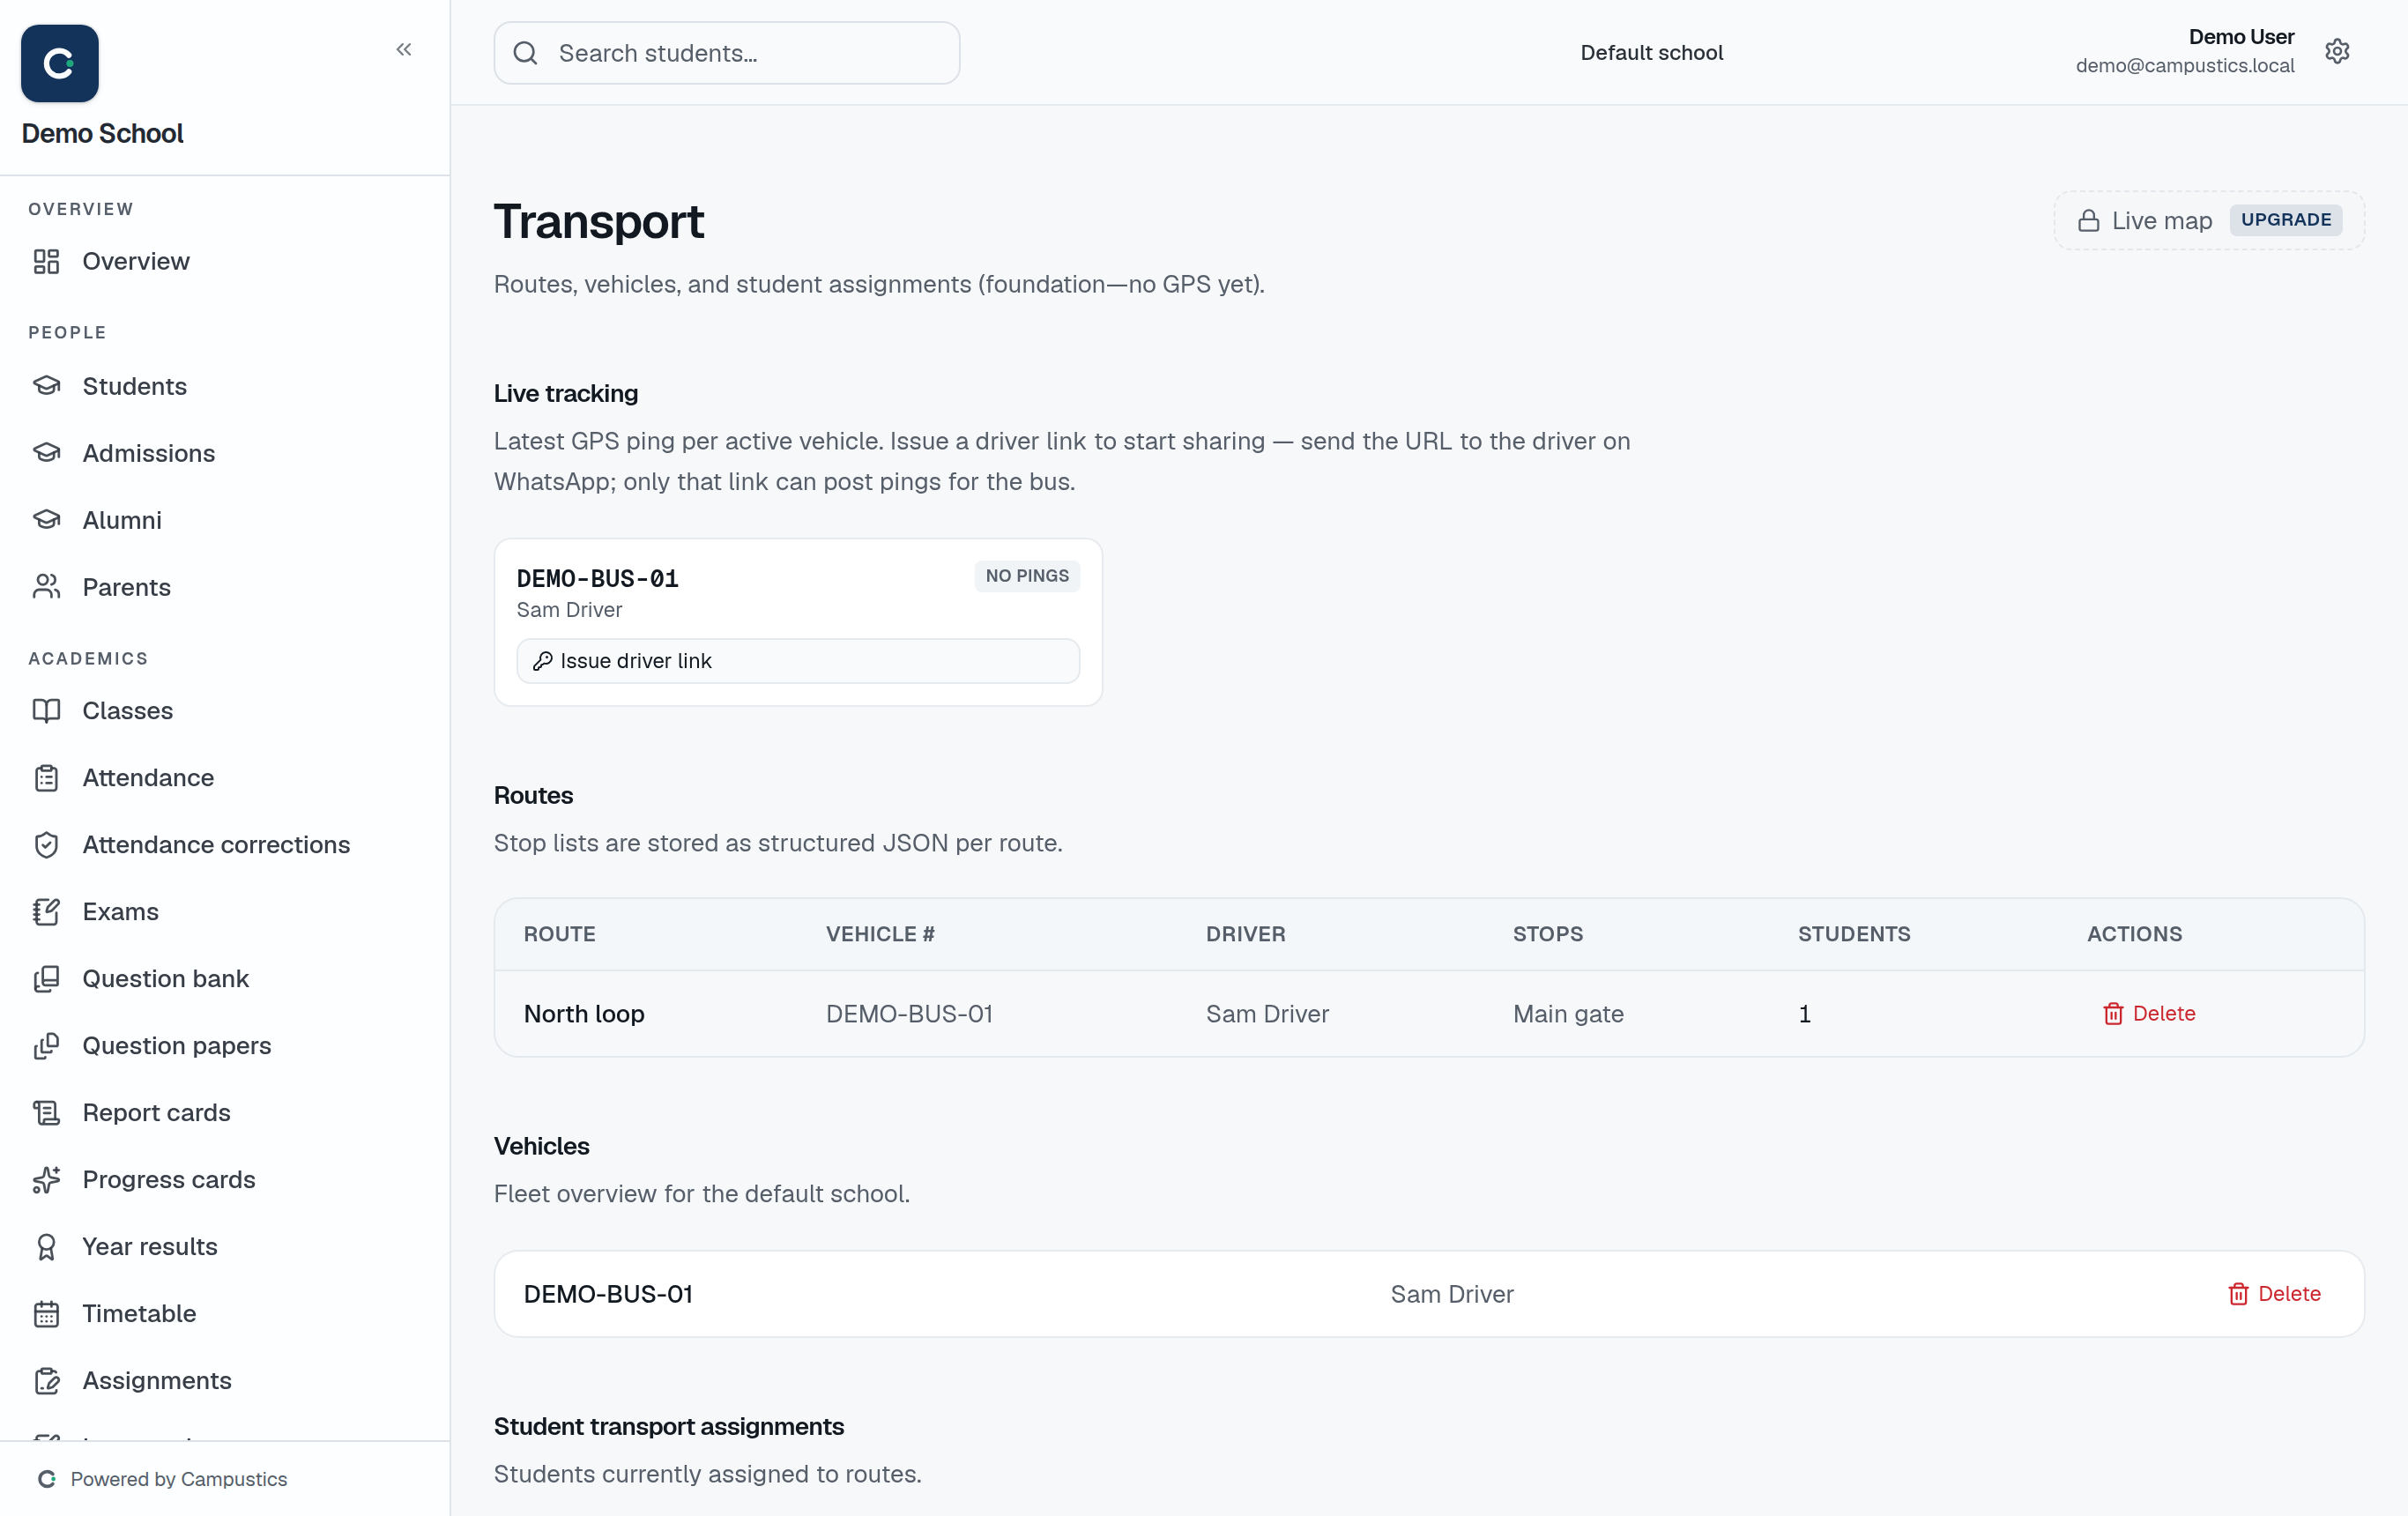
    Go to Transport and add vehicles (registration, capacity, driver) and routes with their stops and pickup times.

    The Transport page
  2. 2

    Assign students to routes

    Assign each student who uses transport to a route.

  3. 3

    Live bus tracking

    The driver shares phone GPS through a one-shot link; parents watch the bus's live position on the tracking page.

    Tip: No hardware needed — the driver's phone is the tracker.

Run the library

Admin · 3 min

Keep a book catalog, issue and return books, and chase overdue copies.

  1. 1

    Add your catalog

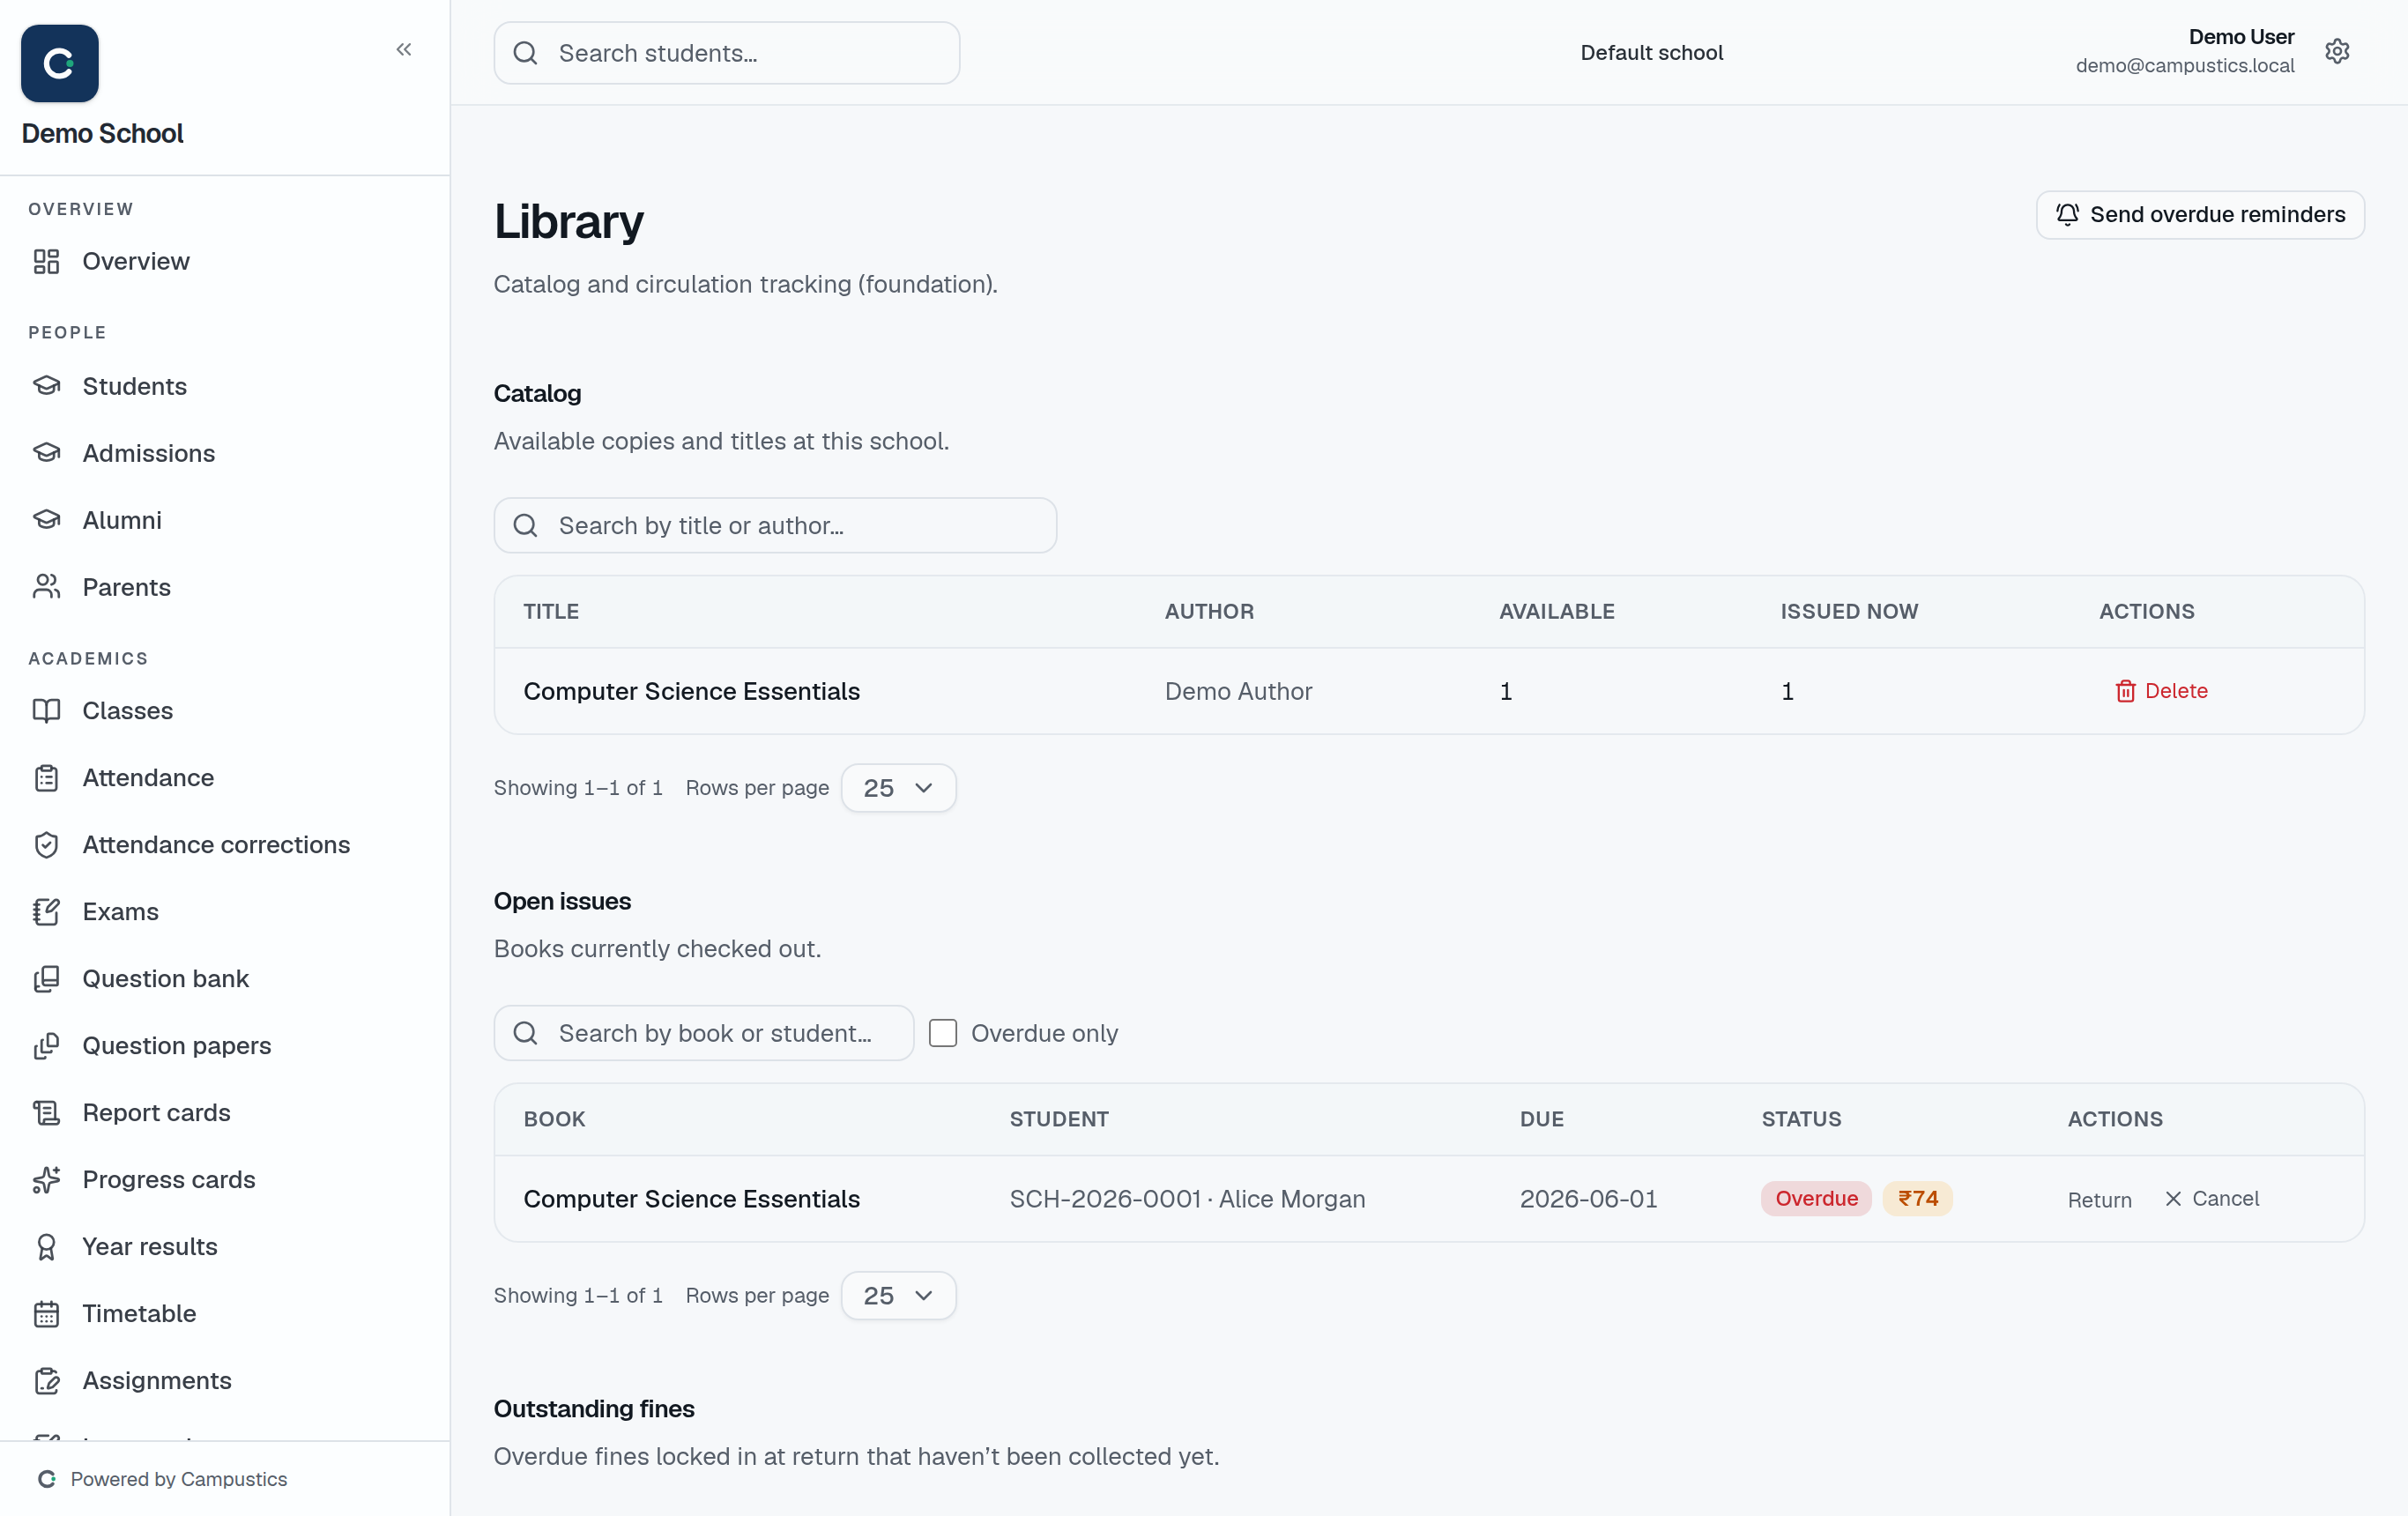
    Go to Library and add books to the catalog.

    The Library page
  2. 2

    Issue and return

    Issue a book to a student and record returns.

    Tip: Overdue reminders go by SMS to both the student and the parent.

  3. 3

    Track overdue

    The overdue list shows who is holding books past the due date.

Manage hostel and medical records

Admin · 4 min

Run hostel rooms and beds, and keep each student's health profile.

  1. 1

    Set up the hostel

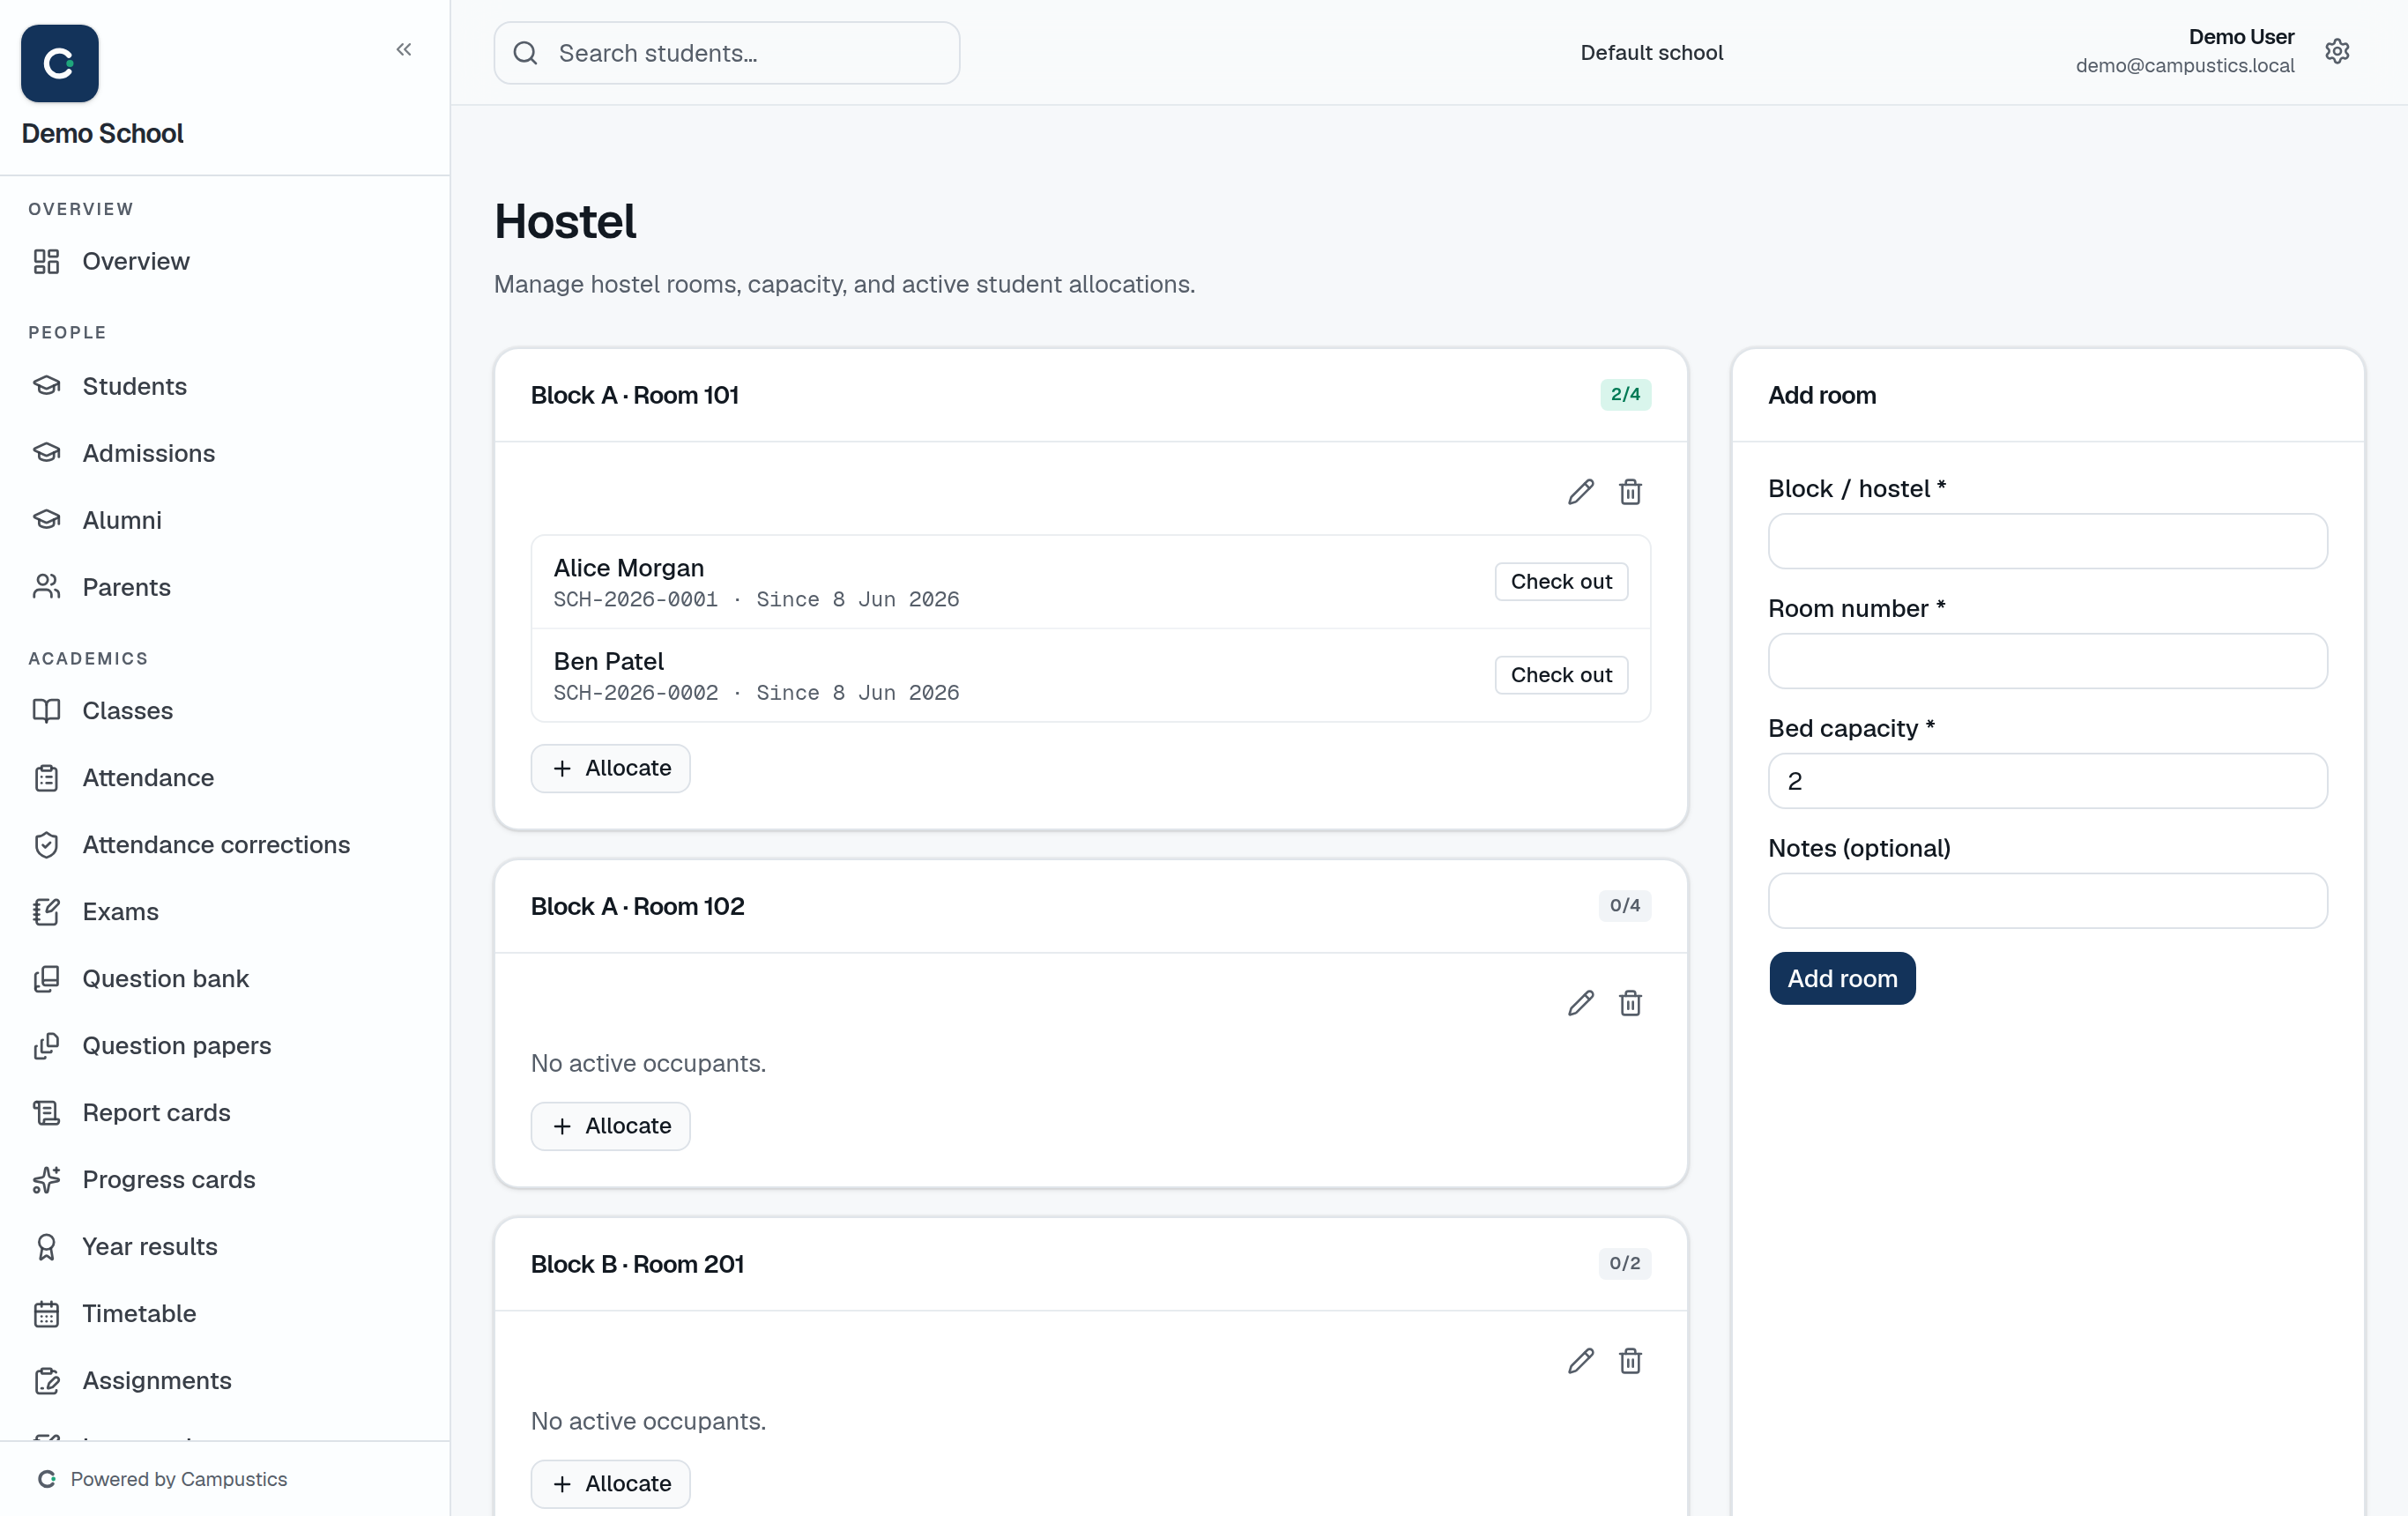
    Go to Hostel to manage rooms, bed assignments, mess attendance, and hostel leave applications.

    The Hostel page
  2. 2

    Assign beds

    Assign students to rooms and beds.

  3. 3

    Keep medical records

    Under Medical, keep each student's health profile (allergies, conditions, prescriptions), an incident log for clinic visits, and a vaccination tracker.

    Tip: Medical records are sensitive — access is limited to staff you grant the medical permission.

Log behaviour

Teacher · 2 min

Record positive shoutouts and incidents that feed the conduct grade.

  1. 1

    Record a note

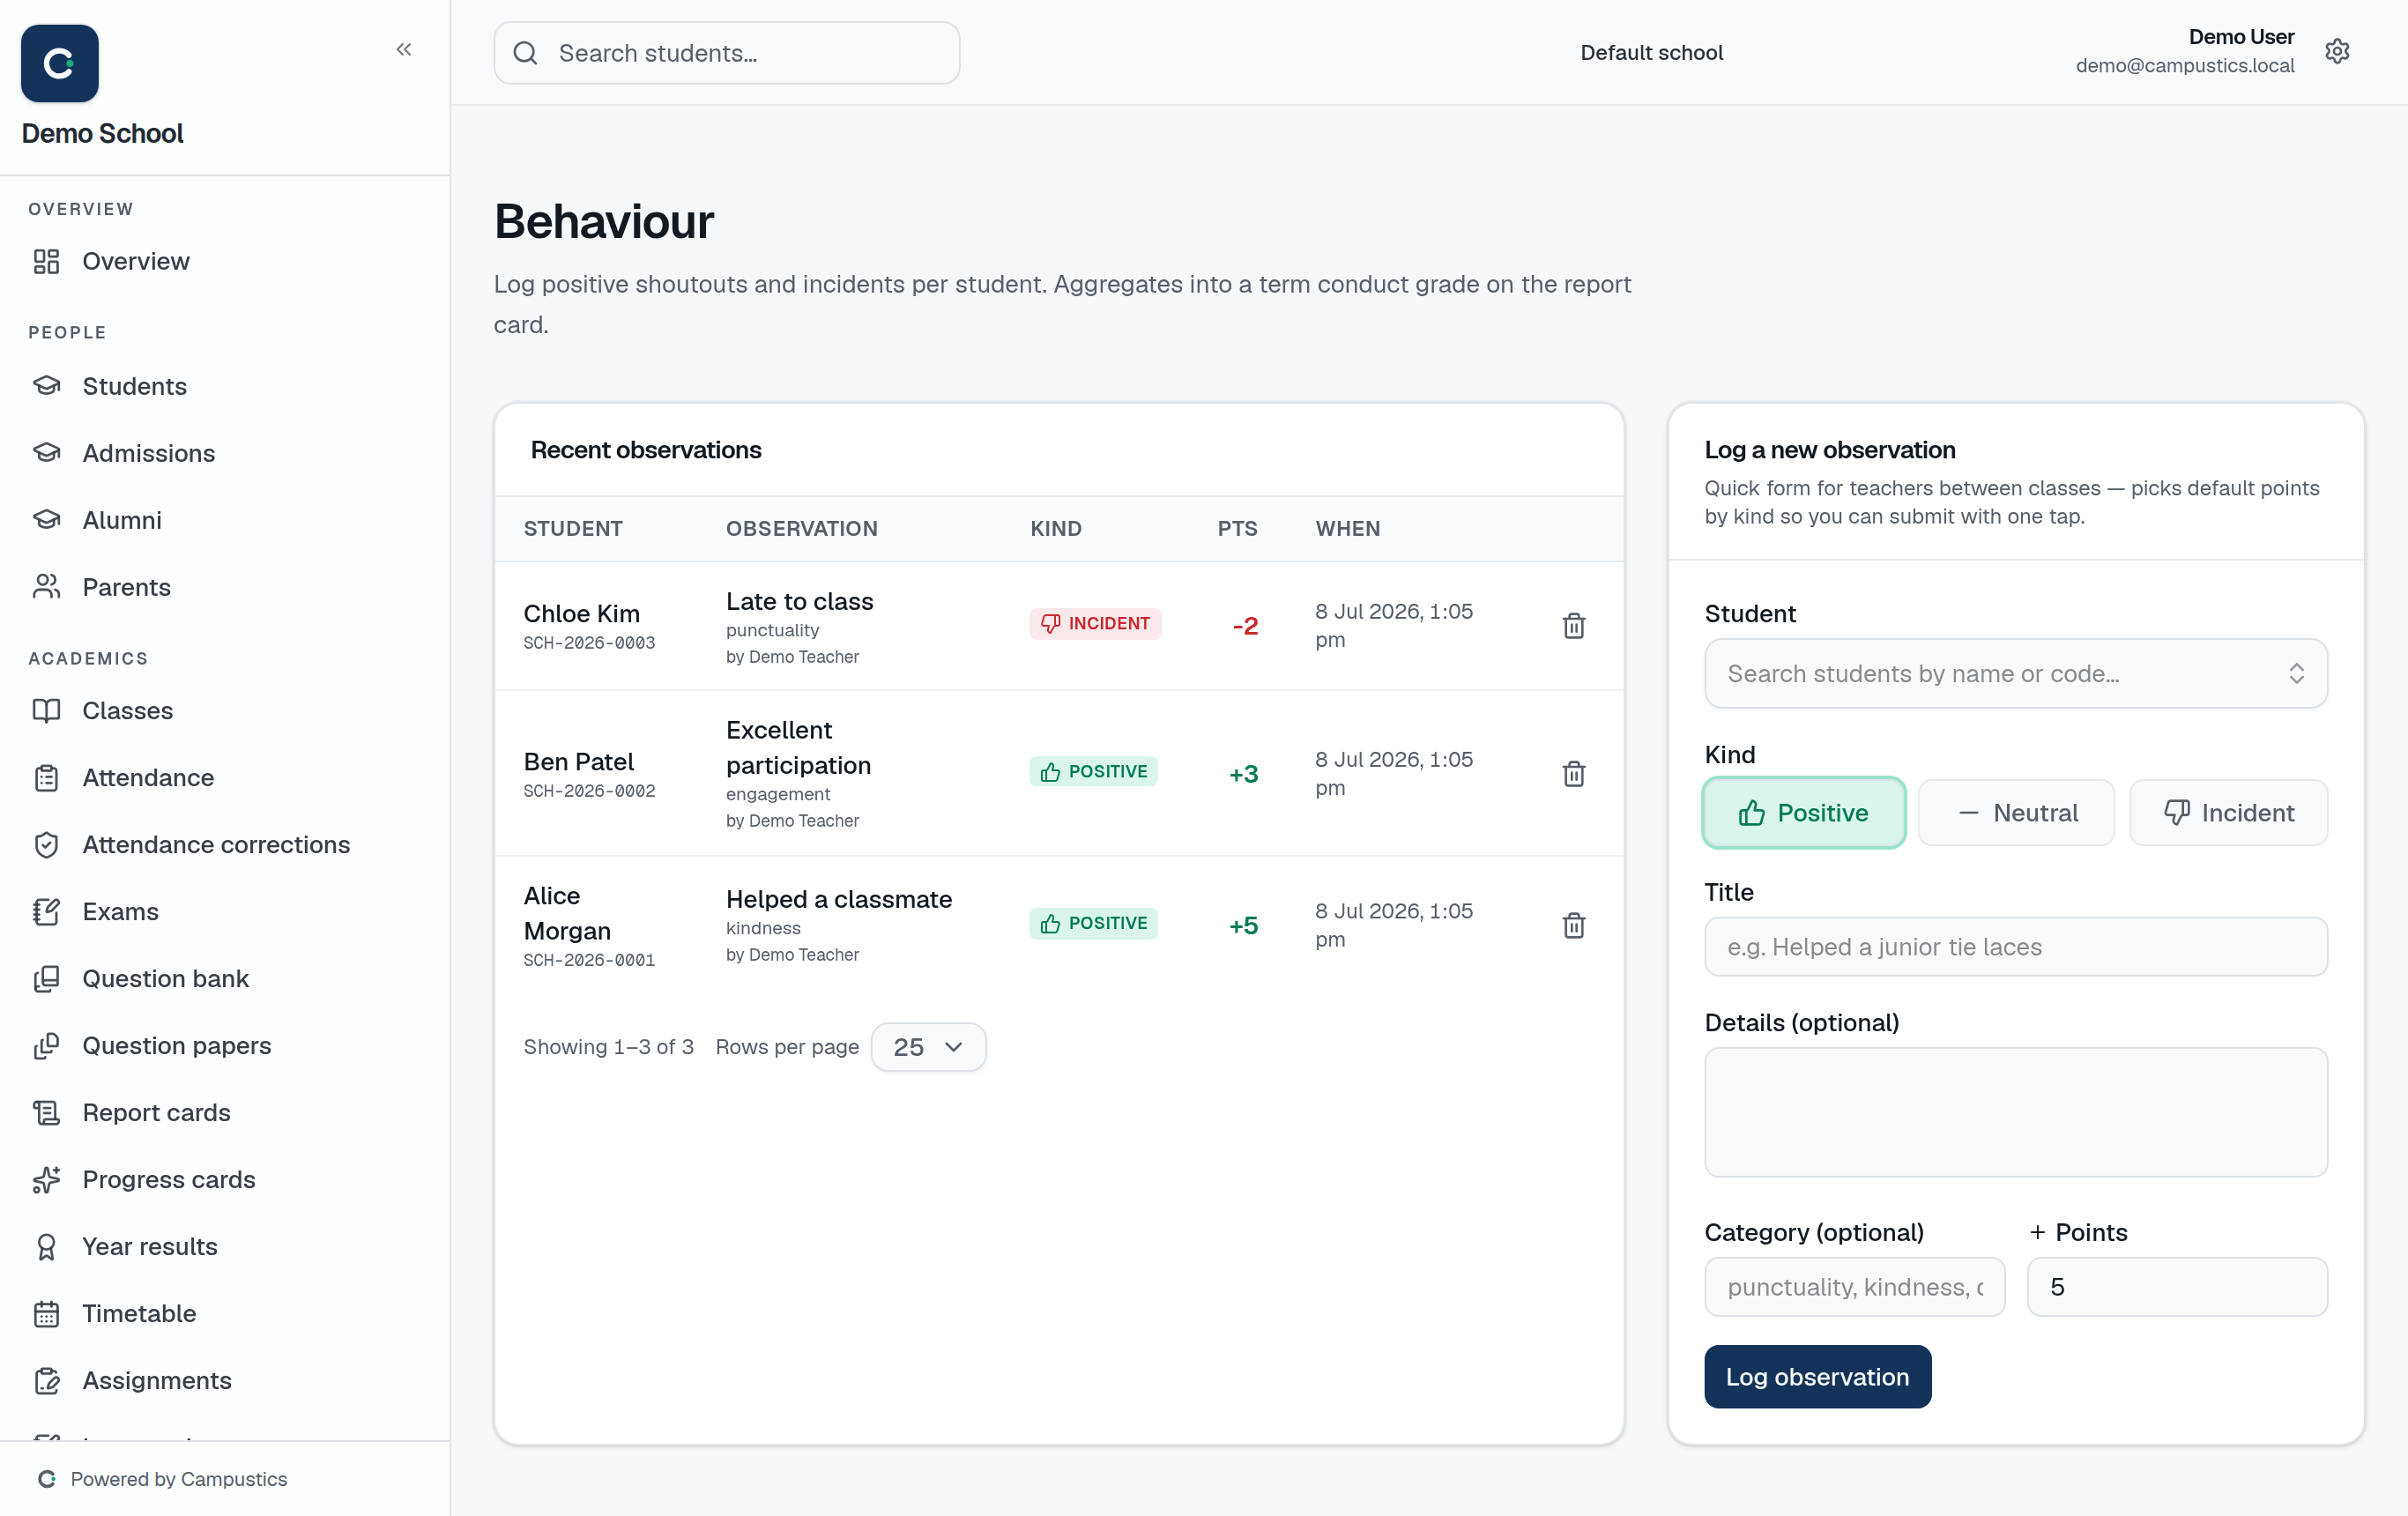
    Go to Behaviour and log a positive shoutout or an incident for a student.

    The Behaviour page
  2. 2

    Feeds the conduct grade

    Behaviour records roll into the term conduct grade on report cards.

    Tip: Keep notes factual and brief — parents may see conduct on the report card.

Register visitors

Admin · 2 min

Log campus visitors and print them a gate pass.

  1. 1

    Register a visitor

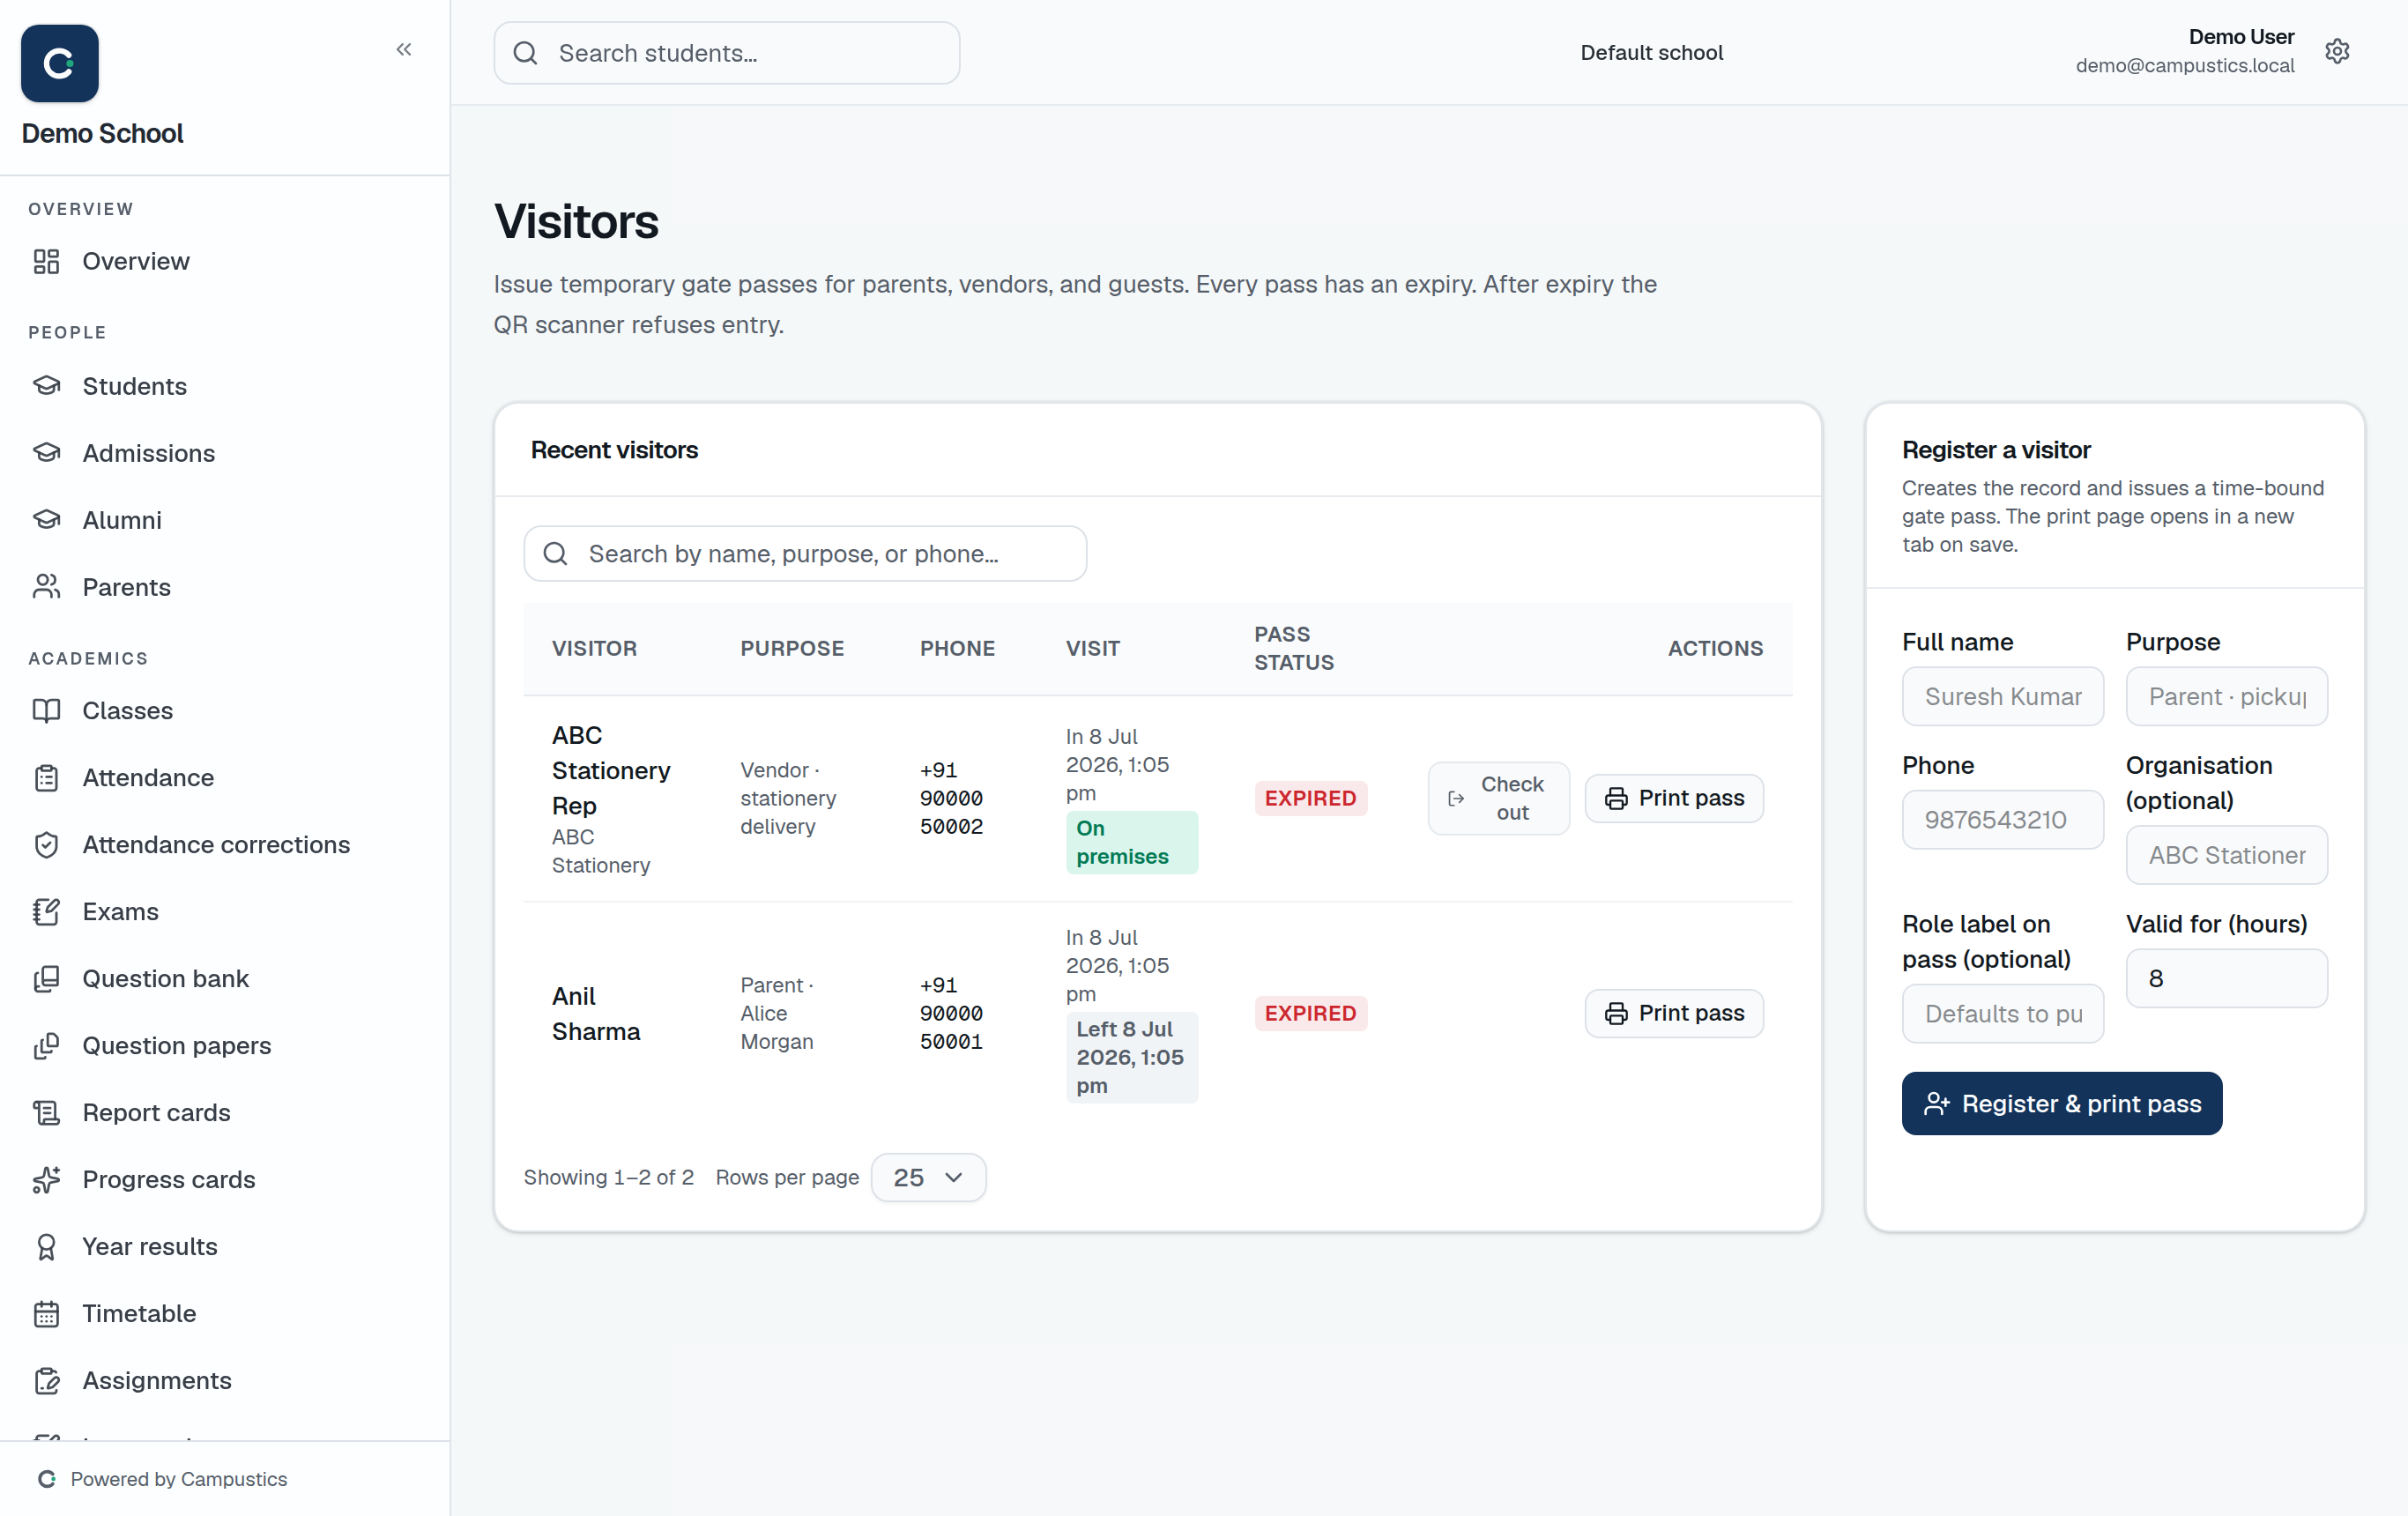
    Go to Visitors and create a visitor with their details and reason for the visit.

    The Visitors page
  2. 2

    Print a gate pass

    Print a visitor ID card for campus access.

    Tip: A visitor log is handy at audit time and for campus safety.

Apply for and approve leave

Anyone · 3 min

Staff apply for leave, see balances, and managers approve from a queue.

  1. 1

    Apply for leave

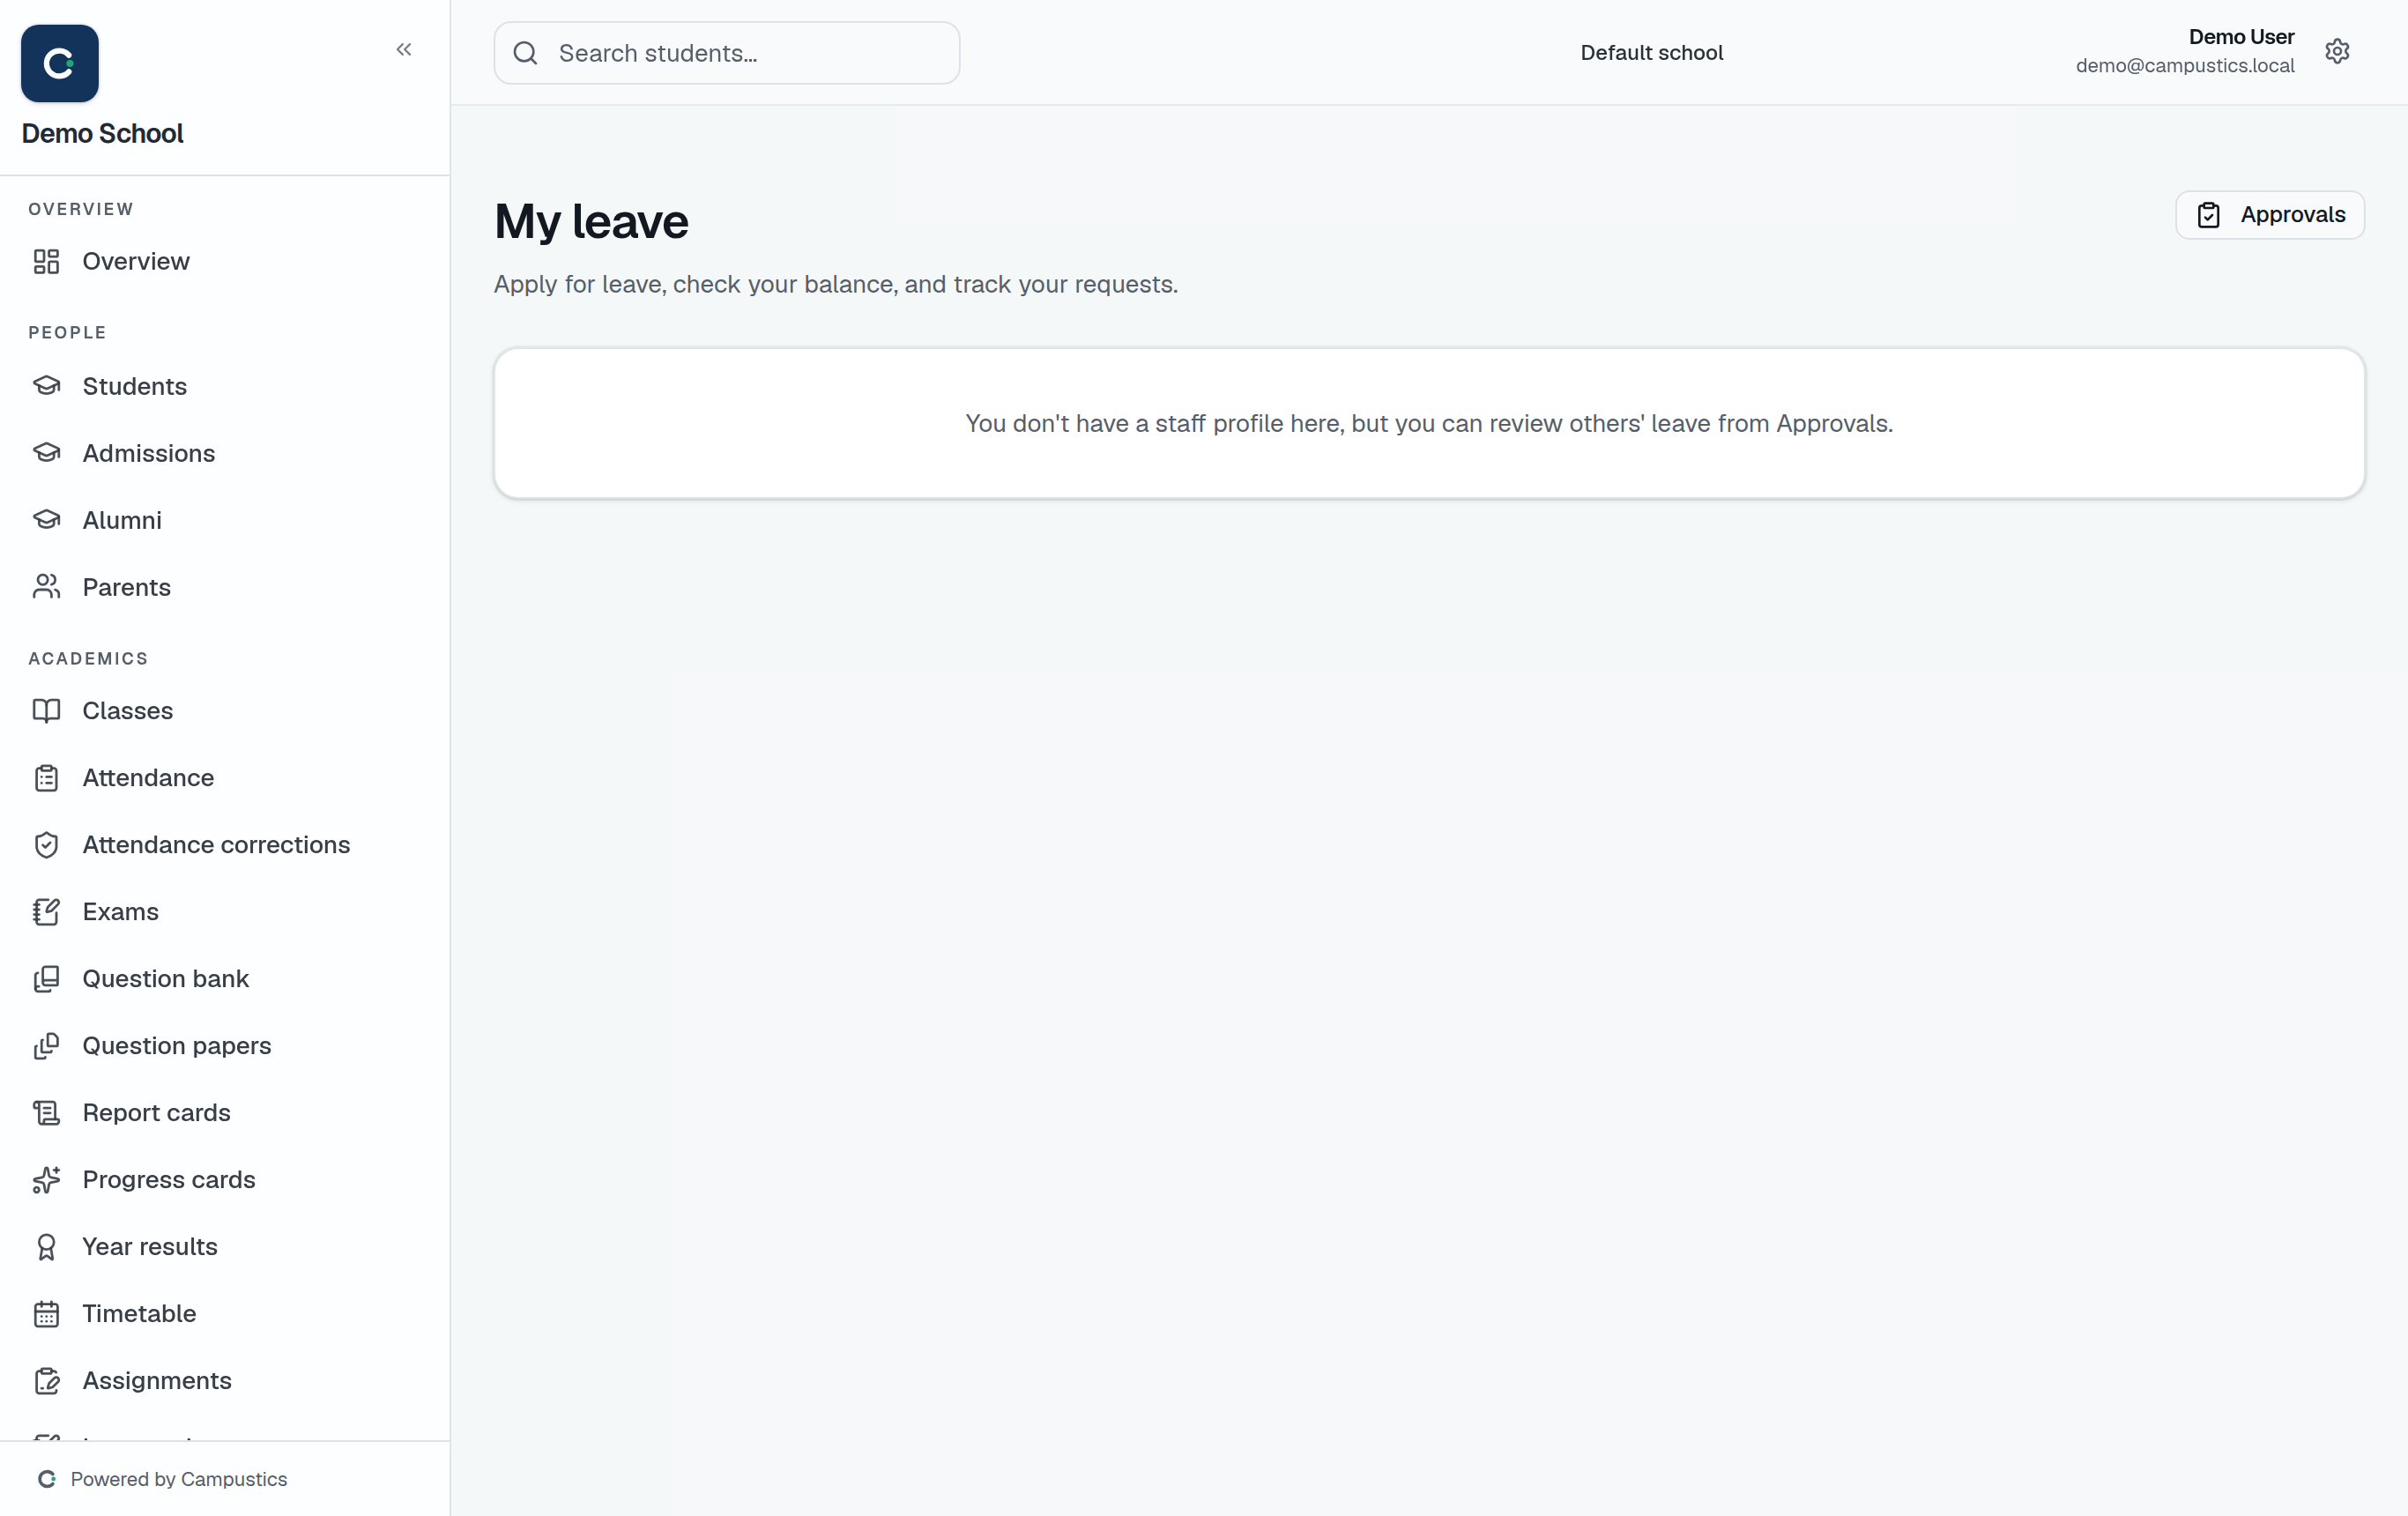
    Any staff member opens Leave, applies with dates and a reason, and sees their leave balances.

    The Leave page
  2. 2

    Approvers see a queue

    Managers get an approvals queue on the same page — approve or reject each request.

    Tip: Leave types and balances are set under Settings → Leave types.

  3. 3

    Parents apply too

    Parents can request leave for their child from their portal, which the school reviews.

Plan the calendar and share photos

Admin · 3 min

Add holidays and events, and share tagged event photos with parents.

  1. 1

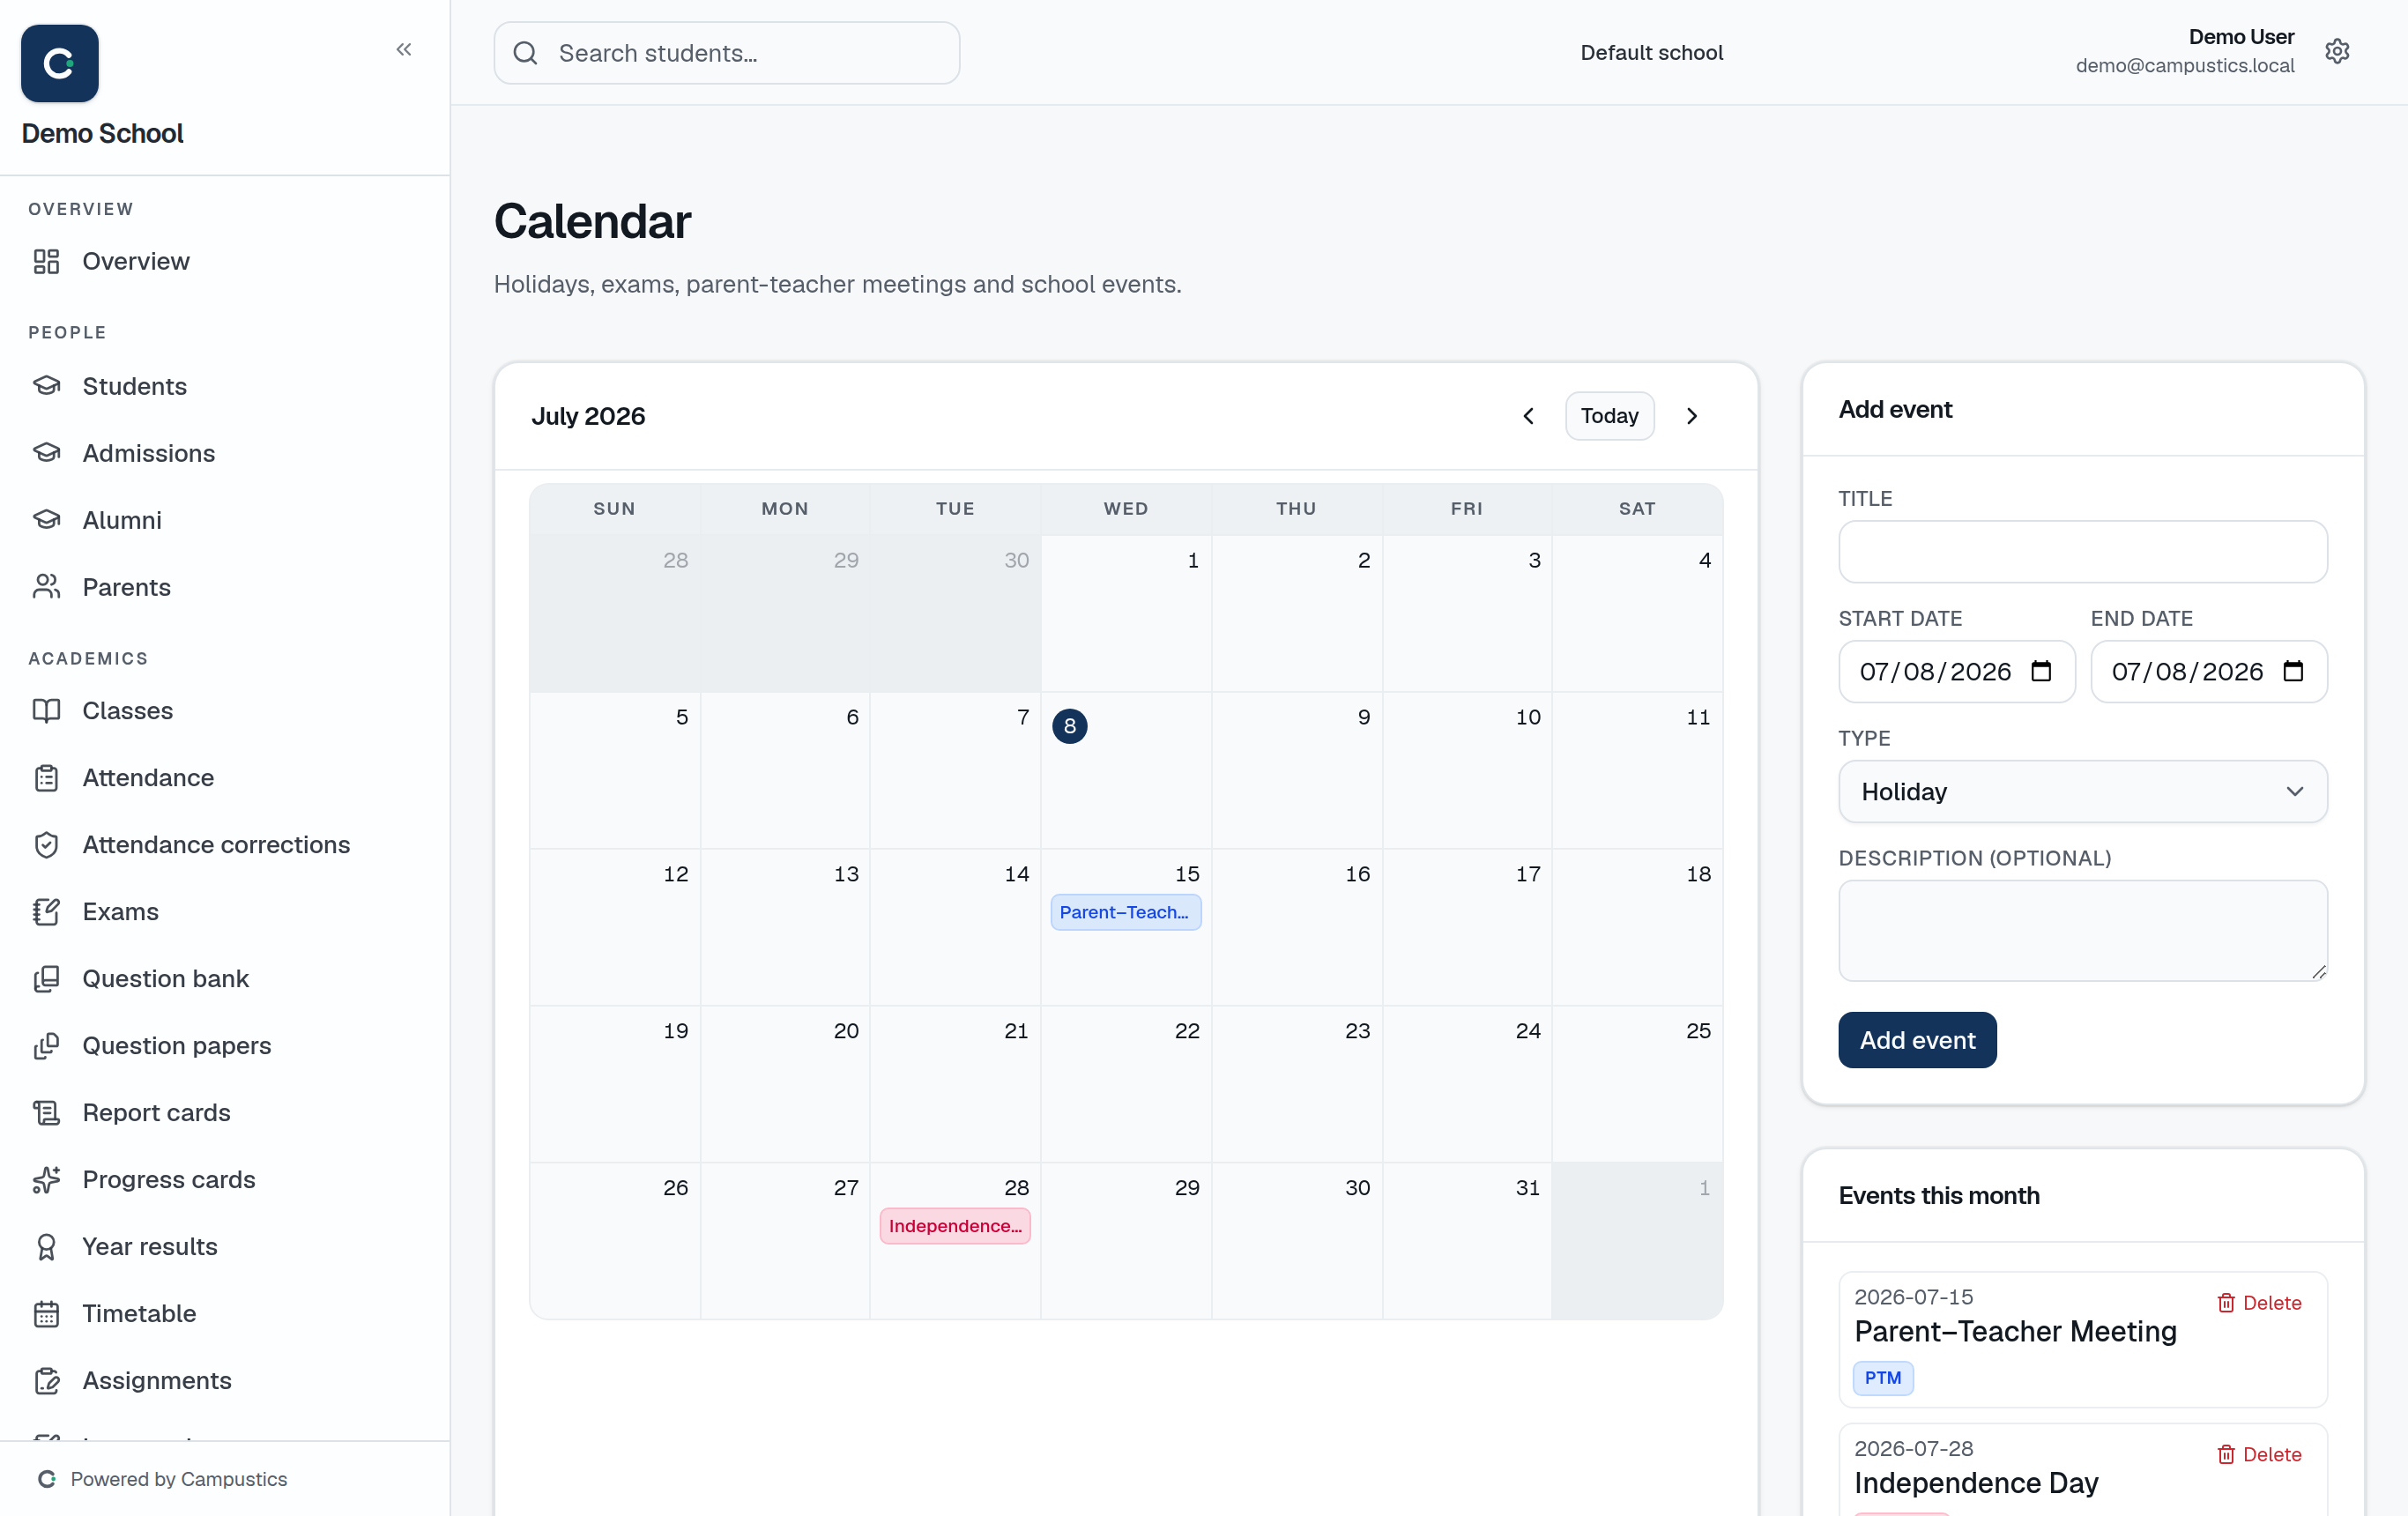
    Plan the calendar

    Go to Calendar and add holidays, events, exam dates, and parent-teacher meets. It drives the dashboard 'Today' widget and auto-marks attendance holidays.

    The Calendar page
  2. 2

    Share event photos

    Under Gallery, upload event photos (auto-resized) and tag them to a grade or section so the right parents see them on their portal.

    Tip: Tagging keeps photos private to the relevant class, not the whole school.

  3. 3

    Everyone stays in sync

    Parents and staff see the calendar and gallery in their portals.

Portals

Give portal access

Admin · 3 min

Create a login so a parent, teacher, or student can see their own portal.

  1. 1

    Make sure the person record exists

    The parent, teacher, or student must already have a record (Parent, Staff, or Student) with an email on it.

  2. 2

    Create their login

    Open the profile → Create login → copy the temporary password and share it privately. They sign in at the same school URL.

    Tip: Internal .local logins can't receive email, so hand those credentials over directly.

  3. 3

    What each portal shows

    Students see attendance, assignments, results, and fees; parents see per-child attendance, marks, fees, notices, and AI chat; teachers see their classes with quick links to roll-call and marks.

Insights

Explore analytics

Admin · 3 min

Drill from the whole organisation down to a single student.

  1. 1

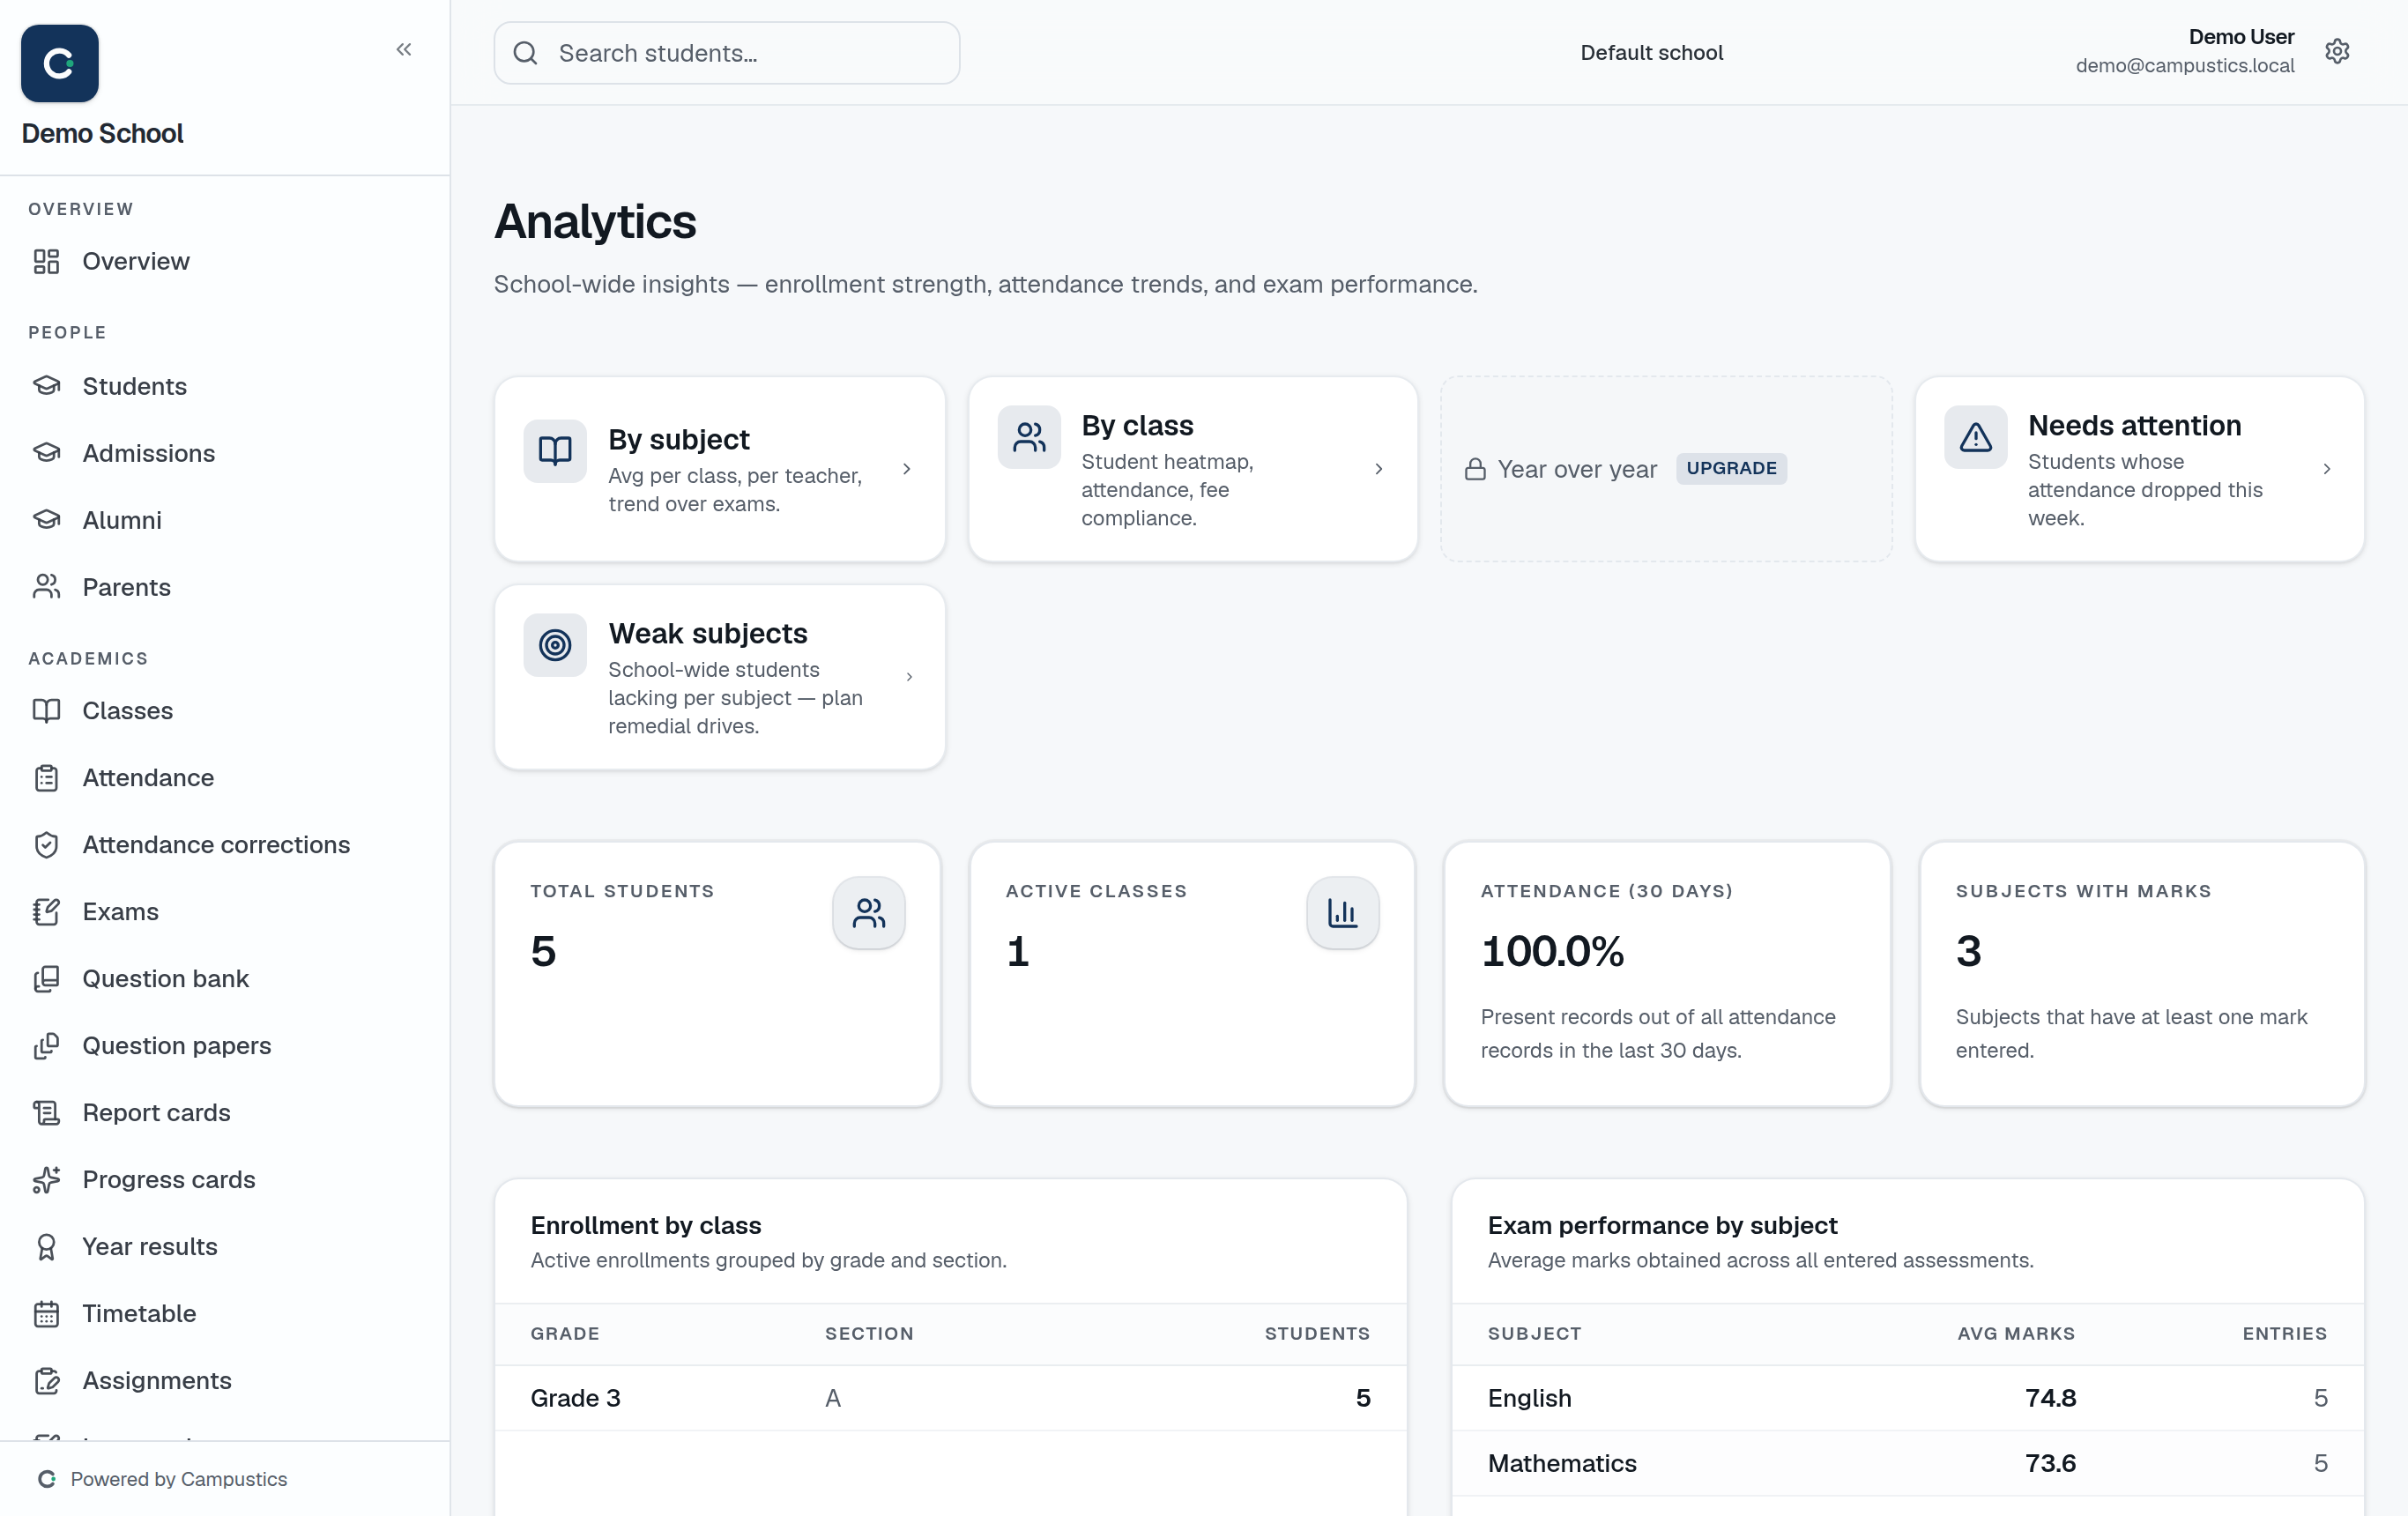
    Open Analytics

    Go to Analytics for dashboards that roll up your whole school (or every campus).

    The Analytics page
  2. 2

    Drill in

    Move from organisation → school → subject → class → student to see attendance %, pass %, subject averages, and year-over-year trends.

    Tip: A weak-subject flag on each student's profile points to where they need help.

Download reports

Admin · 2 min

Get attendance, academic, mark-sheet, and fee-defaulter reports.

  1. 1

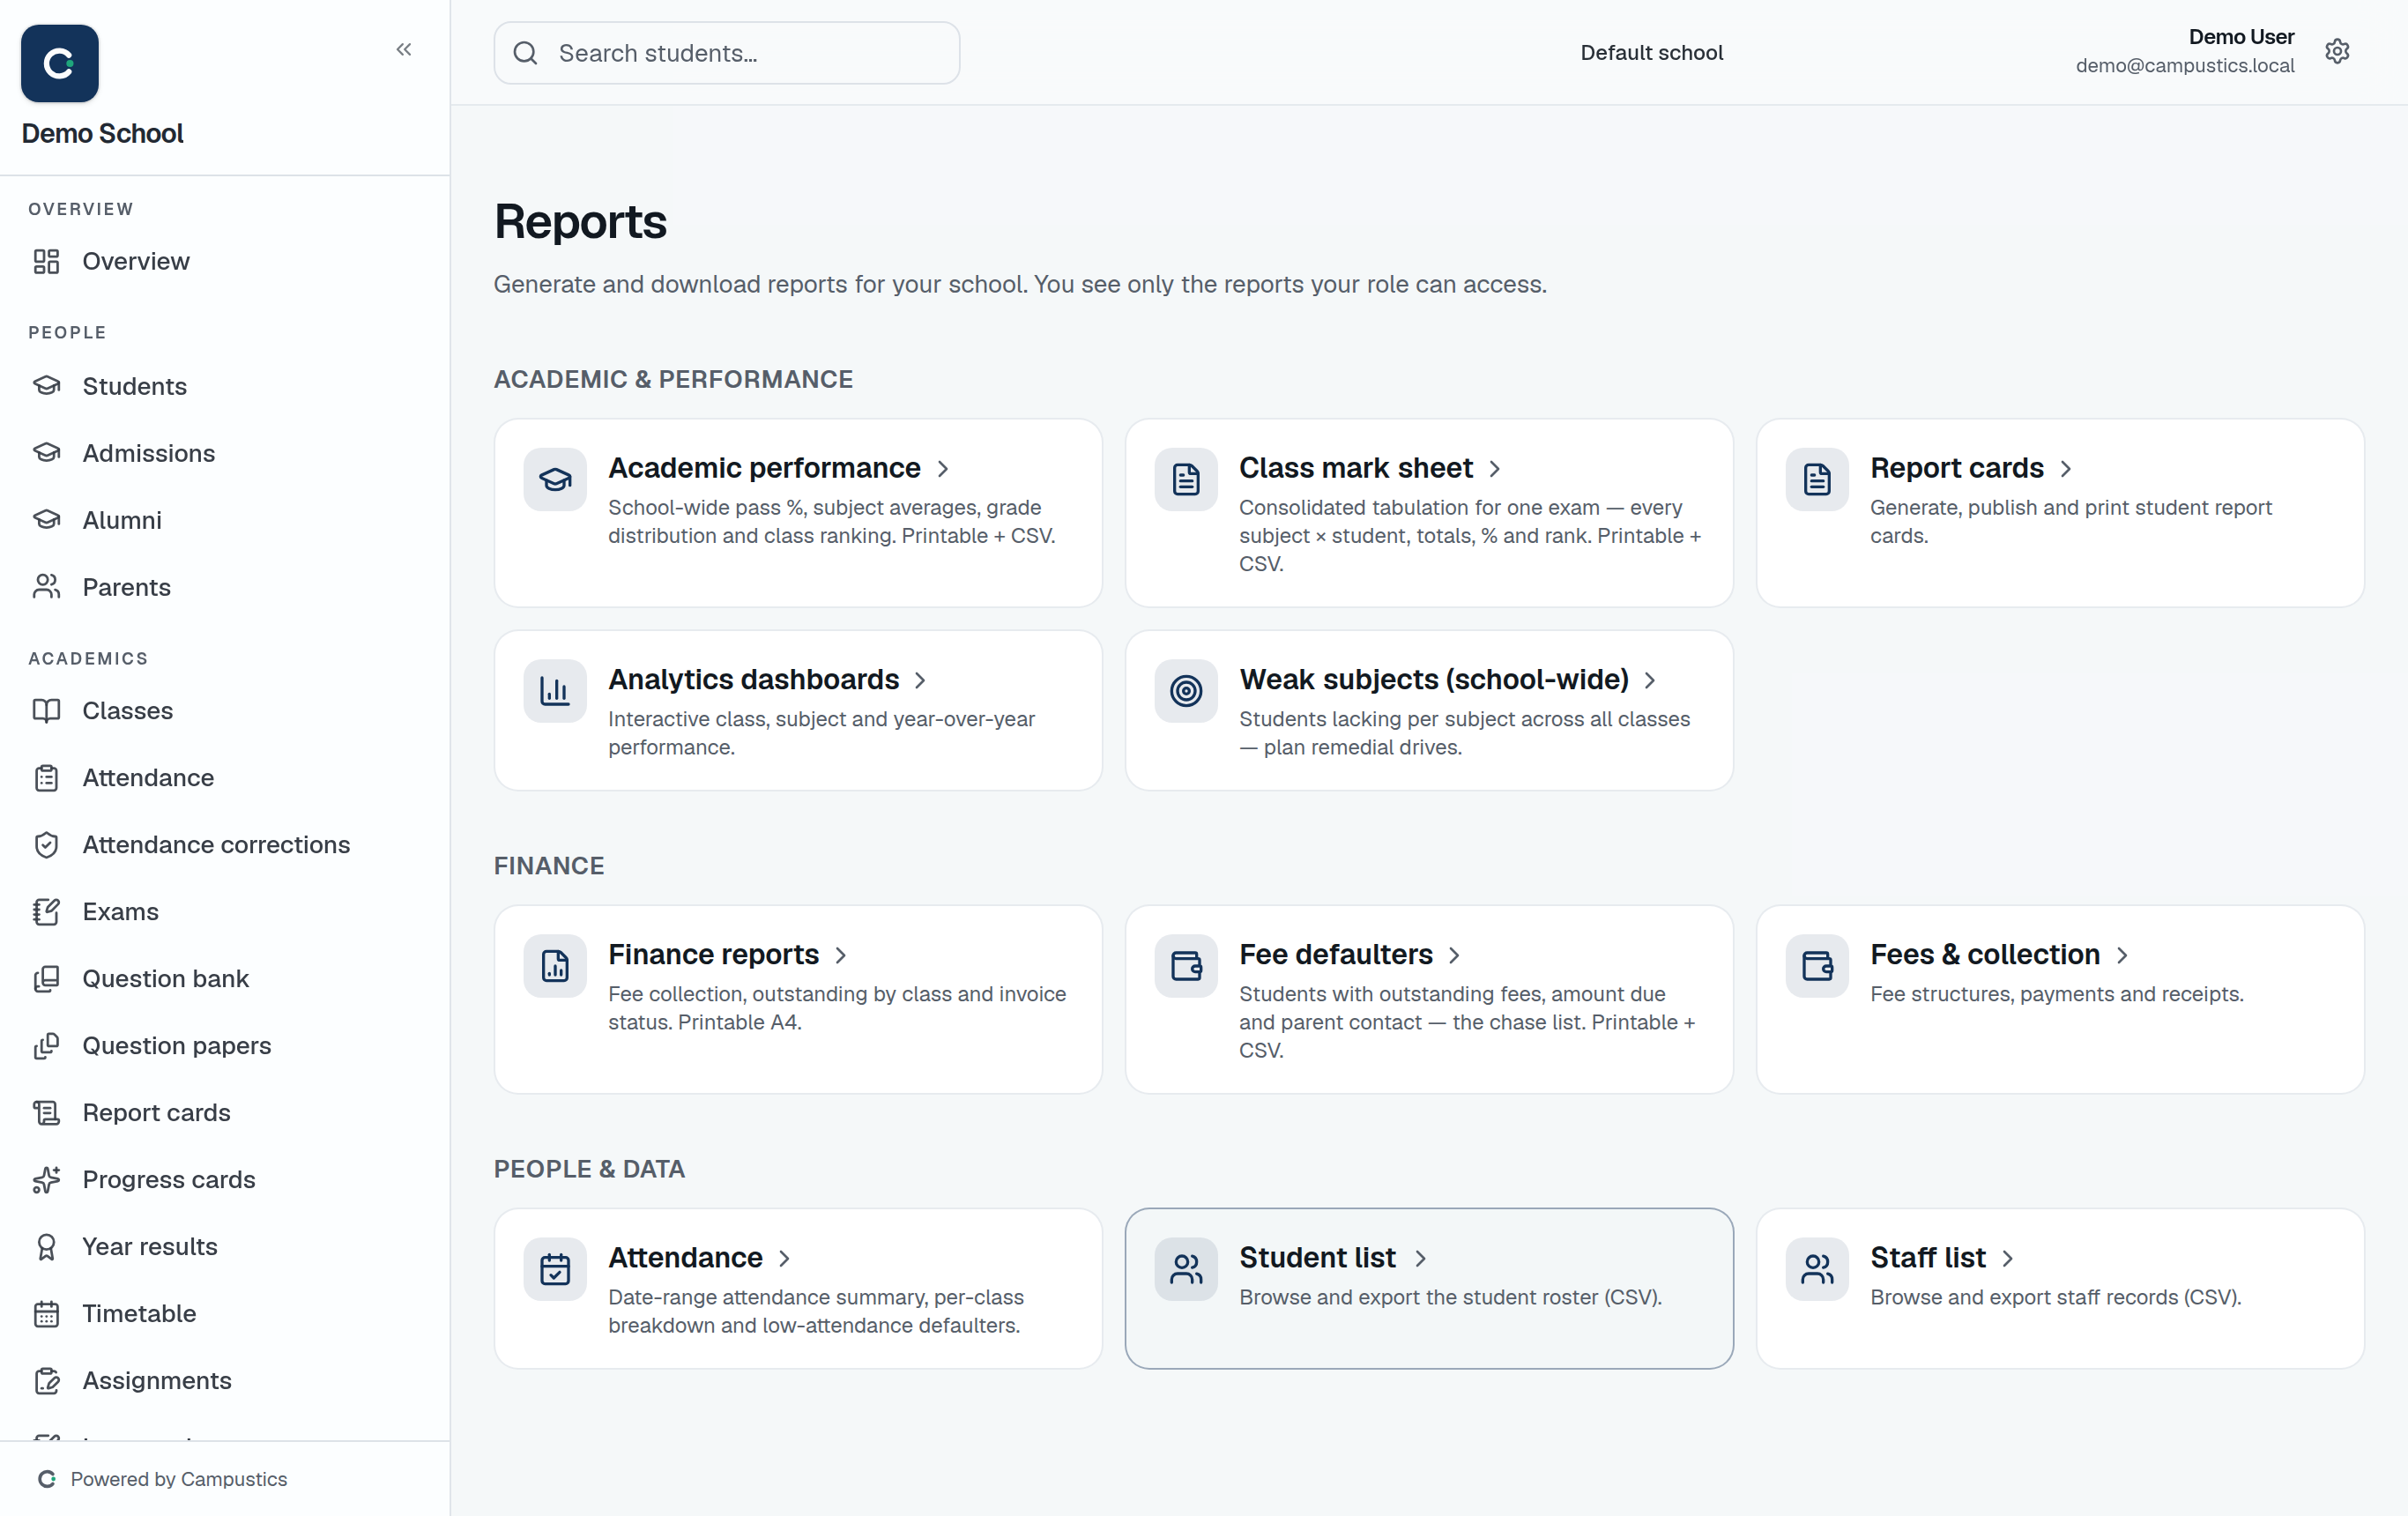
    Open Reports

    Go to Reports for attendance, academic, mark-sheet, and fee-defaulter reports.

    The Reports page
  2. 2

    Print or export

    Print any report as A4, or download a CSV.

    Tip: Reports are printable straight from the browser — no separate PDF tool needed.

Administration

Run the admin panel

Admin · 3 min

Manage users, custom roles, and the audit log.

  1. 1

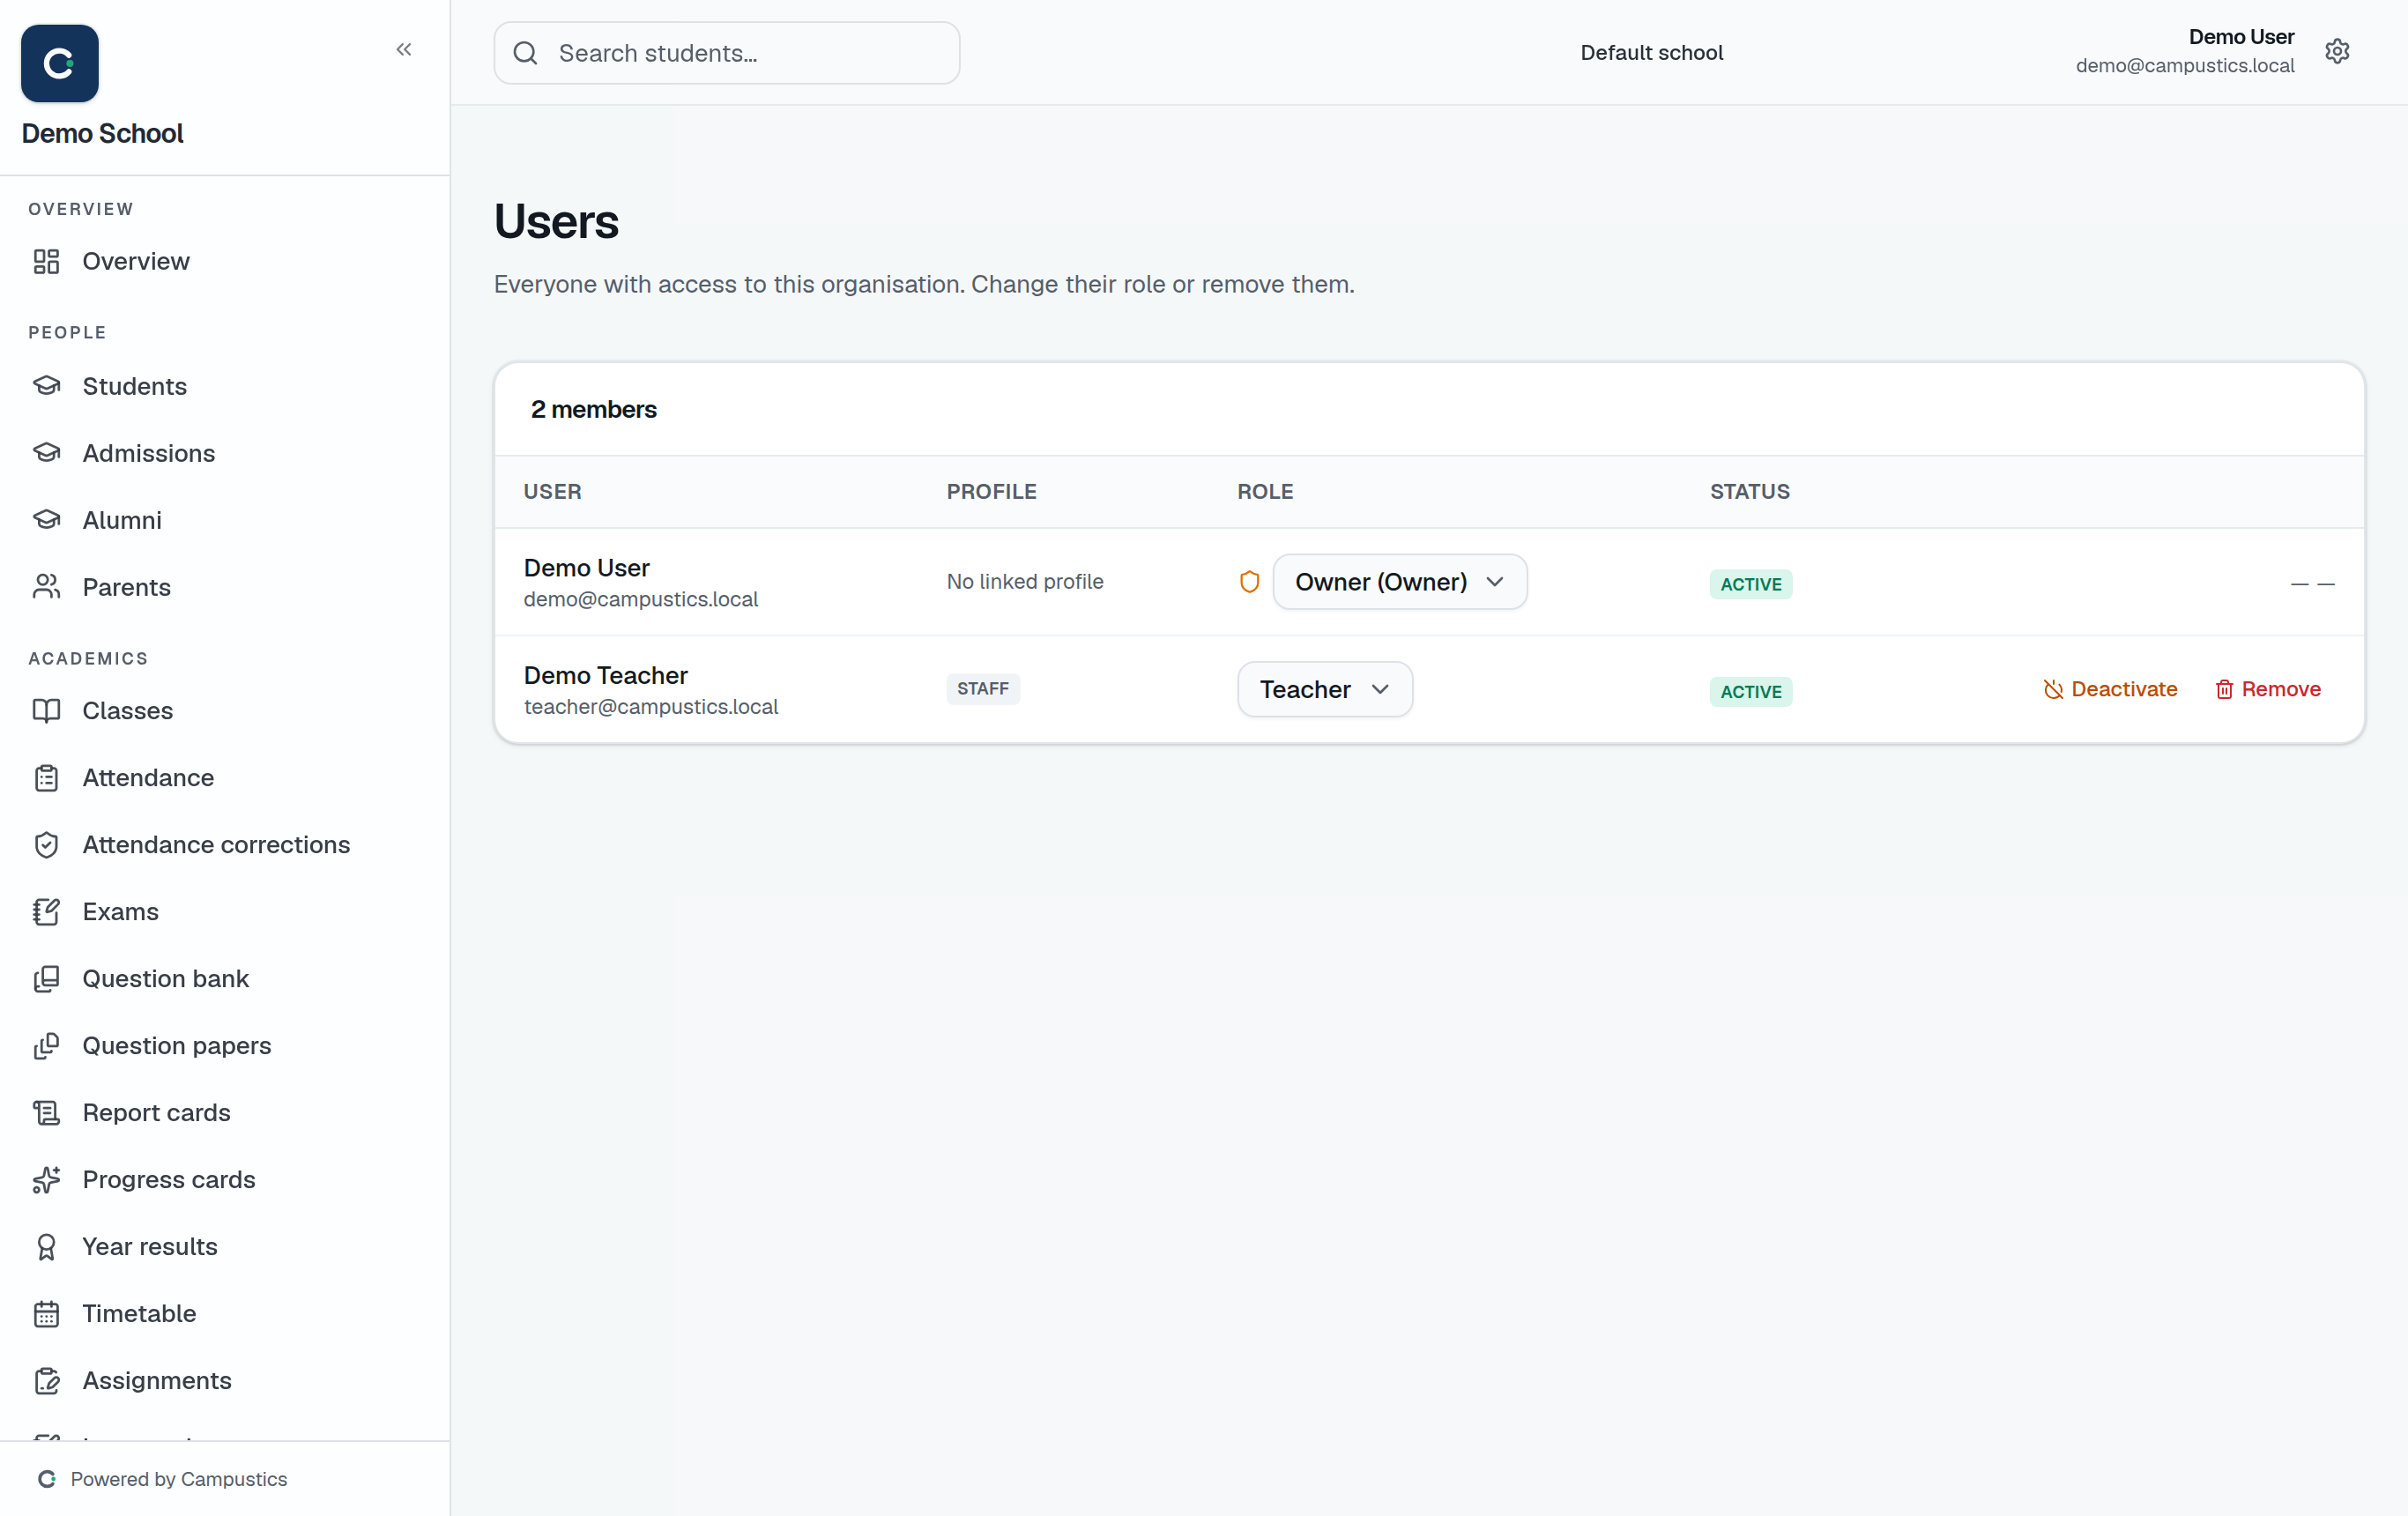
    Manage users

    Go to Admin → Users to change a user's role, deactivate or reactivate them, or remove them from the organisation.

    Admin → Users
  2. 2

    Roles and audit

    Admin → Roles manages custom roles and permission grids; Admin → Audit lets you search the audit log by user, module, and date range.

    Tip: Every mutation across the app is logged, so the audit trail answers 'who changed what, when'.

  3. 3

    Gated to admins

    The Admin panel is only visible to Owners, platform admins, and anyone explicitly granted the admin permission.

The online version at /guide always shows the latest steps.